
Creating 1Password plugin and use it to build an app with Nuxt3, Passage & Appwrite

Last year I built an app for my son (and myself). The app idea was very simple, a digital piggy bank tracker integrated with optional auto credit of pocket money. We're actively using this app even now (if interested, you can read the associated article here). But this app had some shortcomings, the biggest one being not able to invite your family members to the app. This app rewrite is intended to fix that shortcoming.
Tl;dr this article covers a complete rewrite of an existing app using a different technology stack. The article also covers the creation of a 1Password CLI Shell Plugin.
Introduction
To do the rewrite I wanted to use Nuxt3. The reasoning was simple, I've used Nuxt2 in the past, but haven't had the chance to look at Nuxt3 (and Vue3 for that matter). For the database and to process the important database events I decided to use Appwrite. Appwrite has inbuilt authentication but I wanted to try out Passage by 1Password, so this app uses that.
Appwrite provides a CLI, and 1Password also has a CLI but both are not integrated. So it seemed logical to first integrate the two and create the Appwrite shell plugin for the 1Password CLI.
Part 1: Creating a 1Password shell plugin
If you go over to the 1Password docs page which mentions how you can contribute and create your own shell plugin, you'll learn that the whole thing is implemented using Go.

I haven't tried going anywhere with Go😉. But the documentation looked straightforward forward so what is the harm in trying?
Setup the environment
I'm not going to rewrite what is already covered in detail in the docs link shared above. Just follow the link and install the needed dependencies. I had installed GNU Make using homebrew which installs it as gmake. So we'll need to replace make commands with gmake (unless you add a gnubin directory to the PATH as mentioned in the link).
Choosing a Provisioner
The first decision point comes when you need to choose a provisioner. As the docs page says, "Provisioners are in essence hooks that get executed before the executable is run by 1Password CLI, and after the executable exits in case any cleanup is needed.". So how a third-party CLI authenticates you needs to be configured here. This is not a one size fits all scenario. You need to go and read the said third-party CLI documentation to figure it out. But I had used the appwrite CLI, it needs Email & Password so this reading documentation advice is not for me.
1Password CLI supports the following provisioners
const (
    APIClientCredentials = sdk.CredentialName("API Client Credentials")
    APIKey               = sdk.CredentialName("API Key")
    APIToken             = sdk.CredentialName("API Token")
    AccessKey            = sdk.CredentialName("Access Key")
    AccessToken          = sdk.CredentialName("Access Token")
    AppPassword          = sdk.CredentialName("App Password")
    AppToken             = sdk.CredentialName("App Token")
    AuthToken            = sdk.CredentialName("Auth Token")
    CLIToken             = sdk.CredentialName("CLI Token")
    Credential           = sdk.CredentialName("Credential")
    Credentials          = sdk.CredentialName("Credentials")
    DatabaseCredentials  = sdk.CredentialName("Database Credentials")
    LoginDetails         = sdk.CredentialName("Login Details")
    PersonalAPIToken     = sdk.CredentialName("Personal API Token")
    PersonalAccessToken  = sdk.CredentialName("Personal Access Token")
    RegistryCredentials  = sdk.CredentialName("Registry Credentials")
    SecretKey            = sdk.CredentialName("Secret Key")
    UserLogin            = sdk.CredentialName("User Login")
)
Appwrite CLI uses email/password for authentication so, LoginDetails and UserLogin look like the two promising choices. So I picked one of them. The next step asks for an example credential which was confusing as it didn't say whether this example is for the login or the password. Anyway, after putting some random string there we get the template code generated. And we've got a new problem


Both of the above choices generate code with errors. These field names are not defined. And also only one fieldname is created.
Fields: []schema.CredentialField{
  {
    Name:                fieldname.Login,
    MarkdownDescription: "Login used to authenticate to Appwrite.",
    Secret:              true,
    Composition: &schema.ValueComposition{
      Length: 21,
      Charset: schema.Charset{
        Lowercase: true,
        Digits:    true,
      },
    },
  },
},
After defining the missing fieldsname, and adding a new field (password) in the array, tried validating, building and initing the plugin (using op plugin init appwrite). It asked for the login and password and created an entry in the 1Password app. The moment of truth is here

Run appwrite login. Wait for the email and password to be supplied by the 1Password App, and it never happens.
This is the moment I realized something is not right. Tried looking for a config file in the system and found one at ~/.appwrite/prefs.json. It doesn't store a password just a cookie. Essentially what the CLI does is, take the login credentials from you interactively, and then make an auth call and store the auth token in that file for future use. We could store the cookie in 1Password but then who takes care of refreshing the token?
Before giving up, this is where I got in touch with the 1Password team. Learnt that interactive login is not supported, and the following verbatim response "If your file supports provisioning the credentials in a file, you can use the SDK’s file provisioner when building the plugin.".
Interesting! File provisioner is mentioned in the docs but mostly you're going to miss reading it. Well, time to eat my words and go to appwrite CLI docs, and read it, of course. Found that there is a CI mode that works using the API Key. The only limitation is, it works with a single project at a time. And also the supported CLI commands depends on the permissions granted to the API Key.
appwrite client \
    --endpoint https://cloud.appwrite.io/v1 \
    --projectId [YOUR_PROJECT_ID] \
    --key YOUR_API_KEY
On running this command from the home dir of my system, it added the endpoint and the API key to the prefs.json mentioned earlier, but it also created a new appwrite.json file mentioning the project ID in the home dir (from where the command was executed). So the prefs.json doesn't contain the project id. If you've used appwrite then you'll know that the project folder also contains an appwrite.json file mentioning the project id. This hints that we only need to store the endpoint and the API key in 1Password, and then run the appwrite commands from the project directory itself (1Password supports tying up credentials to a particular dir).
After all this detective work, we are finally ready to implement the plugin.
Implementing the plugin
After deleting and running the gmake new-plugin command again, this time I selected API Key as the credential type. Modified the generate api_key.go file as shown below
Required Fields, Default Provisioner & Importer
Fields: []schema.CredentialField{
    {
        Name:                fieldname.APIKey,
        MarkdownDescription: "API Key used to authenticate to Appwrite.",
        Secret:              true,
        Composition: &schema.ValueComposition{
            Length: 256,
            Charset: schema.Charset{
                Lowercase: true,
                Digits:    true,
            },
        },
    },
    {
        Name:                fieldname.Endpoint,
        MarkdownDescription: "Appwrite server endpoint.",
        Secret:              false,
        Optional:            false,
    },
},
DefaultProvisioner: provision.TempFile(appwriteConfig, provision.AtFixedPath(ConfigPath())),
Importer: importer.TryAll(
    TryAppwriteConfigFile(),
)}
Note that we're creating the temp file at a fixed path provision.AtFixedPath(ConfigPath())). Where ConfigPath is as shown below
func ConfigPath() string {
    configDir, err := os.UserHomeDir()
    if err != nil {
        return "~/.appwrite/prefs.json"
    }

    return configDir + "/.appwrite/prefs.json"
}
appwriteConfig function
This function takes the credentials from 1Password and converts that into a JSON object so that a temp config file can be created for the appwrite CLI
func appwriteConfig(in sdk.ProvisionInput) ([]byte, error) {
    // Create config object from the incoming fields
    config := Config{
        APIKey:   in.ItemFields[fieldname.APIKey],
        Endpoint: in.ItemFields[fieldname.Endpoint],
    }

    // Covert the content to a JSON string
    contents, err := json.MarshalIndent(&config, "", "  ")
    if err != nil {
        return nil, err
    }

    // Convert the string to bytes, to be written to the temp file
    return []byte(contents), nil
}

// The config struct (notice the differnt json key names)
type Config struct {
    APIKey   string `json:"key"`
    Endpoint string `json:"endpoint"`
}
TryAppwriteConfigFile function
This function reads an existing prefs.json file at the config path and shows a prompt to the user that these credentials can be imported into 1Password when they run any of the appwrite commands requiring authentication.
func TryAppwriteConfigFile() sdk.Importer {
    return importer.TryFile(ConfigPath(), func(ctx context.Context, contents importer.FileContents, in sdk.ImportInput, out *sdk.ImportAttempt) {
        var config Config
        if err := contents.ToJSON(&config); err != nil {
            out.AddError(err)
            return
        }

        fmt.Println("Printing the imported file")
        fmt.Println(config)

        if config.APIKey == "" {
            return
        }

        if config.Endpoint == "" {
            return
        }

        out.AddCandidate(sdk.ImportCandidate{
            Fields: map[sdk.FieldName]string{
                fieldname.APIKey:   config.APIKey,
                fieldname.Endpoint: config.Endpoint,
            },
        })
    })
}
That's it. We're done. The only thing remaining is writing some tests, and configuring which appwrite commands don't require auth. The latter can be done in appwrite.go file as shown below
NeedsAuth: needsauth.IfAll(
    needsauth.NotForHelpOrVersion(),
    needsauth.NotWithoutArgs(),
    needsauth.NotWhenContainsArgs("client"),
    needsauth.NotWhenContainsArgs("login"),
    needsauth.NotWhenContainsArgs("logout"),
    needsauth.NotForExactArgs("deploy"),
    needsauth.NotForExactArgs("projects"),
    needsauth.NotForExactArgs("storage"),
    needsauth.NotForExactArgs("teams"),
    needsauth.NotForExactArgs("users"),
    needsauth.NotForExactArgs("account"),
    needsauth.NotForExactArgs("avatars"),
    needsauth.NotForExactArgs("functions"),
    needsauth.NotForExactArgs("databases"),
    needsauth.NotForExactArgs("health"),
    needsauth.NotForExactArgs("locale"),
),
The plugin tests can be modified in api_key_test.go file.
// Test whether our file provision is working
func TestAPIKeyProvisioner(t *testing.T) {
    plugintest.TestProvisioner(t, APIKey().DefaultProvisioner, map[string]plugintest.ProvisionCase{
        "temp file": {
            ItemFields: map[sdk.FieldName]string{
                fieldname.APIKey:   "zsaugacpwq6k54nnbdbmh1cys98u2a32qqkacma2ioxn1e2j6eyrk9urom0vzcvm6qbbm8s6l4xbm86n37foauiqba9tlcvohuoz87j7nwvpob5wr71k58i105fn39a10vj7ob84opwf1vrfat3m8konch7xxy2z2dh1ykohdbef7xgmvtn82lebe4mzmfzoylqy4jslrok11zbjtmd6xs84ukd7b1k9ofyuanvinmlhkgua32p5x0gqbexample",
                fieldname.Endpoint: "http://localhost/v1",
            },
            ExpectedOutput: sdk.ProvisionOutput{
                Files: map[string]sdk.OutputFile{
                    ConfigPath(): {
                        Contents: []byte(plugintest.LoadFixture(t, "import_prefs.json")),
                    },
                },
            },
        },
    })
}

// Test the importer
func TestAPIKeyImporter(t *testing.T) {
    plugintest.TestImporter(t, APIKey().Importer, map[string]plugintest.ImportCase{
        "Appwrite prefs file": {
            Files: map[string]string{
                ConfigPath(): plugintest.LoadFixture(t, "import_prefs.json"),
            },
            ExpectedCandidates: []sdk.ImportCandidate{
                {
                    Fields: map[sdk.FieldName]string{
                        fieldname.APIKey:   "zsaugacpwq6k54nnbdbmh1cys98u2a32qqkacma2ioxn1e2j6eyrk9urom0vzcvm6qbbm8s6l4xbm86n37foauiqba9tlcvohuoz87j7nwvpob5wr71k58i105fn39a10vj7ob84opwf1vrfat3m8konch7xxy2z2dh1ykohdbef7xgmvtn82lebe4mzmfzoylqy4jslrok11zbjtmd6xs84ukd7b1k9ofyuanvinmlhkgua32p5x0gqbexample",
                        fieldname.Endpoint: "http://localhost/v1",
                    },
                },
            },
        },
    })
}
To run the tests we can run gmake test or make test command.
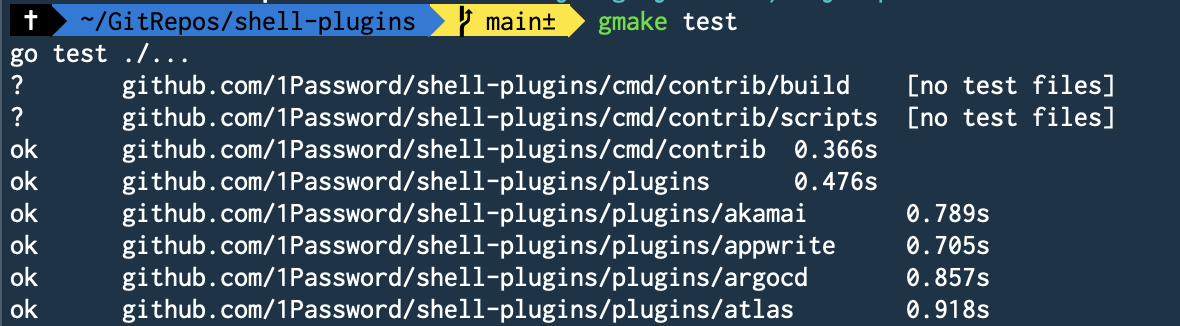
And this gives us the green light we needed.

Part 2: Creating the app
We start with the basics here. Scaffold the app using the below command
npx nuxi@latest init <project-name>
Since we're using Passage for auth, install @passageidentity/passage-elements. Now here is a catch, to make use of the appwrite client SDK we need to create a session using email/password or through supported OAuth providers. Both of these are ruled out as passage auth doesn't need a password, and is also not a supported OAuth provider. I still installed the appwrite SDK as I used its locale services in my app flow.
yarn add @passageidentity/passage-elements appwrite
We definitely need the server SDKs of both of the above. @passageidentity/passage-node for verifying the authenticity of incoming client requests, and node-appwrite for interacting with the appwrite database.
yarn add node-appwrite @passageidentity/passage-node
For styling and readymade components, I decided to use NuxtLabs UI. Now we're all set to start writing the app.
Passage Auth
Passage provides readymade custom web components which handle the end-to-end auth for you. To use it in a Nuxt (or Vue) app, we need to register these components as custom elements in the Nuxt config file. If we do not do that then we'll get warnings in our browser console. Add the following inside the defineNuxtConfig input object in your nuxt.config.ts file.
vue: {
  compilerOptions: {
    isCustomElement: (tag) => tag.startsWith('passage-'),
  },
},
Now I tried to use the <passage-auth> component directly in a page template after adding the necessary import
import '@passageidentity/passage-elements/passage-auth';
But it doesn't work, you'll get the below error
Cannot use import statement outside a module
This happens because Nuxt is running in SSR mode and web components are not available server side. You can get more information on this passage documentation for NextJs here. I tried following the same approach outlined in the link, load the component client side in the onMounted hook
onMounted(()=>{
  require('@passageidentity/passage-elements/passage-auth');
});
But sadly this also is a no-go. Nuxt3 ships with Vite bundler by default, and using require is not supported in Vite. No issues, simply replace require with import there you might say, but we get typescript error "An import declaration can only be used at the top level of a namespace or module".

So what is the solution? To resolve this I created separate components which only contain passage elements, and load this new component only on the client side using the <ClientOnly> option provided by Nuxt.
So a SignUp component might look like this
<template>
  <passage-register :app-id="passageAppId" />
</template>
And then you use this component on a sign-up page as shown below
<template>
  <ClientOnly>
    <UContainer>
      <UCard class="max-w-md mx-auto mt-8 text-center">
        <h1 class="text-3xl font-medium">Sign up</h1>

        <sign-up />

        <div
          class="text-sm font-medium text-gray-500 dark:text-gray-300 text-center"
        >
          Already have an account?
          <UButton variant="link" :padded="false" to="/sign-in">
            Sign in
          </UButton>
        </div>
      </UCard>
    </UContainer>
  </ClientOnly>
</template>
After making the above adjustments it works all right.
<passage-register> and <passage-login> components instead of the <passage-auth> because I've some custom registration fields.Creating user & family accounts
Since we want to be able to invite family members (or create accounts for them ourselves) to the app, we need to roll out our own database schema to connect their accounts. But appwrite supports the creation of Teams and linking user accounts to them. To use this feature we will need to create appwrite users and then link those users to a team. How do we correlate the Passage users to the appwrite users?
Passage allows us to listen to new account creations or a fresh login, by attaching a callback (onSuccess) to passage elements. But there is a catch, we can't simply bind the callback to the pasasge element using the "@" syntax of vue. I needed to use the "." syntax to make it work. You can read more about this here.
This is my final SignUp component which uses the passage callback to make an API call to a Nuxt serverless API
<script setup lang="ts">
import '@passageidentity/passage-elements/passage-register';
import { authResult } from '@passageidentity/passage-elements';
const { getUser } = usePassageUser();

const {
  public: { passageAppId },
} = useRuntimeConfig();

const onRegistrationDone = async (authResult: authResult) => {
  try {
    const res = await $fetch('/api/users', {
      method: 'post',
    });

    console.log('got response from user create', res);
    await getUser(authResult.auth_token);
    navigateTo('/onboarding');
  } catch (error) {
    console.log('failed to create user in appwrite');
  }
};
</script>

<template>
  <passage-register :app-id="passageAppId" .onSuccess="onRegistrationDone" />
</template>
And this is the /api/users code. We receive the request from the client, verify its authenticity using the passage's node SDK, and then create a new user in appwrite using their node SDK.
import { UserObject } from '@passageidentity/passage-node';
import { protectRoute } from '../usePassage';
import { useAppwrite } from '../useAppwrite';

export default defineEventHandler(async (event) => {
  console.log('incoming post event for api/users/', event);

  await protectRoute(event);

  const user = event.context.auth.user as UserObject;
  console.log(`got some auth user:`, user);

  const { $users } = useAppwrite();

  // create an appwrite user with the same ID returned by Passage
  const res = await $users.create(
    user.id,
    user.email,
    undefined,
    undefined,
    user.user_metadata?.name as string
  );

  console.log('res of user create', res);

  return {
    status: 'ok',
  };
});
And this is the protectRoute function to verify the authenticity of the request
import { H3Event } from 'h3';
import Passage, { Metadata } from '@passageidentity/passage-node';

let _passage: Passage | null = null;

const getPassage = () => {
  if (!_passage) {
    const {
      passageApiKey,
      public: { passageAppId },
    } = useRuntimeConfig();

    const passageConfig = {
      appID: passageAppId,
      apiKey: passageApiKey,
    };

    _passage = new Passage(passageConfig);
  }

  return _passage;
};

export const protectRoute = async (event: H3Event) => {
  const passage = getPassage();

  try {
    const userId = await passage.authenticateRequest(event.node.req);

    if (userId) {
      console.log('request authenticated', userId);

      const user = await passage.user.get(userId);
      event.context.auth = { user };

      return;
    }
  } catch (error) {
    console.log('failed to authenticate request', error);
  }

  throw createError({
    statusCode: 401,
    message: 'Unauthorized',
  });
};
Handle adding family members
During the onboarding of a new user, the app asks them to create a family account and add family members to it. But to invite the family members they should have a passage account, right? That is the approach we've followed above, the appwrite user id is provided by Passage. To handle this, we first create Passage users using the passage-node SDK, get the user ids, create corresponding appwrite users, and then finally link these users to the created team/family.
The frontend function which adds the family members
const addMembers = async () => {
  loading.value = true;
  try {
    const res: any = await $fetch('/api/families', {
      method: 'post',
      body: {
        type: 'ADD_MEMBERS',
        familyId: metadata?.family_id,
        members: members.value,
        onboardStep: metadata?.onboard_step,
      },
    });

    console.log('response of add members', res);
    if (res.user && user.value) {
      user.value.user_metadata = res.user.user_metadata;
    }

    emit('membersAdded');
  } catch (error) {
    console.log('error is adding members', error);
  }

  loading.value = false;
};
The /api/families code
import { UserObject } from '@passageidentity/passage-node';
import { protectRoute, createUser, updateUser } from '../usePassage';
import { useAppwrite } from '../useAppwrite';

const addFamilyMembers = async (
  userId: string,
  urlOrigin: string,
  data: any
) => {
  if (!data.familyId || !data.members || !data.members.length) {
    throw createError({
      statusCode: 400,
      message: 'Missing familyId or members to add',
    });
  }

  const { $users, $teams } = useAppwrite();
  try {
    const userPromises = [];
    for (const member of data.members) {
      // Create Passage Users
      userPromises.push(
        createUser(member.email, {
          name: member.name,
          family_id: data.familyId,
          roles: member.role,
          onboard_step: 'done',
        })
      );
    }

    const users = await Promise.all(userPromises);
    console.log('created new users in passage: ', users);

    const appwriteUserPromises = [];
    for (const user of users) {
      appwriteUserPromises.push(
        $users.create(
          user.id,
          user.email,
          undefined,
          undefined,
          user.user_metadata?.name as string
        )
      );
    }

    const appwriteUsers = await Promise.all(appwriteUserPromises);

    console.log('created new users in appwrite: ', appwriteUsers);

    const memberPromises = [];
    for (const user of users) {
      memberPromises.push(
        $teams.createMembership(
          data.familyId,
          [user.user_metadata?.roles as string],
          `${urlOrigin}/join-team`,
          user.email,
          user.id,
          user.phone,
          user.user_metadata?.name as string
        )
      );
    }

    const memberships = await Promise.all(memberPromises);

    console.log('created memberships in appwrite', memberships);

    let updatedUser;
    if (data.onboardStep === 'family') {
      // updat passage user metadata
      updatedUser = await updateUser(userId, {
        onboard_step: 'jar',
      });
    }

    return {
      user: updatedUser,
    };
  } catch (error) {
    console.log('failed to add members', error);
    throw createError({
      statusCode: 500,
      message: 'Failed to add family members',
    });
  }
};

export default defineEventHandler(async (event) => {
  console.log('incoming post event for api/families/');

  await protectRoute(event);

  const body = await readBody(event);
  console.log('body', body);

  if (!body.type || !['CREATE', 'ADD_MEMBERS'].includes(body.type)) {
    throw createError({
      statusCode: 400,
      message: 'Missing or unsupported event type',
    });
  }

  const user = event.context.auth.user as UserObject;
  console.log(`got some auth user: ${user}`);

  const origin = getHeader(event, 'origin');

  let data;
  if (body.type === 'CREATE') {
    data = await createFamily(user.id, origin || '', body);
  } else {
    data = await addFamilyMembers(user.id, origin || '', body);
  }

  return {
    status: 'ok',
    ...data,
  };
});
These are the passage functions to create and update a user.
import Passage, { Metadata } from '@passageidentity/passage-node';

export const createUser = async (email: string, metadata: Metadata) => {
  const passage = getPassage();

  let userData = await passage.user.create({ email, user_metadata: metadata });
  console.log(userData);

  return userData;
};

export const updateUser = async (userId: string, data: Metadata) => {
  const passage = getPassage();

  let userData = await passage.user.update(userId, { user_metadata: data });
  console.log(userData);

  return userData;
};
As you can see, we're storing important user metadata inside the passage user object itself. Barring the name, none of the other fields are visible to the user. We use the familyId field from this metadata to add members to the same family as the calling user.
{
  name: member.name,
  family_id: data.familyId,
  roles: member.role,
  onboard_step: 'done',
}
Appwrite functions
The app also uses some appwrite functions to handle important database events. The shell plugin that we created in the first part gets verified for creating/deploying these functions. The database events that the app handles currently include
- Jar created event: Whenever a new jar is created and it has auto credit enabled, then we update the jar object and set its nextMoneyAt field. This is the field that is queried by the cron job for auto-crediting the configured amount to the jar.
- Transaction event: On every transaction (create or update), we update the corresponding jar balance. If the transaction was done by a child, it will be pending and the jar won't be updated. Once the said transaction is approved (transaction update event) by a family member (role: member), then only the jar gets updated.
- Cron job: This job runs every day at midnight and auto credits the configured auto credit amount to the eligible jars.
App Screenshots
The rest of the app follows the same principle. All app data is fetched from Nuxt serverless APIs where every API call is authenticated by the passage-node SDK. Here are some of the screenshots from the app.
For styling the passage elements, I had to set the following CSS variables
passage-register,
passage-login {
  --passage-container-background-color: transparent;
  --passage-body-text-color: #ffffff;
  --passage-primary-color: #fbbf24;
  --passage-onprimary-color: #0f172a;
  --passage-hover-color: #f59e0b;
  --passage-button-font-weight: 500;
  --passage-container-max-width: 100%;
  --passage-container-padding: 30px 0 10px;
  --passage-button-width: 100%;
  --passage-control-border-color: #6b6b6b;
  --passage-otp-input-background-color: #434343;
}
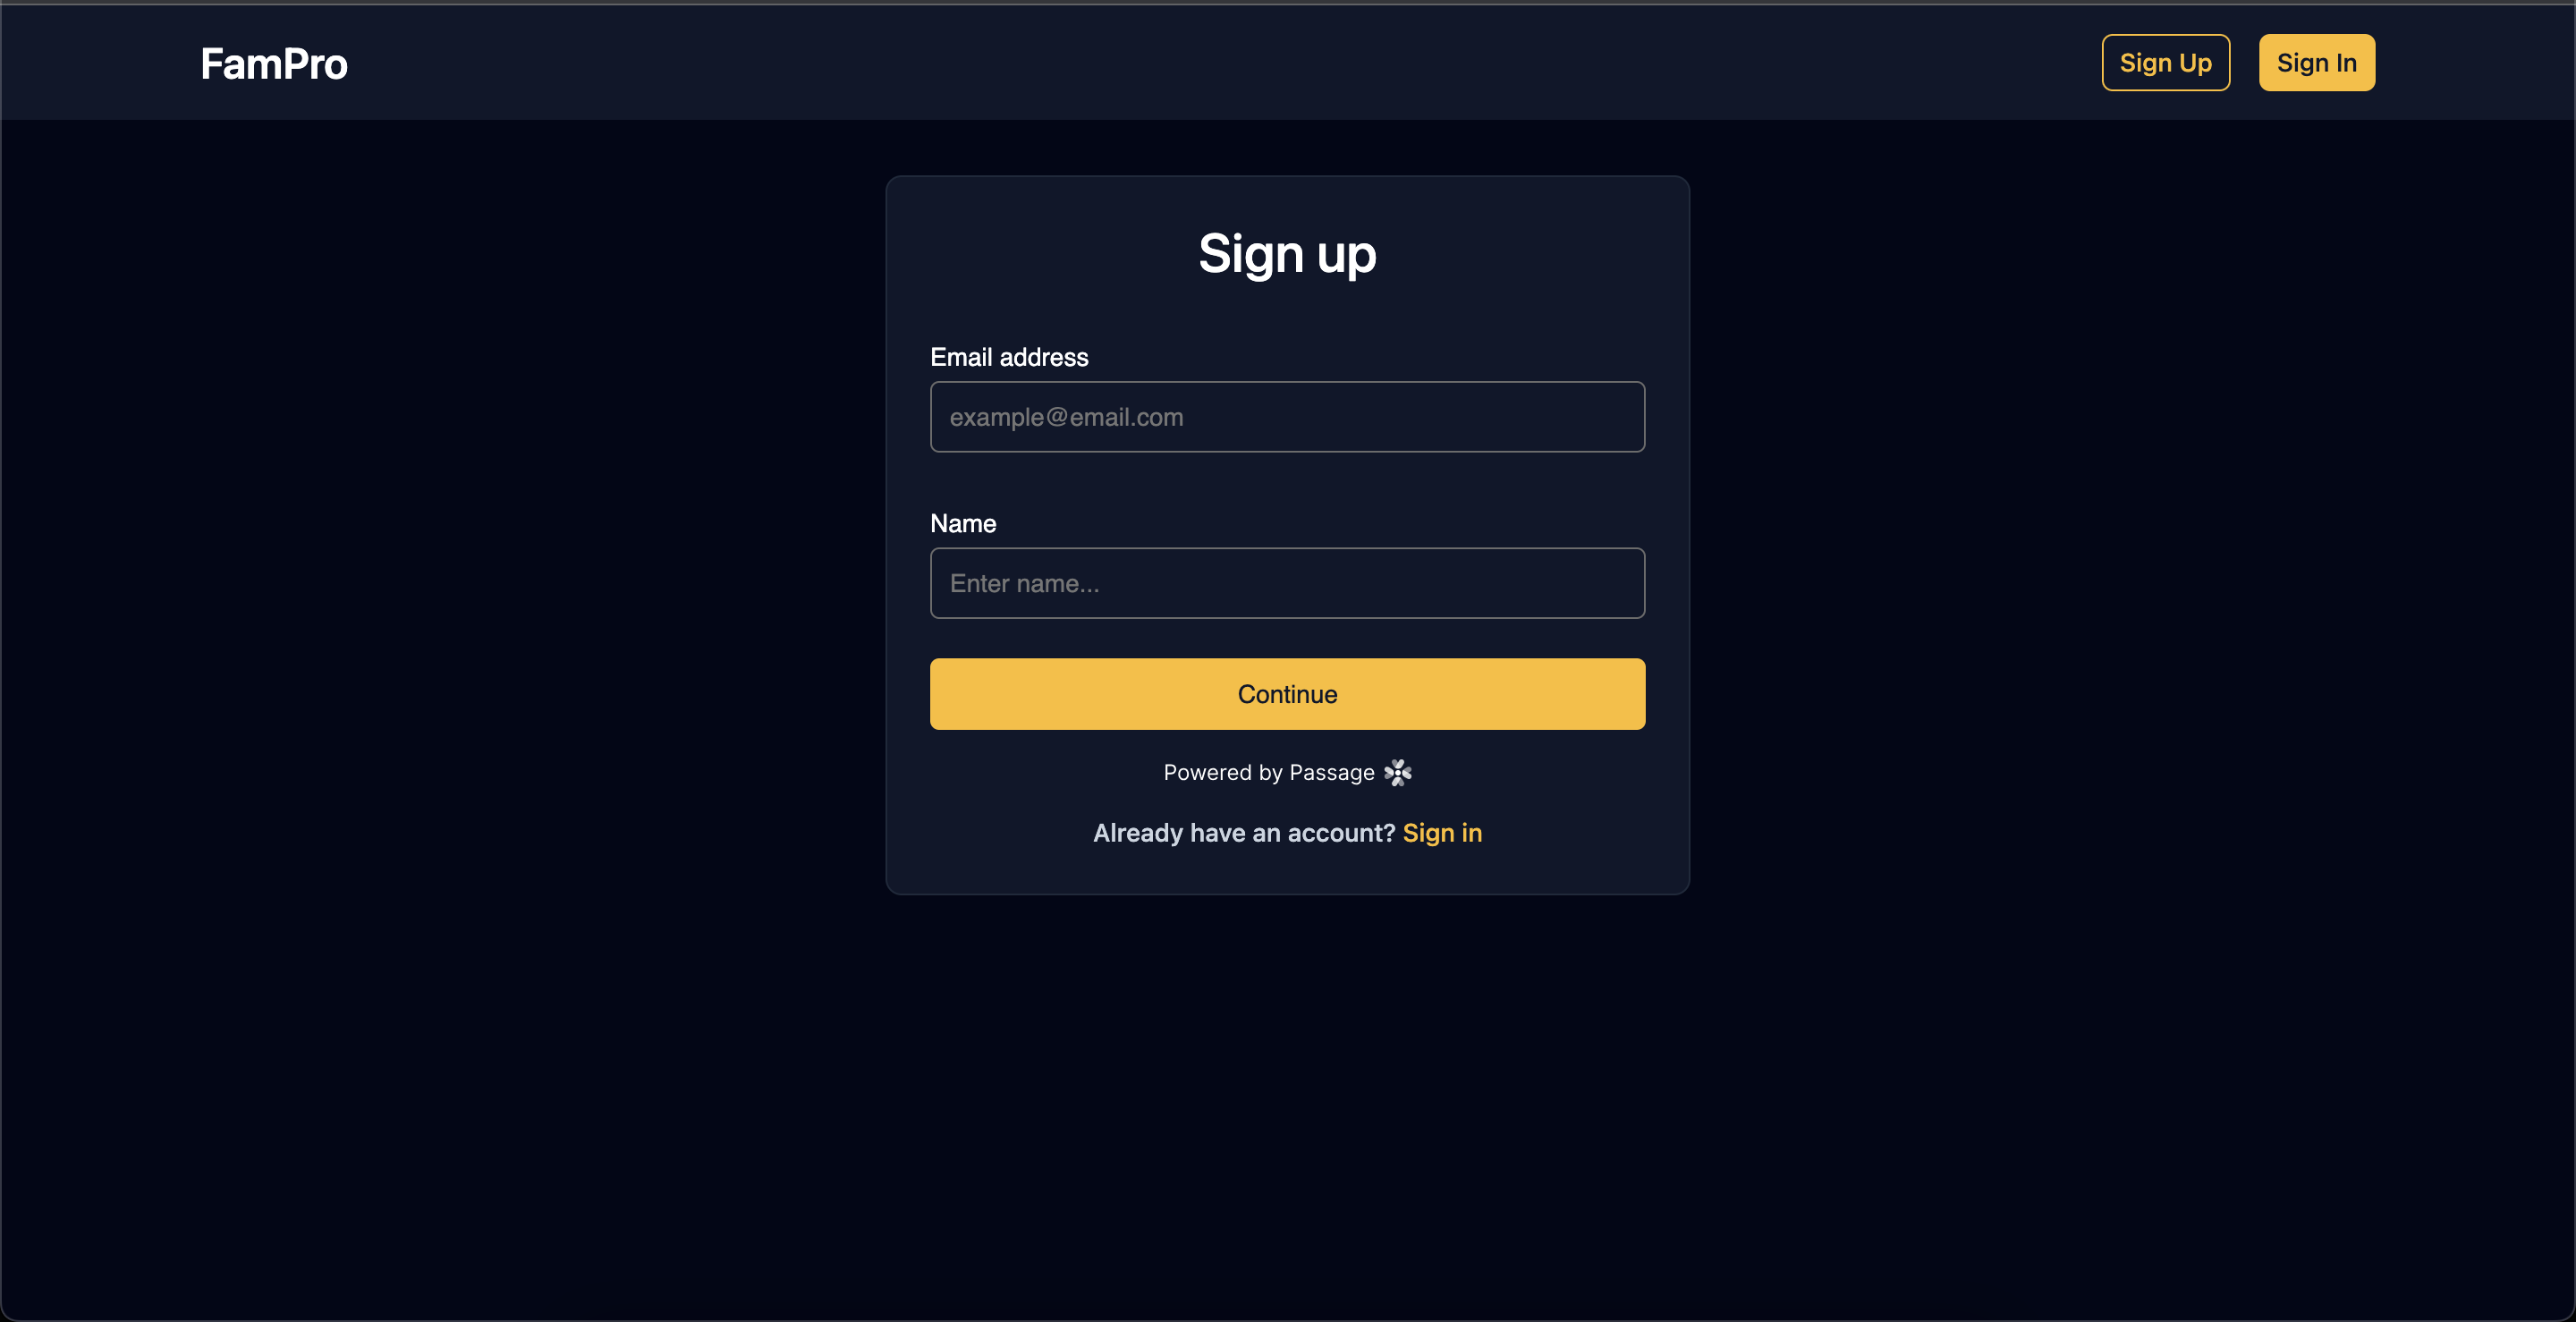
Sign up screen
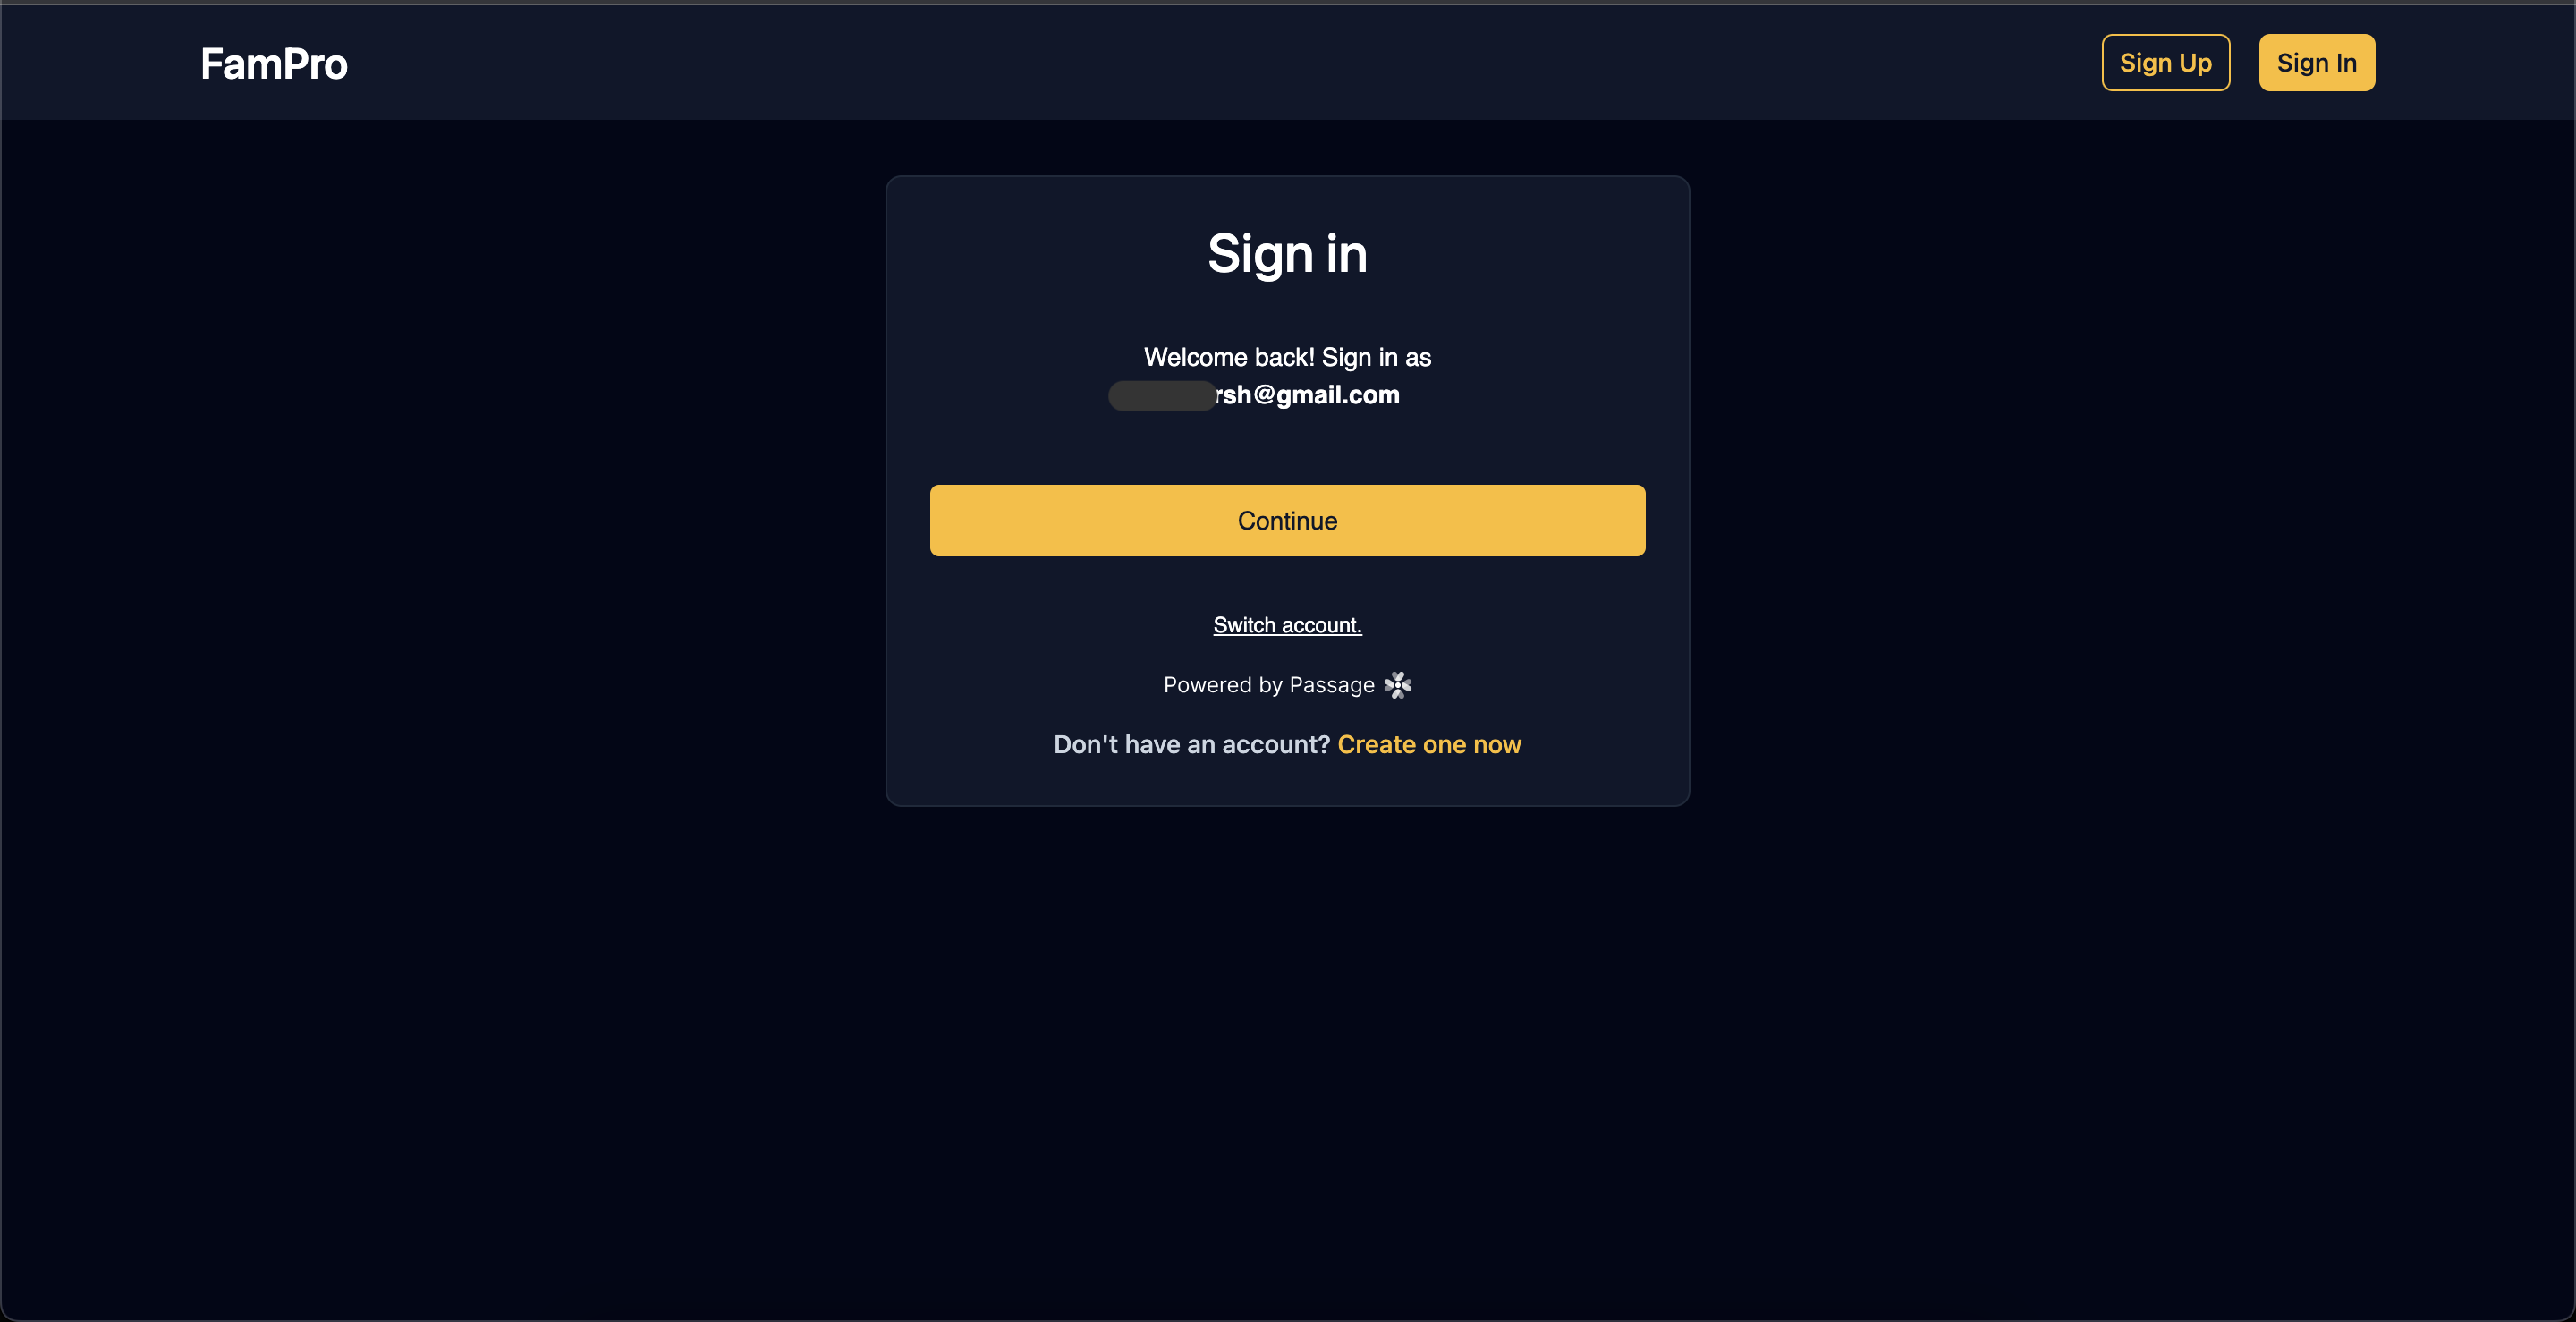
Sign in screen
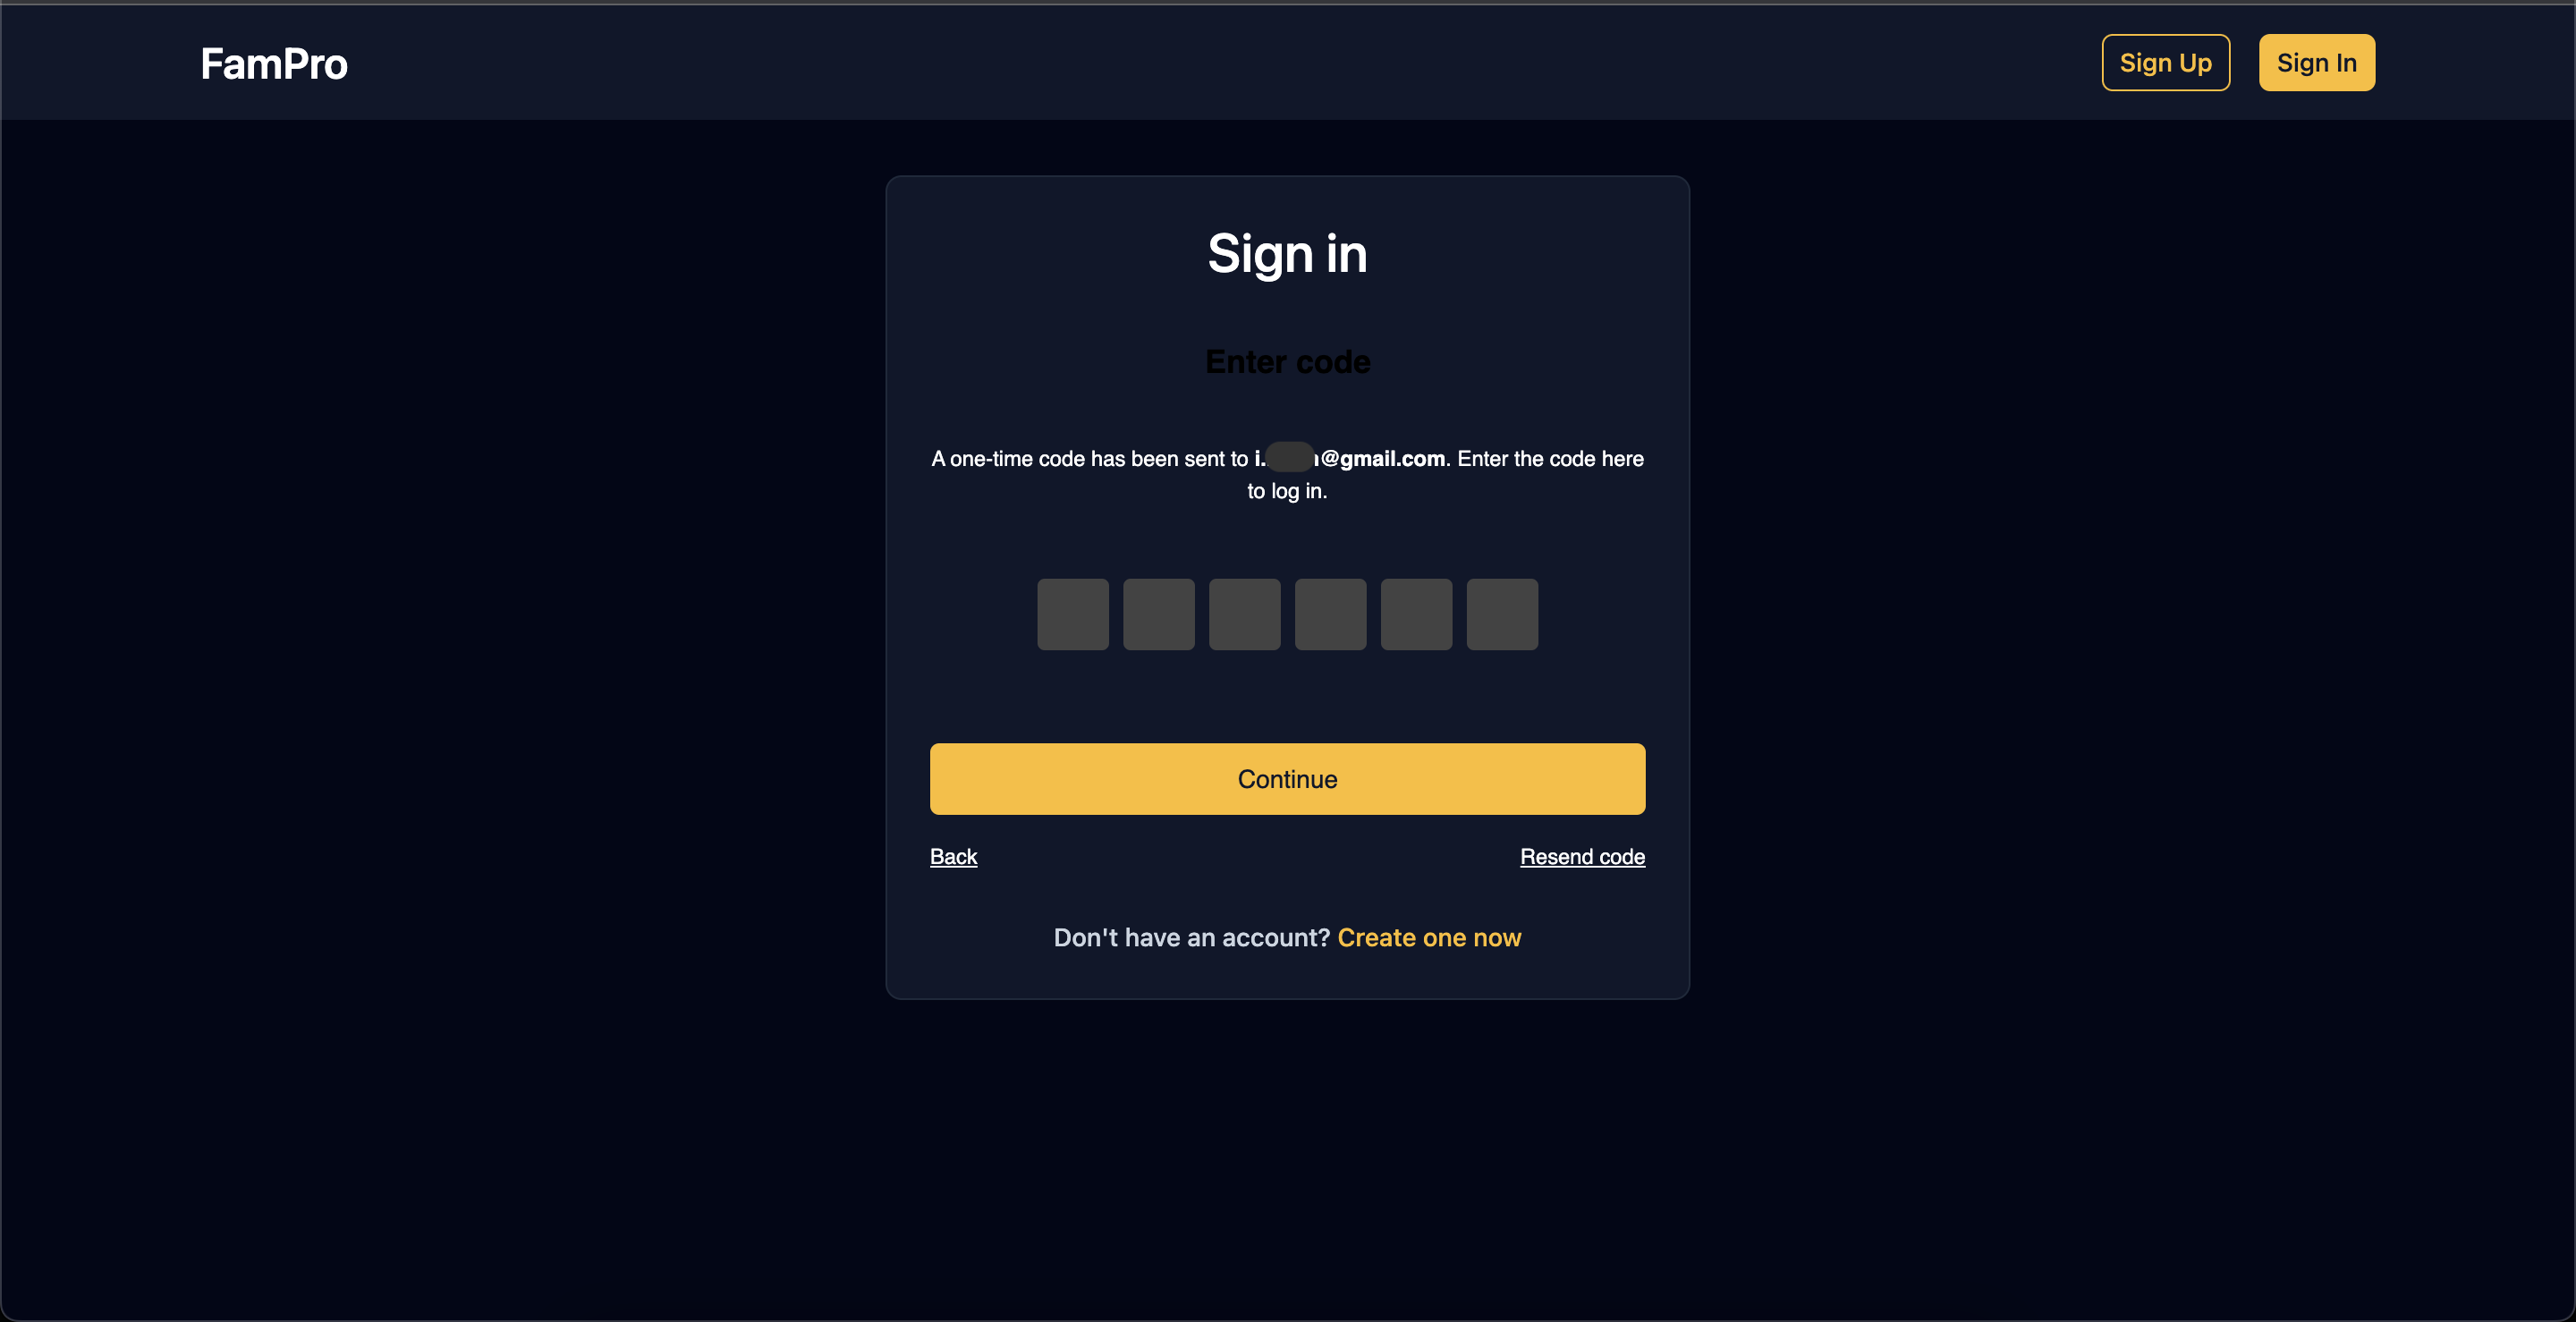
Sign in code
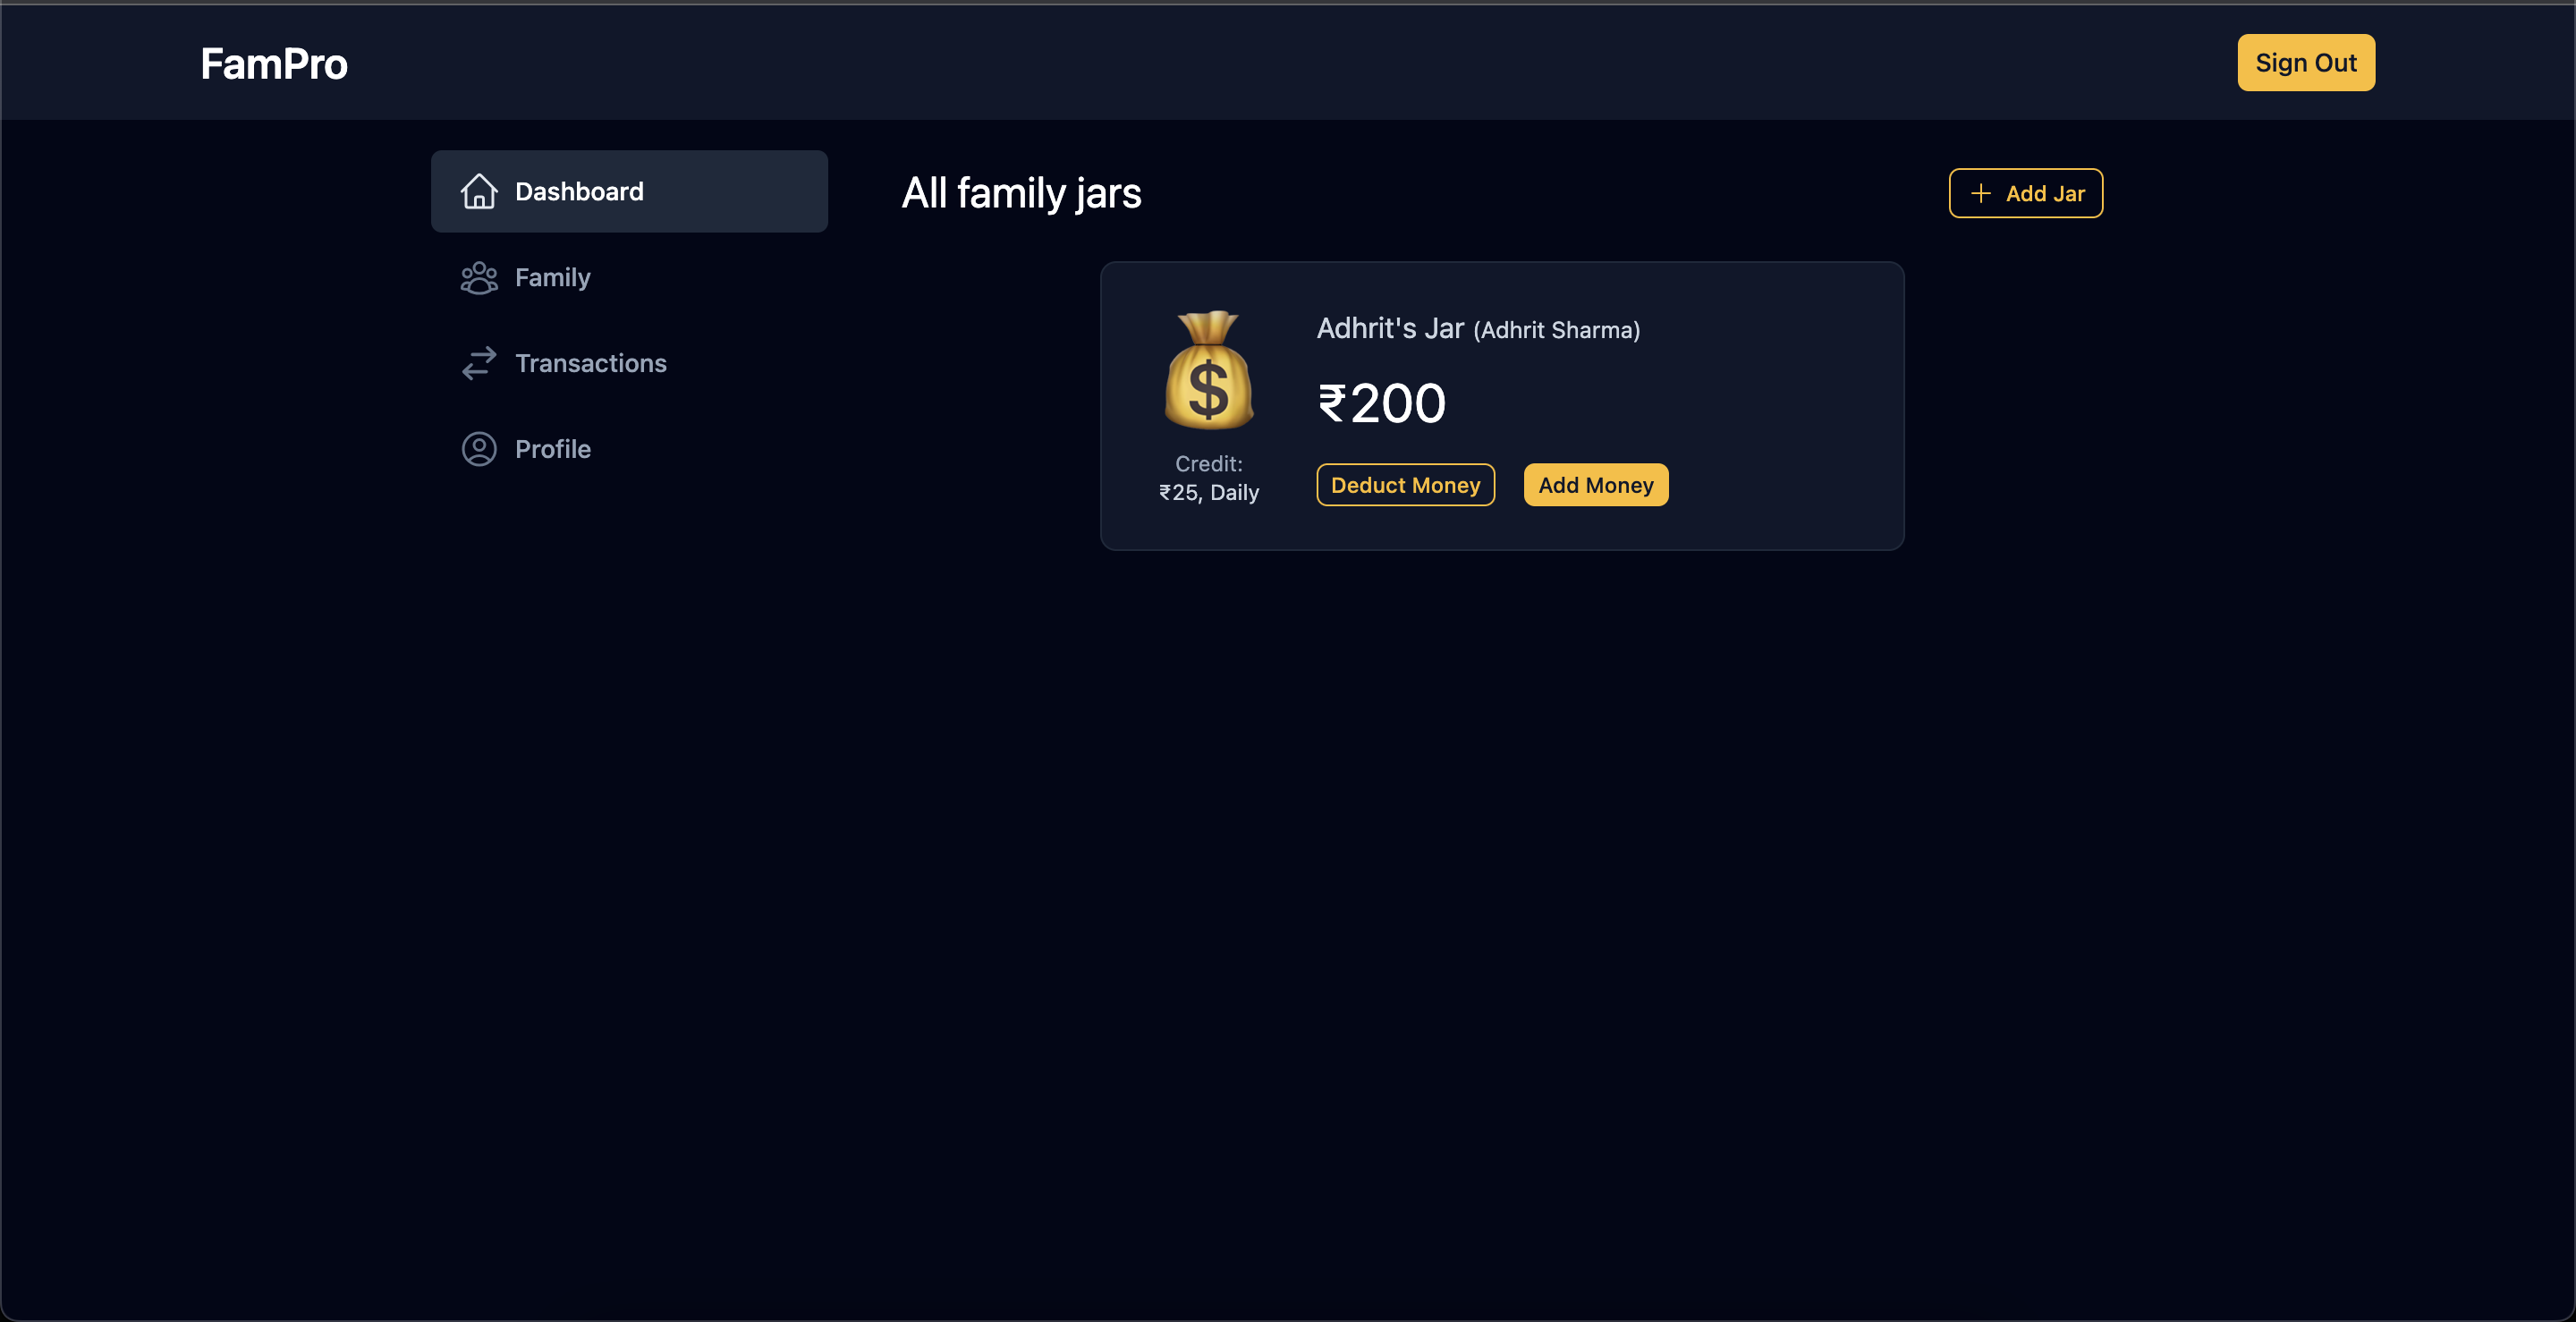
App dashboard
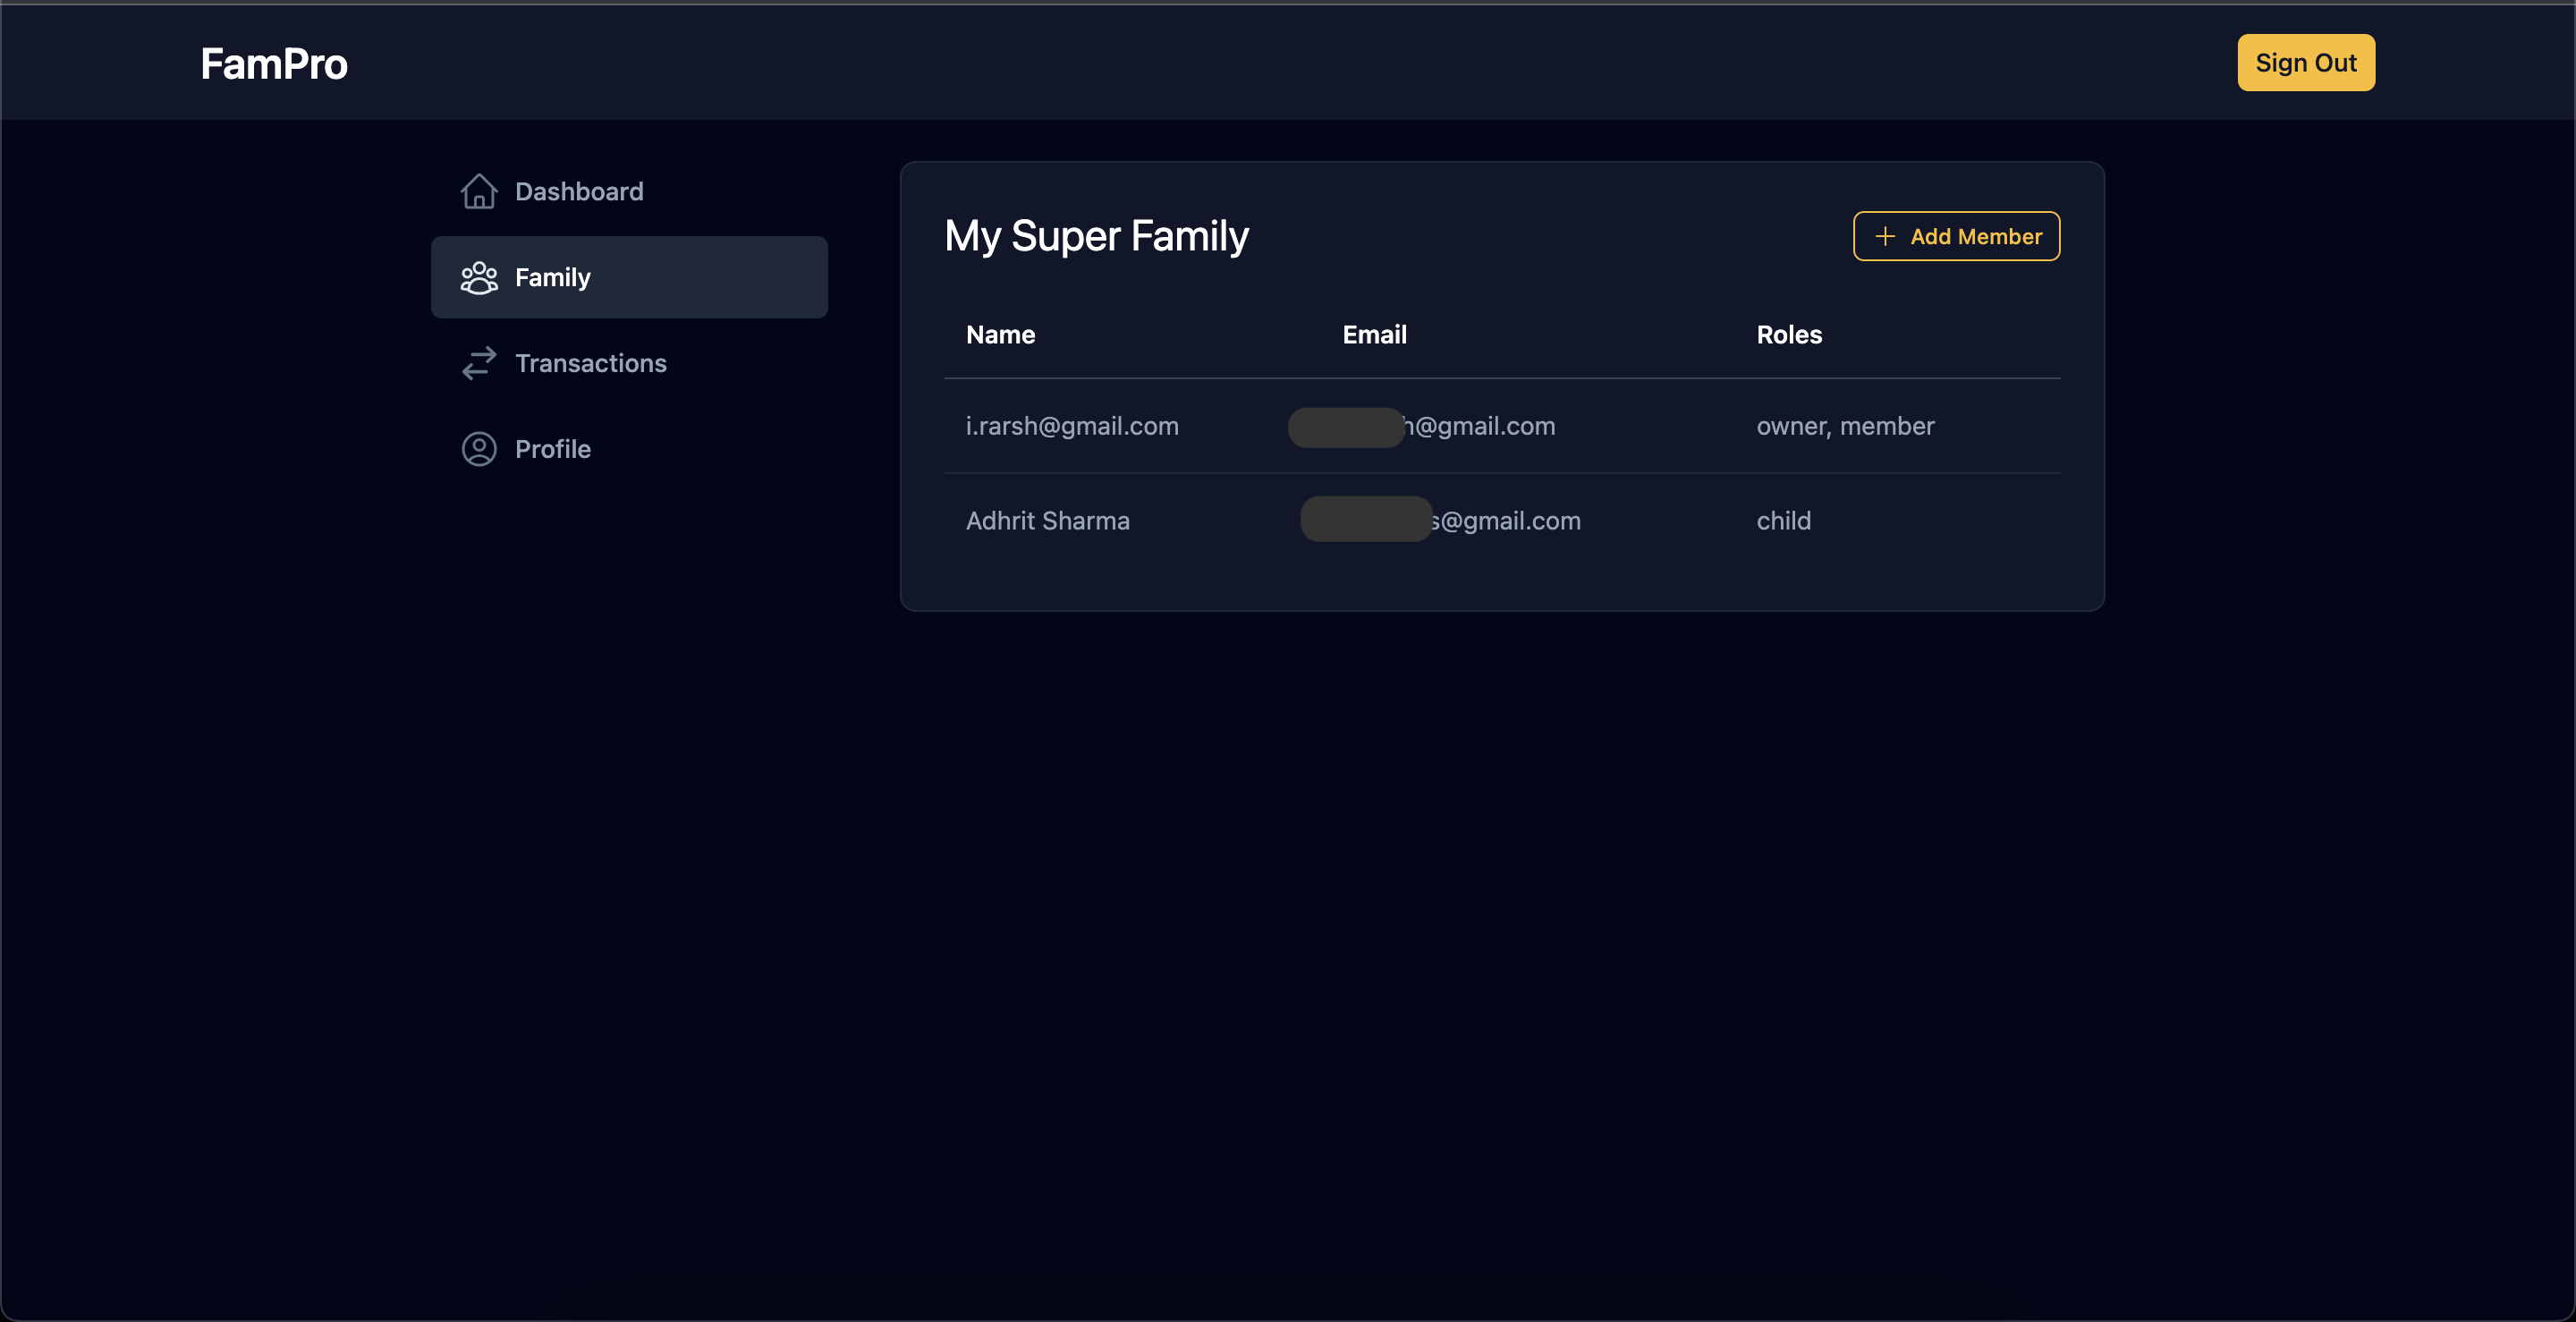
Family screen
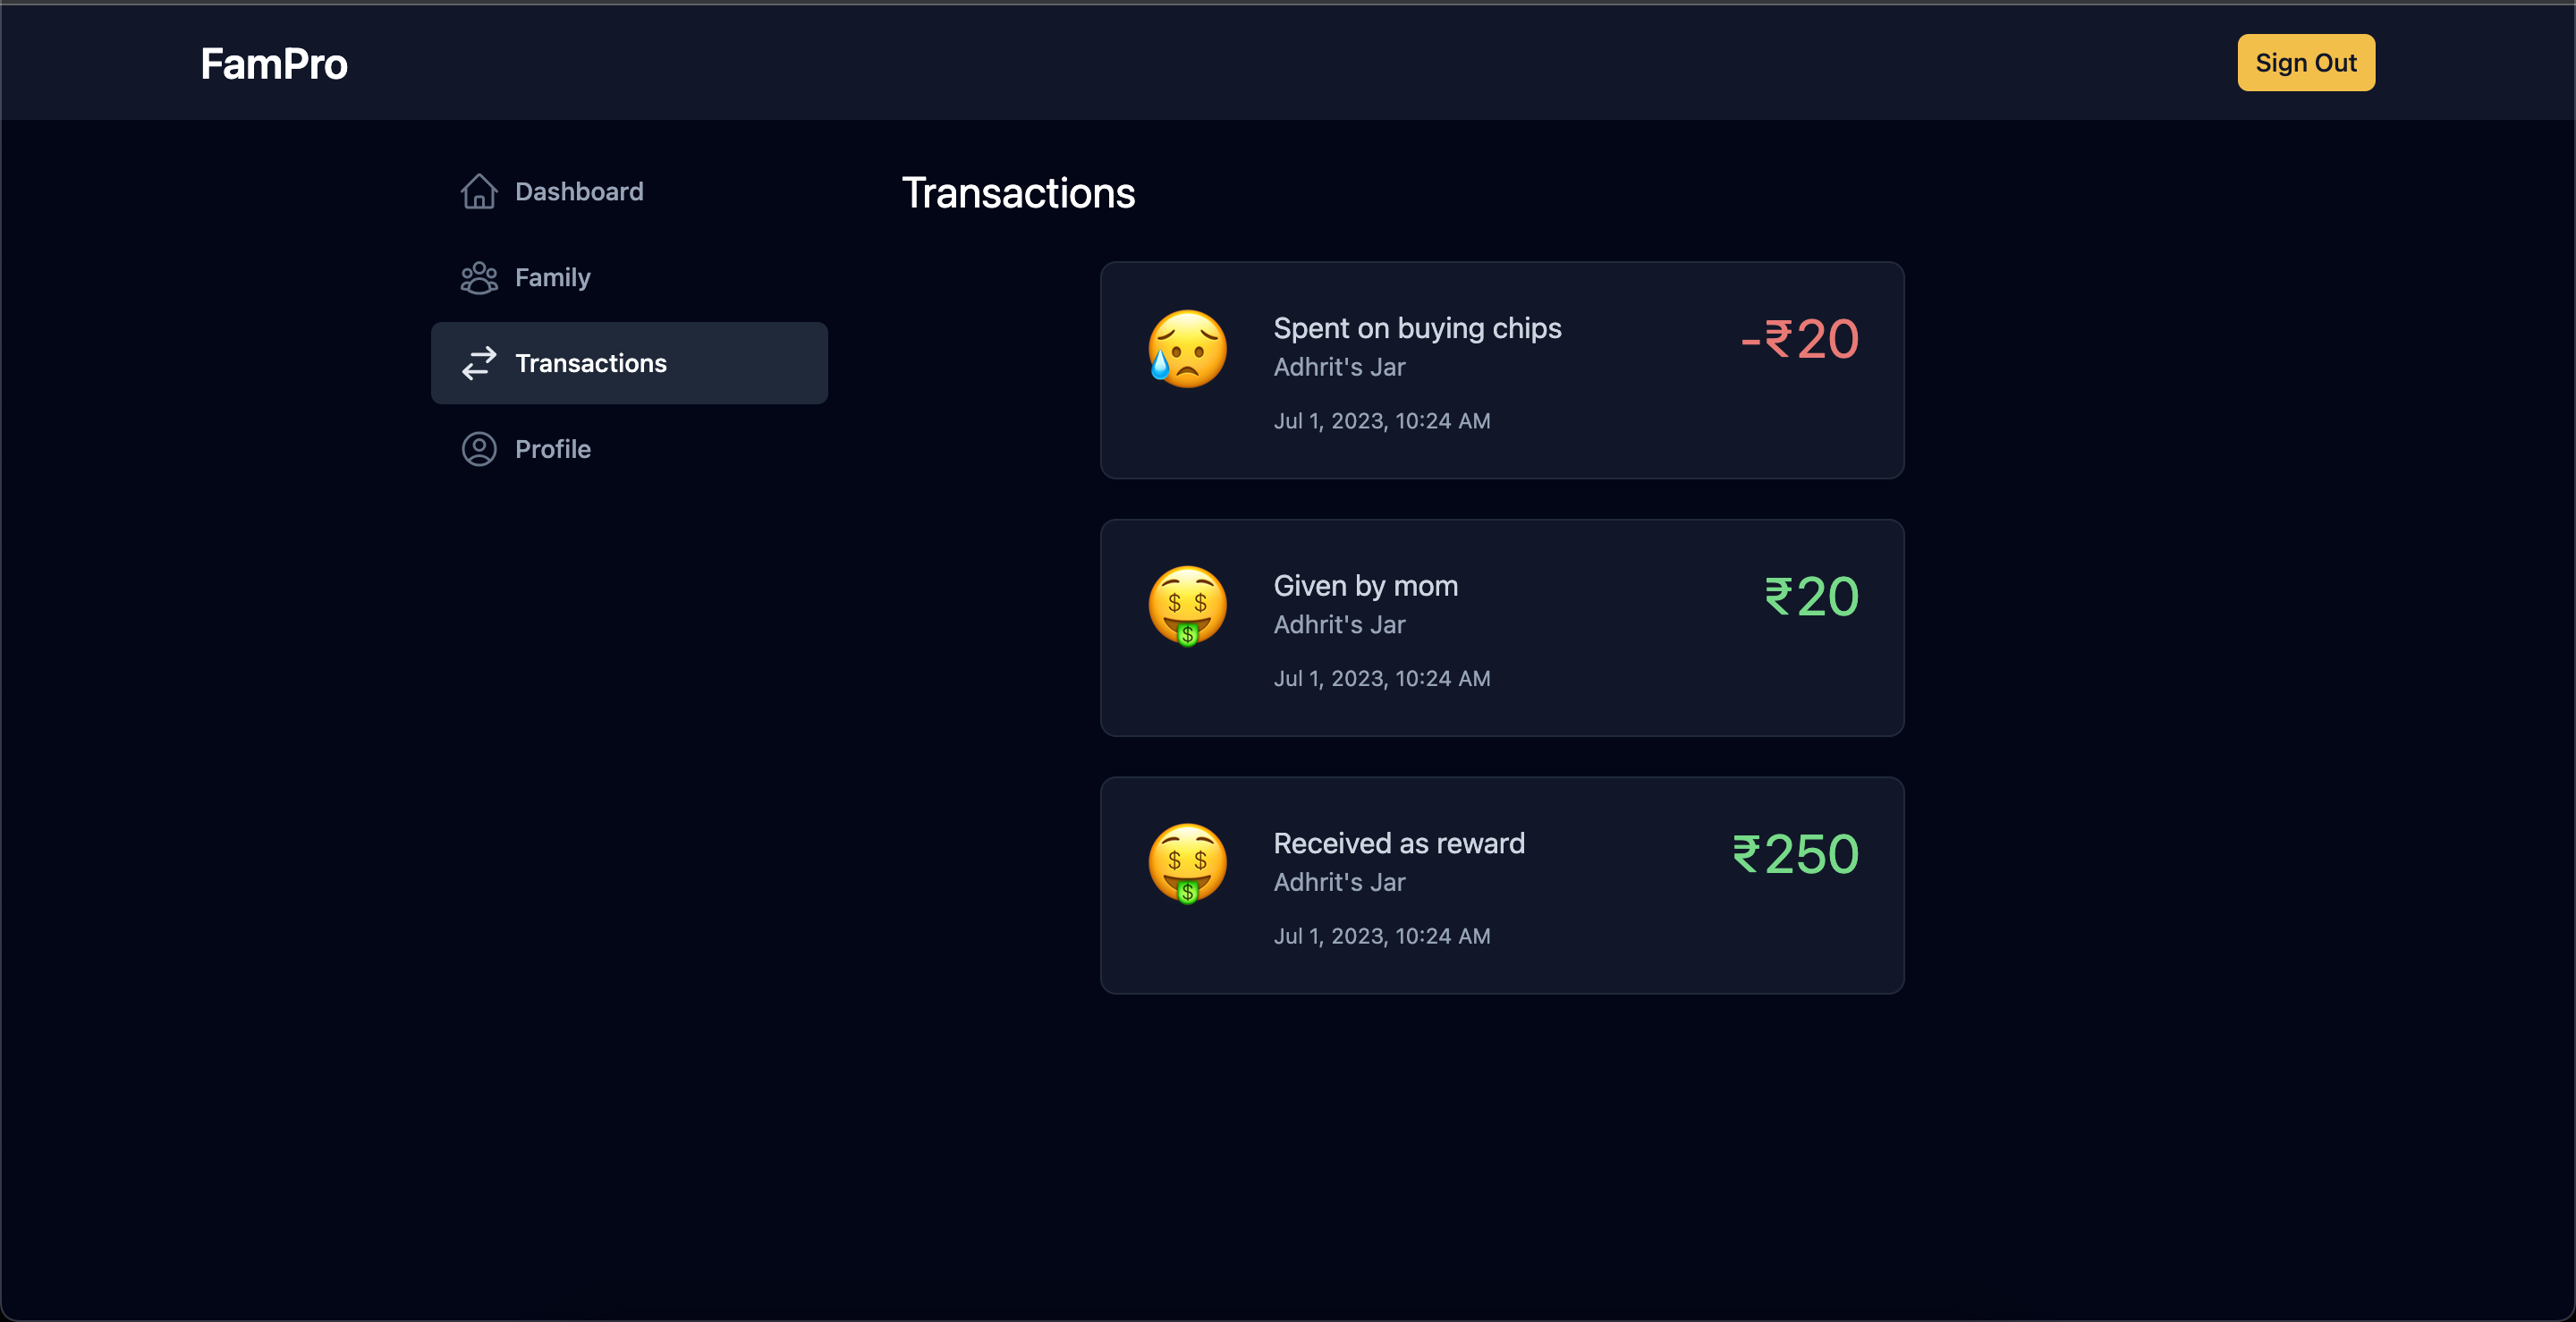
Transactions screen
User profile screen
This screen uses the <passage-profile> component provided by the passage's client SDK. We can change our profile update operation from here.
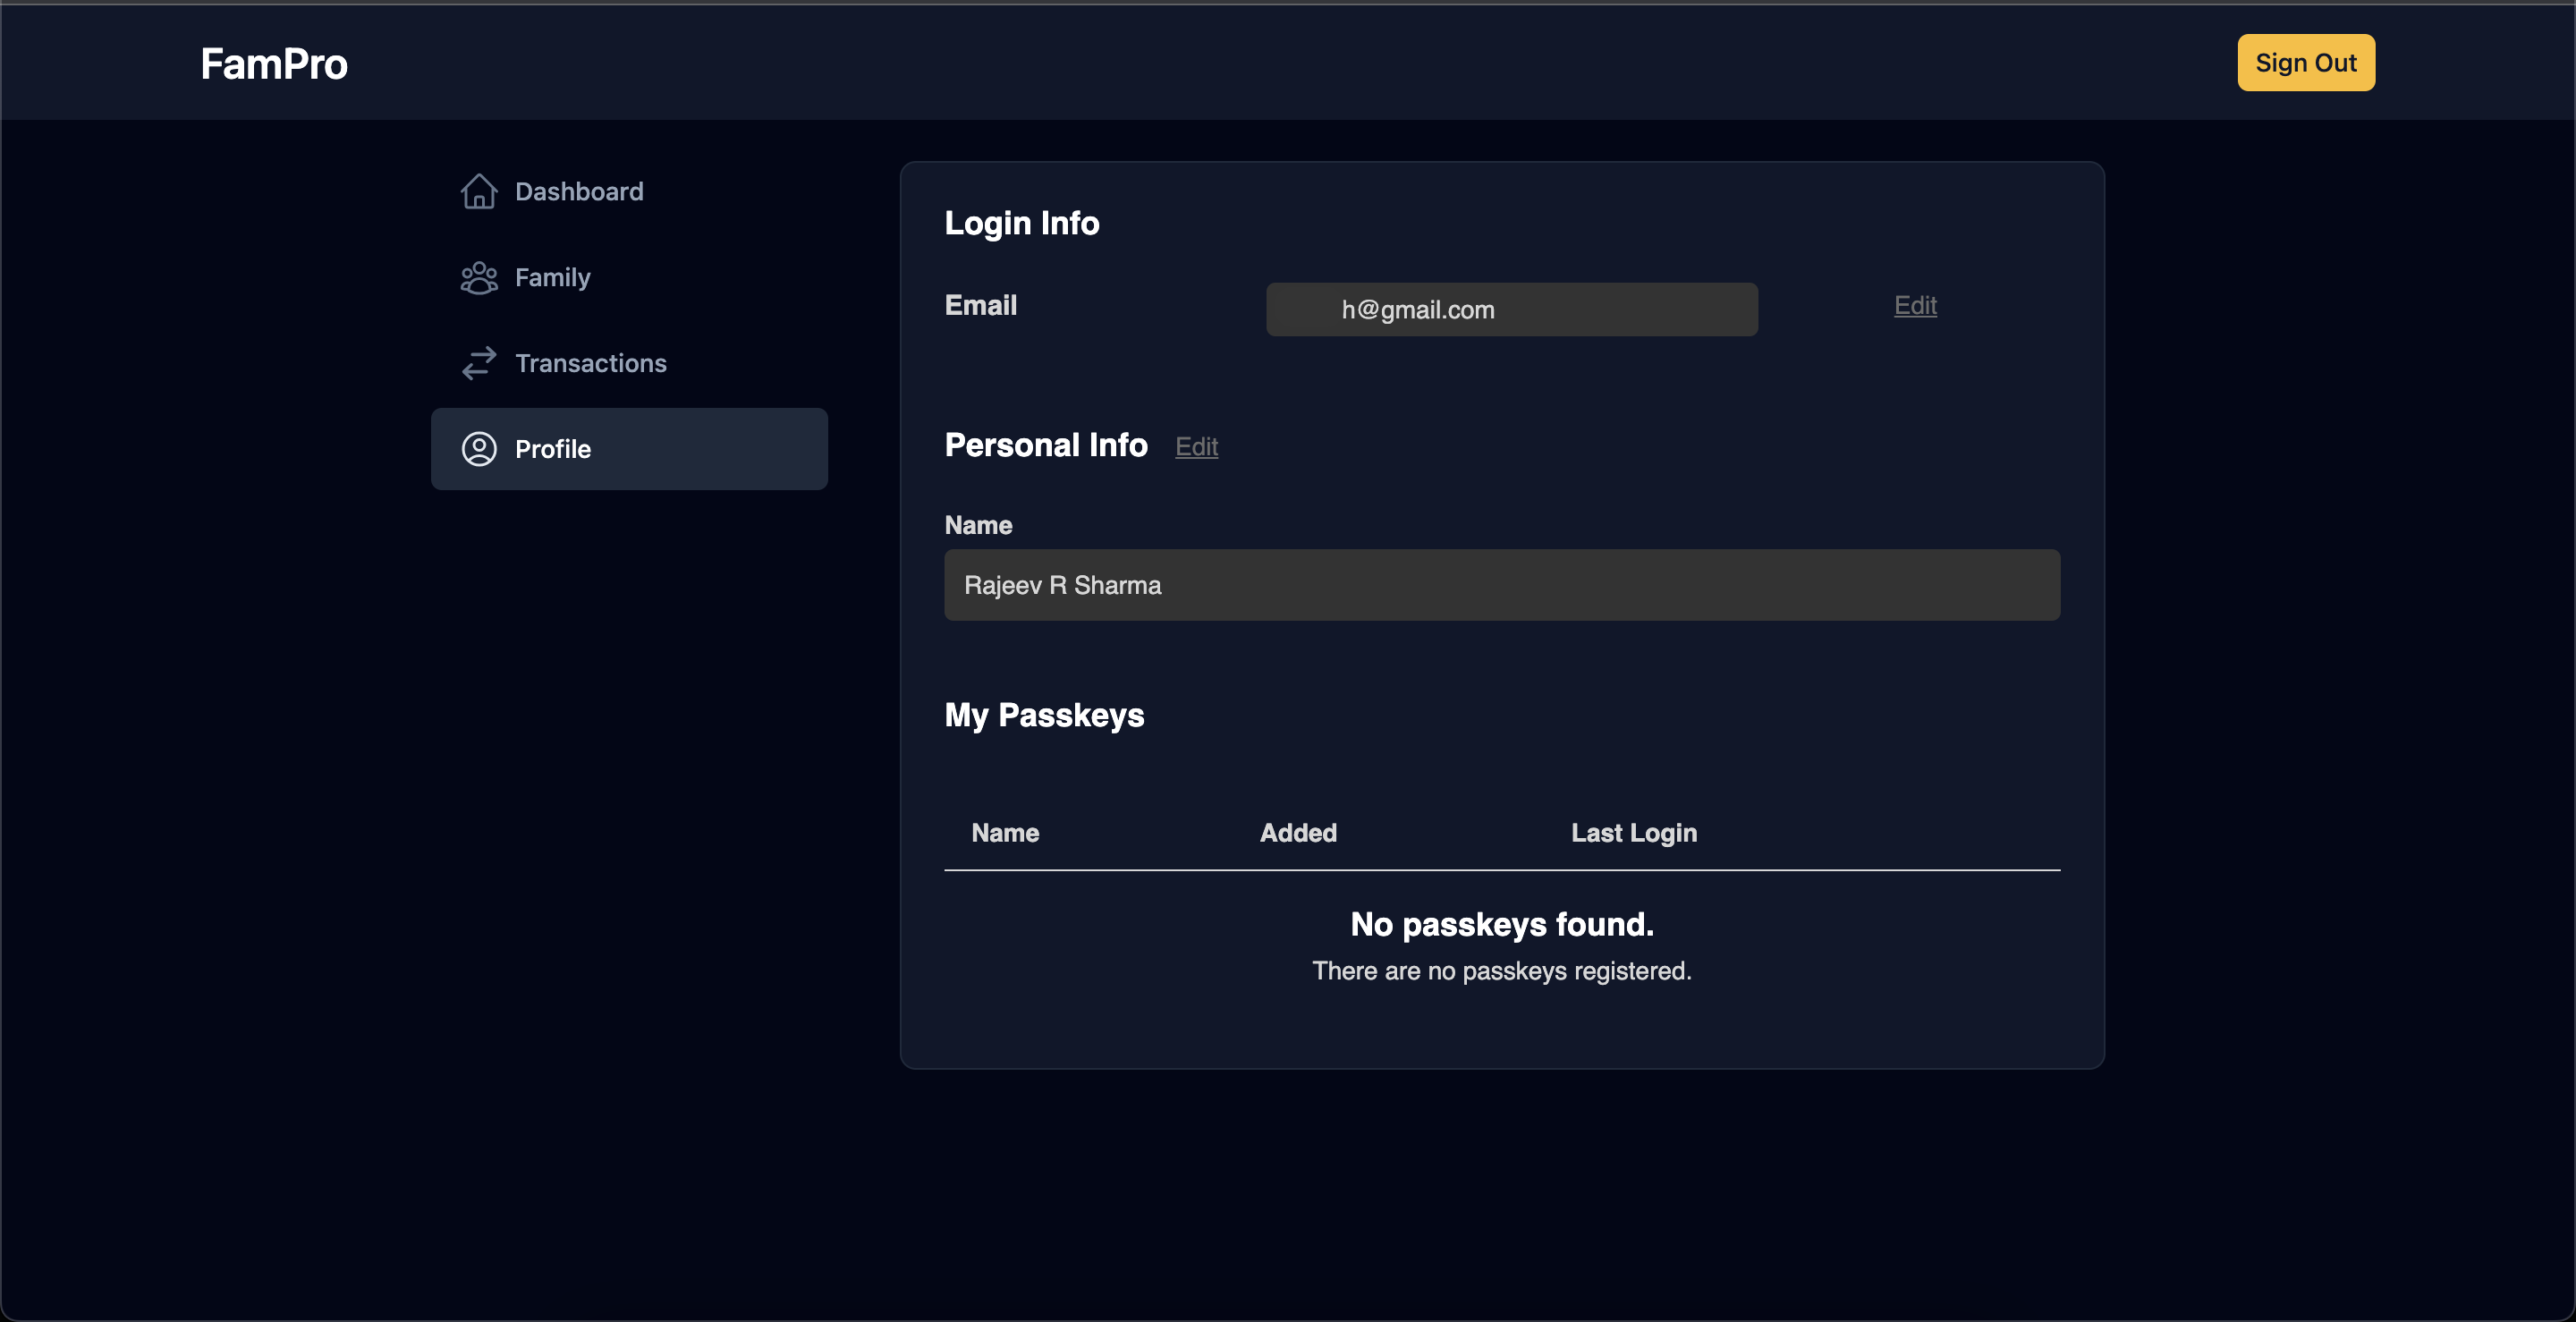
But it seems there is a bug in profile updation which the Passage team needs to look at. This app uses 3 other hidden metadata fields, and when you try to update the name it throws an error as shown below


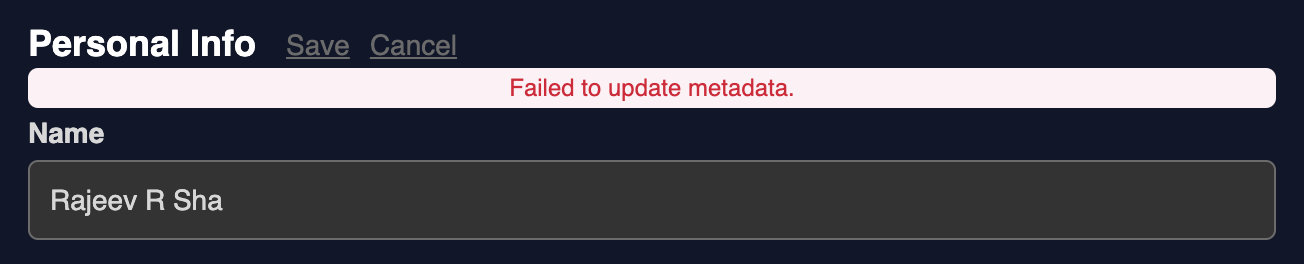
The error message is clear enough, but the app doesn't have any control on this component. This can be fixed by the Passage team only.
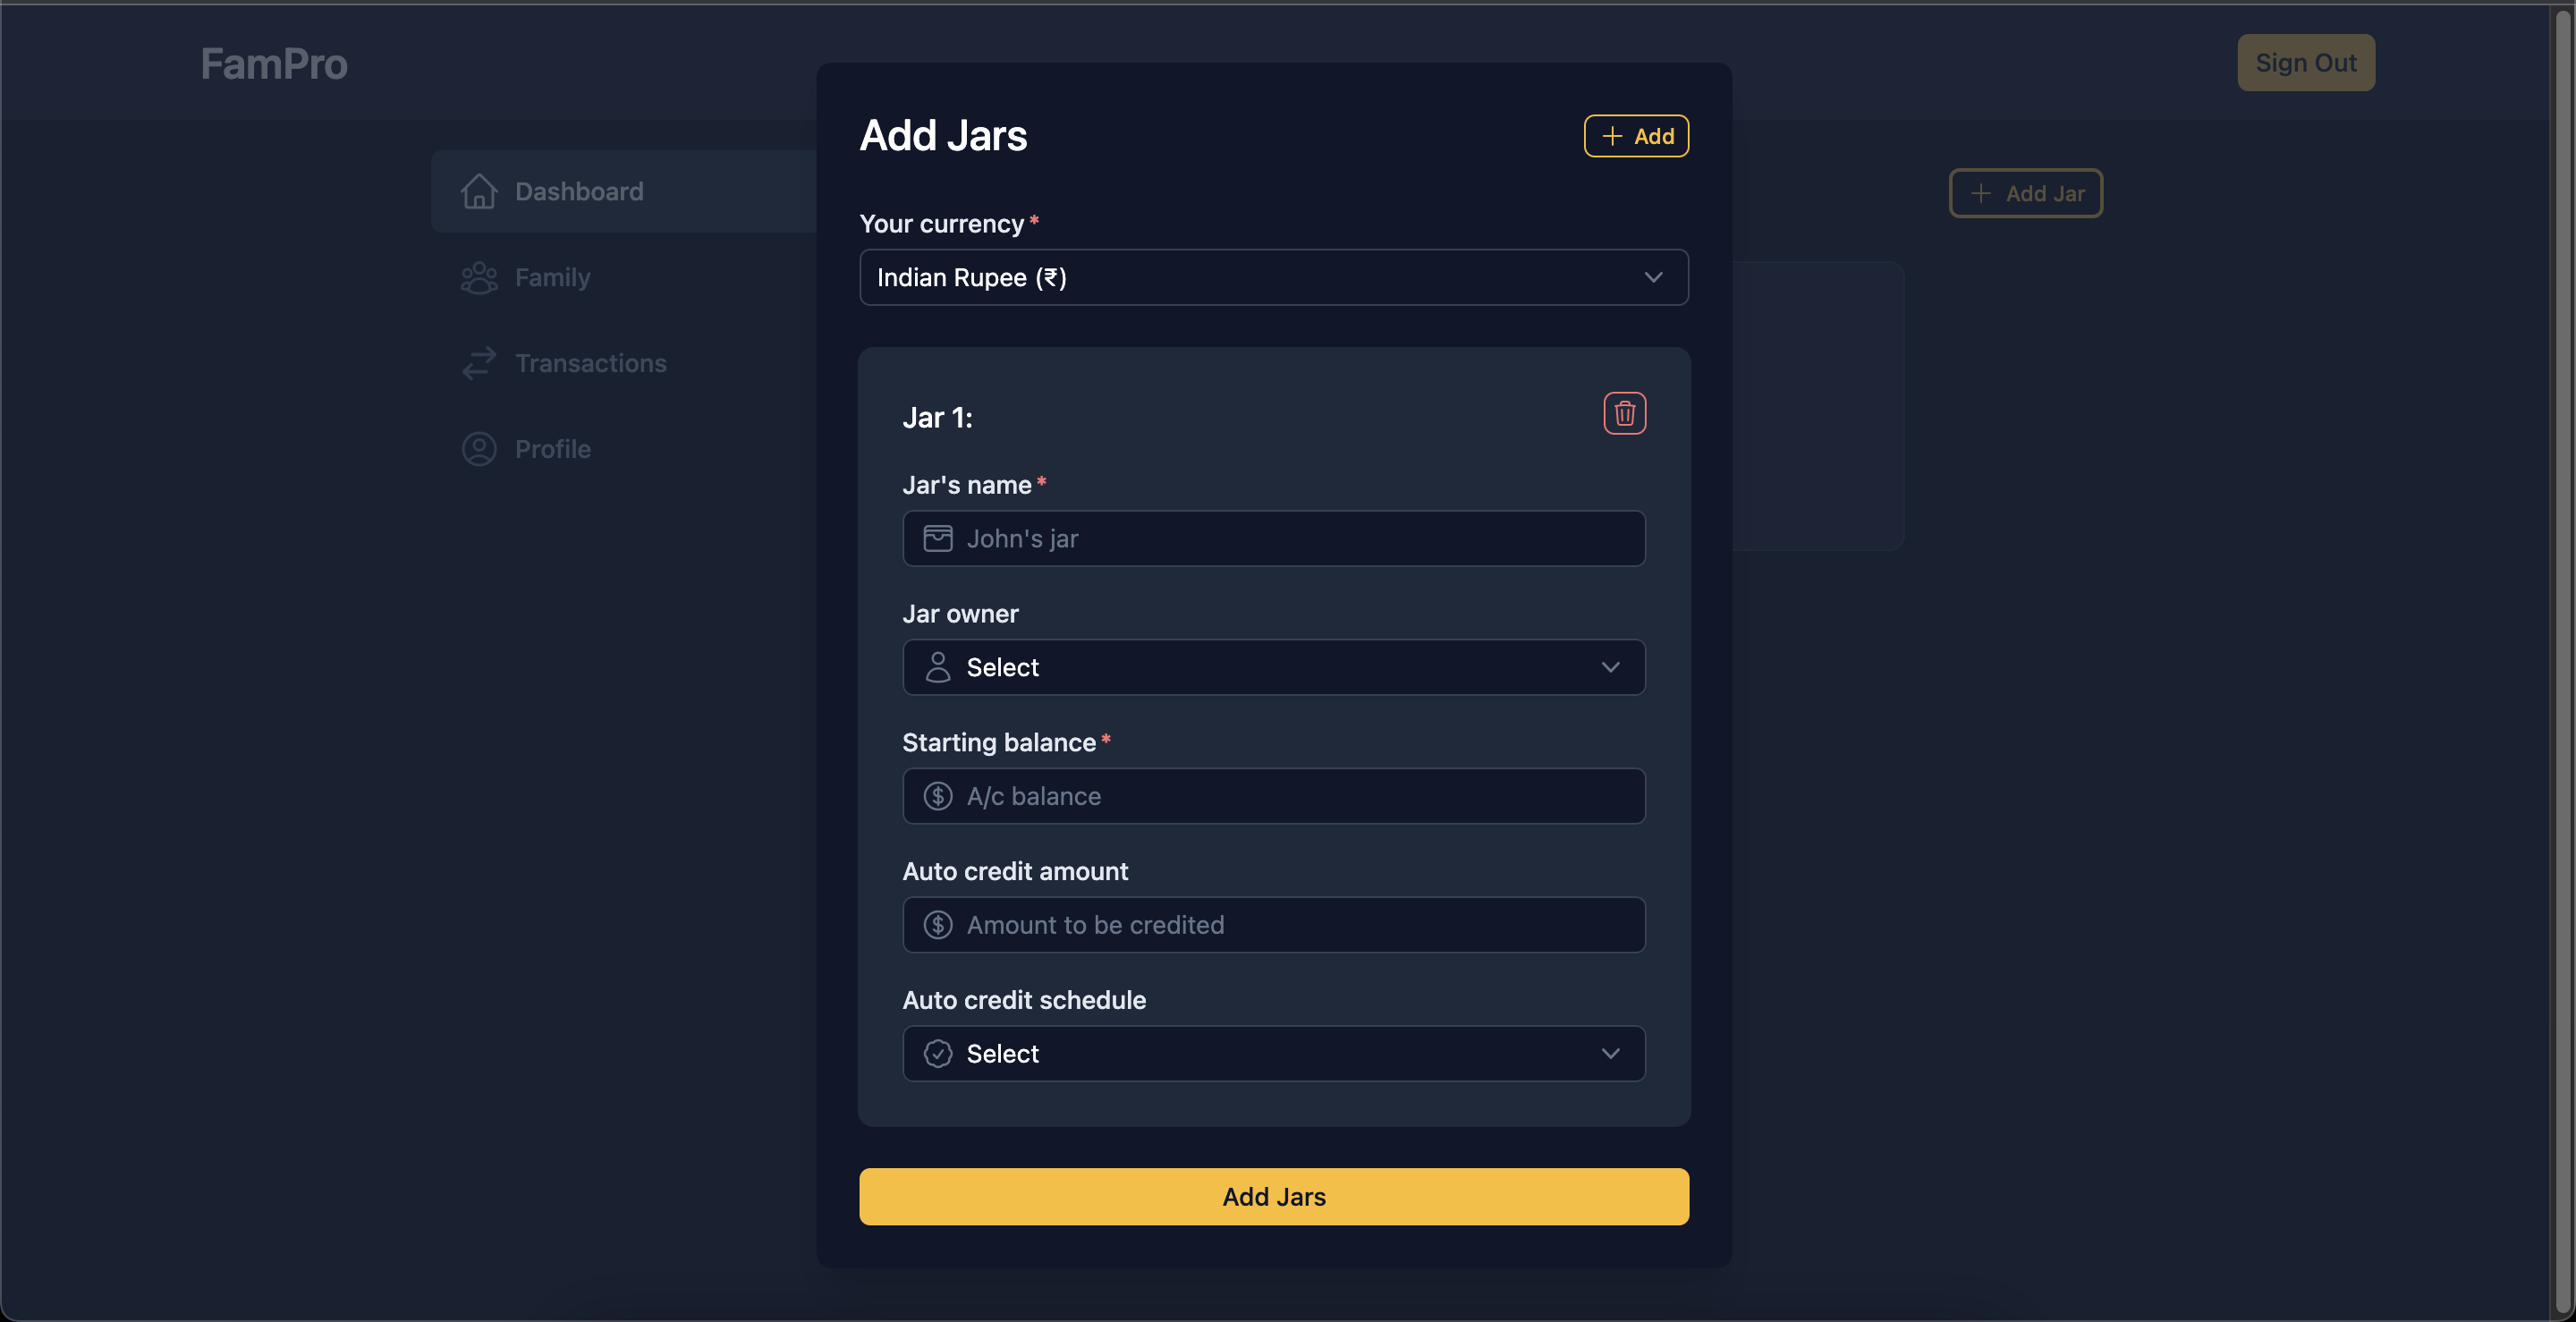
Create jar
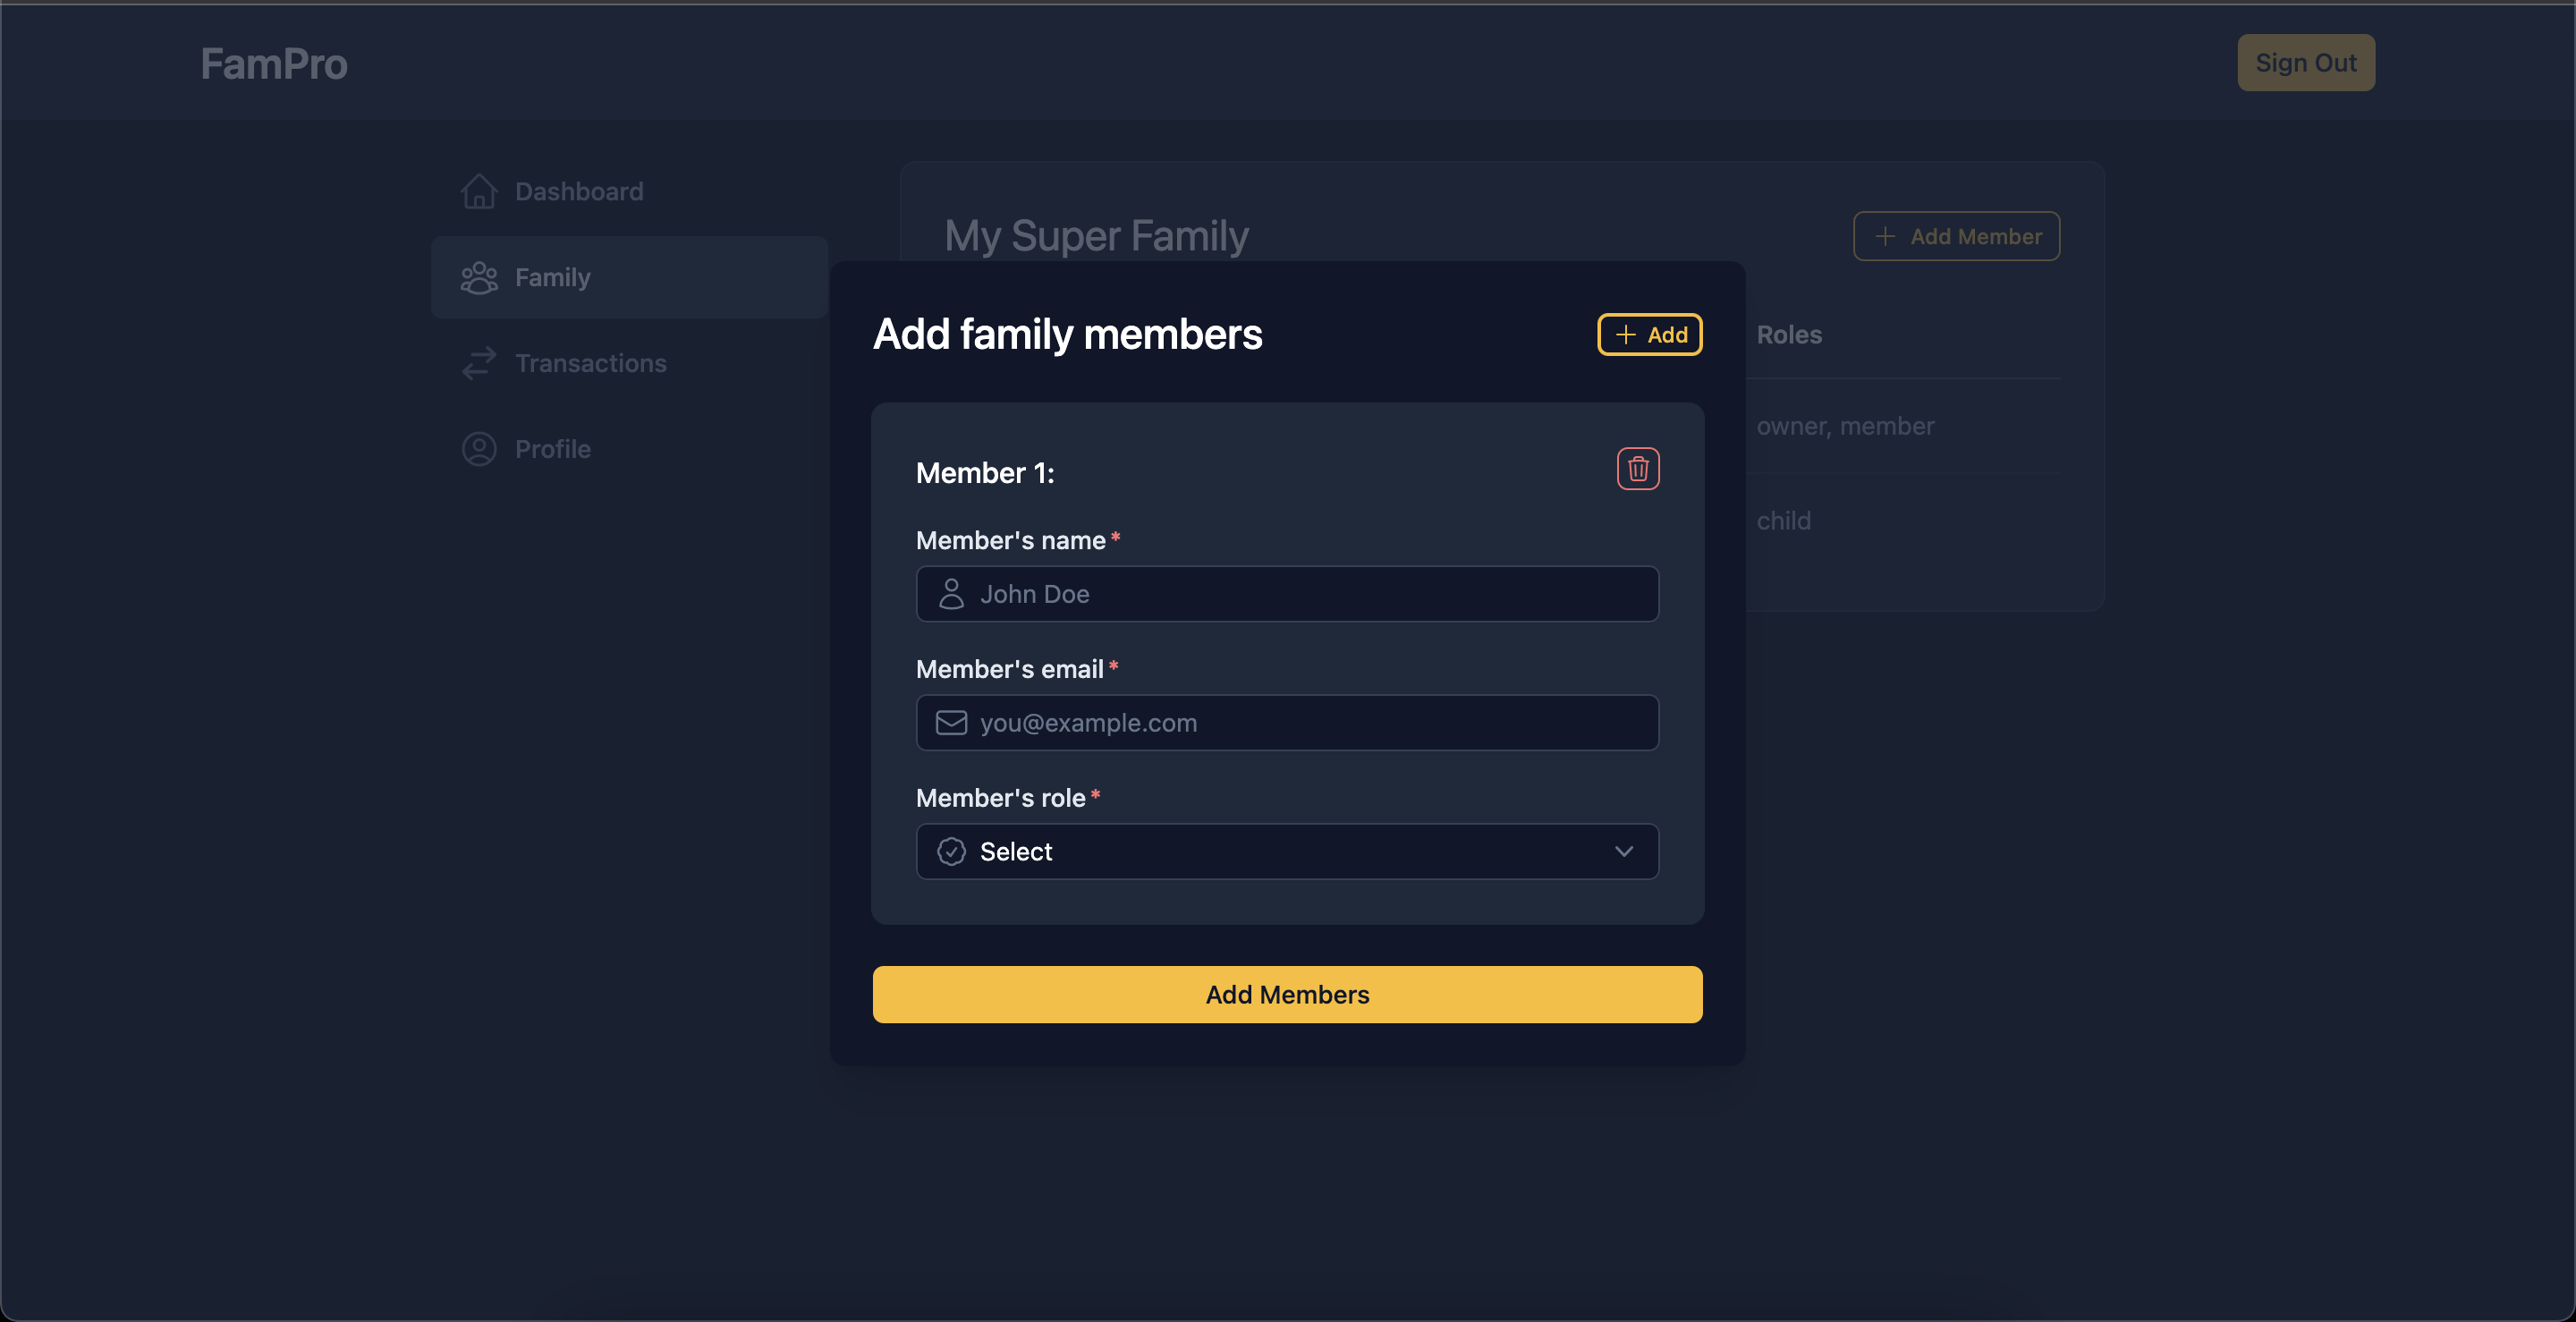
Add family members
Make transaction

Part 3: Automating the env file
As this app utilizes 1Password in a big way, I decided to make use of the 1Password CLI to handle the app env file as well. Below is a simple script that reads an env file and creates a 1Password item in the specified vault and replaces field values with the respective 1Password secrets.
#!/bin/sh

# Parse command-line arguments
while [ $# -gt 0 ]; do
  key="$1"

  case $key in
    --vault)
      vault="$2"
      shift # past argument
      shift # past value
      ;;
    --item-name)
      item_name="$2"
      shift # past argument
      shift # past value
      ;;
    --env-file)
      env_file="$2"
      shift # past argument
      shift # past value
      ;;
    *)
      # unknown option
      shift
      ;;
  esac
done

# Check if the --vault, --item-name, and --env-file parameters were provided
if [ -z "$vault" ] || [ -z "$item_name" ] || [ -z "$env_file" ]; then
  echo "Please provide --vault, --item-name, and --env-file parameters."
  exit 1
fi

# Check if the specified .env file exists
if [ ! -f "$env_file" ]; then
  echo "The specified .env file does not exist."
  exit 1
fi

# Check if the 1Password CLI is installed
if ! command -v op > /dev/null 2>&1; then
  echo "1Password CLI is not installed. Please install it before running this script."
  exit 1
fi

# Check if the item already exists in the vault
if op item get "$item_name" --vault "$vault" > /dev/null 2>&1; then
  echo "Item '$item_name' already exists in the '$vault' vault. Skipping creation."
  exit 0
fi

# Variable to store the fields string
fields=()
skipped_fields=()

# Read the .env file line by line
while IFS= read -r line || [ -n "$line" ]; do
  # Skip empty lines and comments
  if [ -z "$line" ] || [ "${line#"#"}" != "$line" ]; then
    continue
  fi

  # Split the line into key and value
  key="${line%%=*}"
  value="${line#*=}"

  # Check if the value is already a reference to a 1Password secret
  if [ "${value#op://}" != "$value" ]; then
    echo "Skipping creation of '$key' field as it is already a reference to a 1Password secret."
    skipped_fields+=($line)
    continue
  fi

  # Add the key-value pair to the fields array
  fields+=("$key=$value")
done < "$env_file"

# Create the item in 1Password using the op create command
op item create \
  --category Server \
  --title "$item_name" \
  --vault "$vault" \
  "${fields[@]}" \
  --tags "$item_name,env"

# Update the .env file with the secret references
for ((i = 0; i < ${#fields[@]}; i++)); do
  # Split the field into key and value
  field="${fields[i]}"
  IFS="=" read -r key value <<< "$field"

  fields[i]="$key=op://$vault/$item_name/$key"
done

final_fields=("${fields[@]}" "${skipped_fields[@]}")

# Overwrite the .env file with the updated key-value pairs
printf "%s\n" "${final_fields[@]}" > "$env_file"

echo "Item '$item_name' created successfully in the '$vault' vault."
echo "Updated the '$env_file' file with the secret references."
We need to pass the vault name, the item entry name and the env file path while executing the script. Now this env file can be uploaded to the repo along with the rest of the code.
./save-env.sh --vault AppVaults --item-name FamPro --env-file ./client/.env
APPWRITE_ENDPOINT=op://AppVaults/FamPro/APPWRITE_ENDPOINT
APPWRITE_PROJECT_ID=op://AppVaults/FamPro/APPWRITE_PROJECT_ID
APPWRITE_DATABASE_ID=op://AppVaults/FamPro/APPWRITE_DATABASE_ID
APPWRITE_JAR_COLLECTION_ID=op://AppVaults/FamPro/APPWRITE_JAR_COLLECTION_ID
APPWRITE_TRANSACTION_COLLECTION_ID=op://AppVaults/FamPro/APPWRITE_TRANSACTION_COLLECTION_ID
APPWRITE_API_KEY=op://AppVaults/FamPro/APPWRITE_API_KEY
PASSAGE_APP_ID=op://AppVaults/FamPro/PASSAGE_APP_ID
PASSAGE_API_KEY=op://AppVaults/FamPro/PASSAGE_API_KEY
To load the secrets back into the env file we can use the below command (with the correct file paths)
op inject -i .env_template -o .env
Supported features
The app supports the following features at the moment
- Creating a family account.
- Adding members to the family with a member or child role. Only a user with a member role can add other members.
- Creating multiple jars per user (member or child). Again, only users with a member role can create jars.
- Making ad-hoc transactions against a jar. A user with a member role can make transactions in any of the jars in the family. A child can only view and do transactions in their jars.
- Transactions done by a user with a child role remain pending. These transactions need to be approved by a user with a member role before the jar balance can be updated.
Further enhancements
- Improve the dashboard experience
- Allow deletion of member accounts
- Allow modification and deletion of transactions
App source code and link
The full source code of the app along with the 1Password CLI script can be found here
The code for the appwrite shell plugin can be checked in this PR.
You can play around with the app here: https://fam-pro.vercel.app/
Conclusion
Overall it was a great experience building with 1Password, Appwrite and Nuxt3. I did face some challenges in the process outlined above, but we could overcome those. 1Password offers a seamless auth experience and it would be interesting to see what features they add on top of the existing functionality. I also thank the Hashnode team for organizing this hackathon.
I hope you enjoyed reading the article. It would mean a lot to me if you can show appreciation by sharing your feedback. If you found any mistake then please let me know in the comments.
-- Keep adding the bits, soon you'll have more bytes than you may need. :-)