
Boost Your API Performance with Firebase CDN: A Guide to API Caching
If you're using or thinking of using Firebase Cloud Functions or Cloud Run for your website/app backend, I highly recommend looking into caching your API responses. Used appropriately it can improve the speed and performance of your website/app. This article will give you a simple overview of what CDN and caching are, and how you can easily configure them in Firebase.
Introduction
Before going further, let's review the two terms, Caching and CDN, which are essential for a basic understanding of the topic.
What is Caching?
Caching is the process of storing copies of some of your data in temporary storage locations for faster retrieval. These temporary storage locations can be anywhere in between and including the original content storage (e.g. a database) and the client (e.g. your browser).
What is a CDN?
A CDN or Content Delivery Network is a network of geographically distributed servers that are used to serve content/data to end users faster.
These servers sit between us, the client, and the origin server, and can keep a cache of our content for the configured time. Also, since they are distributed across the world, the data is served from the edge that is closest to us. And because of this proximity, the round trip delay is much lower compared to if the request had to be served from the origin server (or simply the origin).
But how does the CDN get the data in the first place?
Initially, the CDN cache doesn't have any data, we call it a cold cache. When a request is made, it is routed to the edge closest to you. The edge location checks its cache, which is empty, gets the data from the origin and returns it to you, simultaneously storing it in its cache (this is called warming the cache) for future requests.
So one request is all it takes for the CDN to get the data?
Yes and no! The edge location closest to you gets the data when you make the first request. Now, any subsequent "similar" request to the same edge, either by you or someone else, is served from the cache. Since this cache has the relevant data for the request, it is called a warm or hot cache.
If a request is made to some other edge location by someone else then that server might not have any data stored yet, so the same process of data fetching and storing gets repeated there.
As you might have guessed, in this article we will be looking at storing our API responses at the CDN for faster retrieval.
Configuring API Caching with Firebase CDN
So how do we configure the firebase CDN? If you look at the firebase documentation, you won't find any separate subsection called CDN. Firebase CDN is covered under firebase hosting, you can read about it in the introduction here.
To use the CDN for API caching we need to connect our firebase function(s)/cloud run to firebase hosting. But does that mean we need to host our website on firebase hosting? Not necessarily.
Setup a Firebase Project
If you don't have a firebase project already, create one using either the command line or the firebase console.
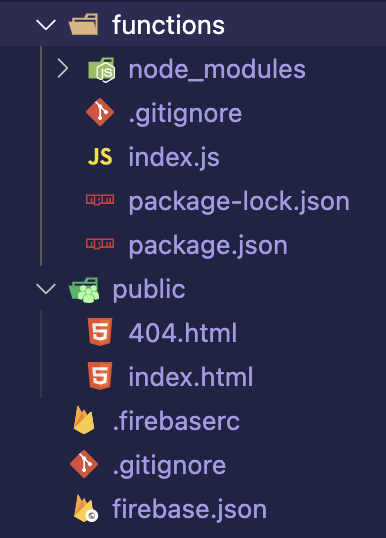
To show the difference between a direct firebase function call and one through the CDN we'll be creating a simple project. I simply executed the firebase init command inside an empty directory and followed the prompts (selected the default choice for each). In this project, I've enabled only hosting and functions.
This is my current project directory. Everything has been generated by the init command
Next, head to the index.js file within the functions folder. I've created two simple functions inside it as shown below. We'll be using one of the functions directly and the other one through the CDN. On function calls, we just respond with preconfigured messages
const functions = require('firebase-functions');

exports.helloWorld = functions.https.onRequest((req, res) => {
  functions.logger.info(`helloWorld! Hostname: ${req.hostname}`);
  res.send({ message: 'Hello World!' });
});

exports.wonderfulWorld = functions.https.onRequest((req, res) => {
  functions.logger.info(`wonderfulWorld! Hostname: ${req.hostname}`);
  res.send({ message: 'What a Wonderful World!' });
});
If we try to call these functions from our index.html file we'll get CORS errors. So before deploying the functions let's install the cors package using the "npm i cors" command and wrap the two functions' bodies inside it.
const functions = require('firebase-functions');
// Require cors. For testing we're allowing it for all origins
const cors = require('cors')({origin: true})

exports.helloWorld = functions.https.onRequest((req, res) => {
  functions.logger.info(`helloWorld! Hostname: ${req.hostname}`);
  cors(req, res, () => {
    res.send({ message: 'Hello World!' });
  })
});

exports.wonderfulWorld = functions.https.onRequest((req, res) => {
  functions.logger.info(`wonderfulWorld! Hostname: ${req.hostname}`);
  cors(req, res, () => {
    res.send({ message: 'What a Wonderful World!' });
  })
});
Now we're ready to test these functions. Deploy the functions using the firebase deploy command
firebase deploy --only functions
Now head over to the index.html file inside the public folder and replace its content with the below code. I've just modified the file generated by firebase and added the two function calls in it.
Don't forget to replace <project_id> with your actual project id. You may also need to change the function region if you deployed to a region other than us-central1
<!DOCTYPE html>
<html>
<head>
<meta charset="utf-8" />
<meta name="viewport" content="width=device-width, initial-scale=1" />
<title>Welcome to Firebase Hosting</title>
<style media="screen">
body {
background: #eceff1;
color: rgba(0, 0, 0, 0.87);
font-family: Roboto, Helvetica, Arial, sans-serif;
margin: 0;
padding: 0;
}
#message {
background: white;
max-width: 360px;
margin: 100px auto 16px;
padding: 32px 24px;
border-radius: 3px;
}
#message h1 {
font-size: 32px;
color: #ffa100;
font-weight: bold;
margin: 0 0 16px;
}
#message p {
line-height: 140%;
font-size: 14px;
}
#message a {
display: block;
text-align: center;
background: #039be5;
text-transform: uppercase;
text-decoration: none;
color: white;
padding: 16px;
border-radius: 4px;
cursor: pointer;
}
#message a:hover {
background: #028bd5;
}
#message,
#message a {
box-shadow: 0 1px 3px rgba(0, 0, 0, 0.12), 0 1px 2px rgba(0, 0, 0, 0.24);
}
#cdn,
#direct {
background: #e1e1e1;
padding: 4px 8px;
border-radius: 4px;
color: black;
}
@media (max-width: 600px) {
body,
#message {
margin-top: 0;
background: white;
box-shadow: none;
}
body {
border-top: 16px solid #ffa100;
}
}
</style>
</head>
<body>
<div id="message">
<h1>Welcome</h1>
<p>Click on the button below to make the API Calls...</p>
<a onclick="makeCalls()">Test API Calls</a>
<p>Response through CDN</p>
<pre id="cdn">Waiting for the click…</pre>
<p>Response through function</p>
<pre id="direct">Waiting for the click…</pre>
</div>
<script>
const directEl = document.getElementById('direct');
const cdnEl = document.getElementById('cdn');
async function makeCalls() {
directEl.textContent = 'Loading...';
cdnEl.textContent = 'Loading...';
const promises = [
fetch(
'https://us-central1-<project_id>.cloudfunctions.net/helloWorld'
),
fetch(
'https://us-central1-<project_id>.cloudfunctions.net/wonderfulWorld'
),
];
const [directCall, cdnCall] = await Promise.allSettled(promises);
if (directCall.status === 'fulfilled' && directCall.value.ok) {
const directCallData = await directCall.value.json();
console.log('directCallData', directCallData);
directEl.textContent = JSON.stringify(directCallData, null, 2);
}
if (cdnCall.status === 'fulfilled' && cdnCall.value.ok) {
const cdnCallData = await cdnCall.value.json();
console.log('cdnCallData', cdnCallData);
cdnEl.textContent = JSON.stringify(cdnCallData, null, 2);
}
}
</script>
</body>
</html>
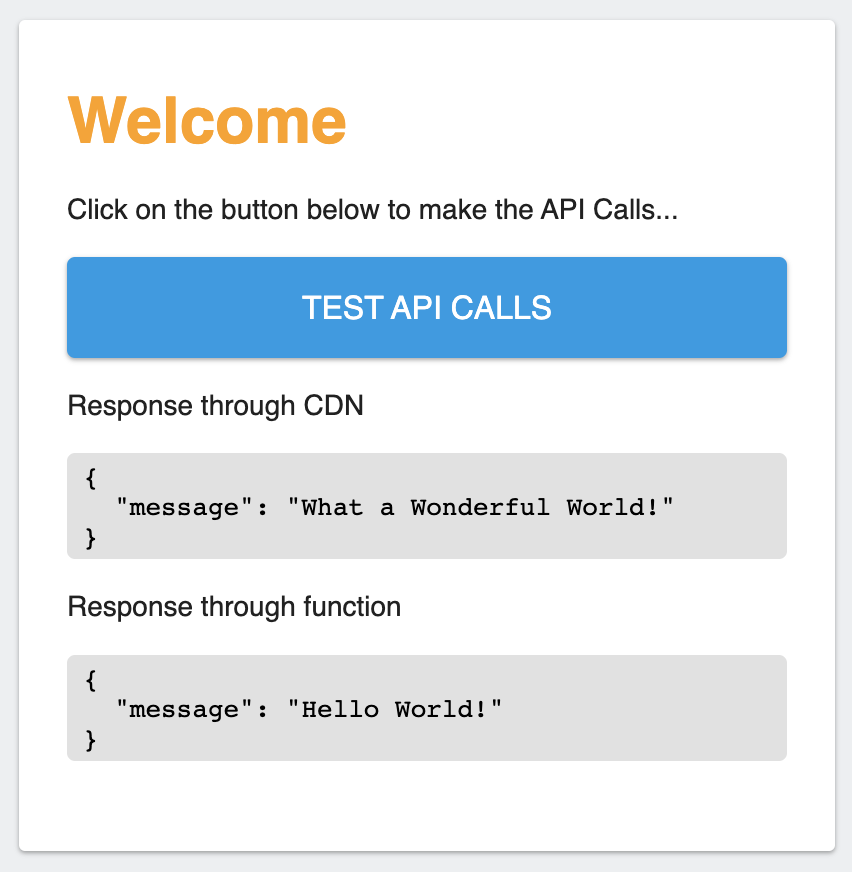
If you load this html file in your browser and click the button you should be able to see the configured messages. But the first output label is misleading, as we haven't configured any CDN yet. Let's change that in the next section.
Below is a screenshot of my Chrome dev console's network tab. As you can see both requests are taking similar times at this point

Connecting Firebase function & CDN
To connect one of the functions to the CDN, let's head over to the "firebase.json" file at the root of the project, and make the below changes
// Modify the hosting attribute of your "firebase.json"
"hosting": {
  //...other hosting settings

  // Add the "rewrites" attribute within "hosting"
  "rewrites": [
    {
      "source": "/api/wonderful", // Your api route
      "function": "wonderfulWorld", // Your function name
      "region": "us-central1" // The region where the function is deployed
    }
  ]
}
If you want to use Google Cloud Run instead of firebase cloud functions, you can connect the two using the below rewrite
"hosting": {
  "rewrites": [
    {
      "source": "/api/wonderful",
      "run": {
        "serviceId": "<cloud_run_service_id>",
        "region": "us-central1" // The region where cloud run is deployed
      }
    }
  ]
}
Next, head over to the index.html file and replace the "wonderfulWorld" function URL with the below URL. Replace <project_id> with your actual project id.
const promises = [
  fetch(
    'https://us-central1-<project_id>.cloudfunctions.net/helloWorld'
  ),
  fetch('https://<project_id>.web.app/api/wonderful'),
];
After making this change we need to deploy our changes to firebase hosting. We can simply execute the "firebase deploy" or "firebase deploy --only hosting" command to do it.
Now, if we reload our local index.html file, or, head over to the URL https://<project_id>.web.app and click on the button a couple of times, we should see results similar to as shown below.

Do note that the response size for the wonderful API call has increased from the earlier value of 13 Bytes. Also, as you can see, the first calls for both functions take significantly more time which is because of the cold start of the cloud function. Afterwards, the direct function call is consistently faster compared to the wonderful call routed through the CDN. This is because we've added one extra step to the trip and haven't added any cache yet.
You can click on these calls to see their details (specifically the Response headers)
The helloWorld call
The wonderful API call
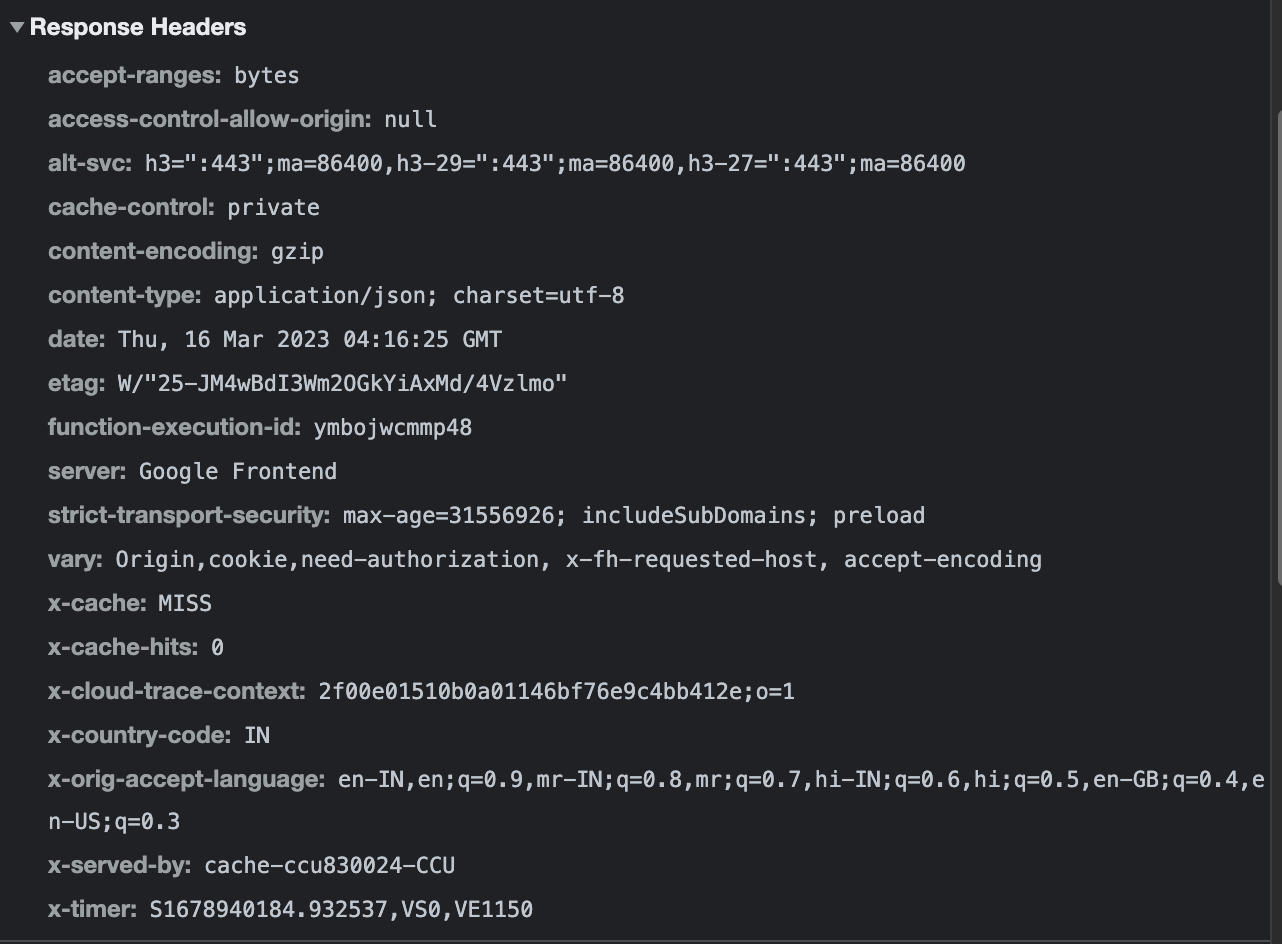
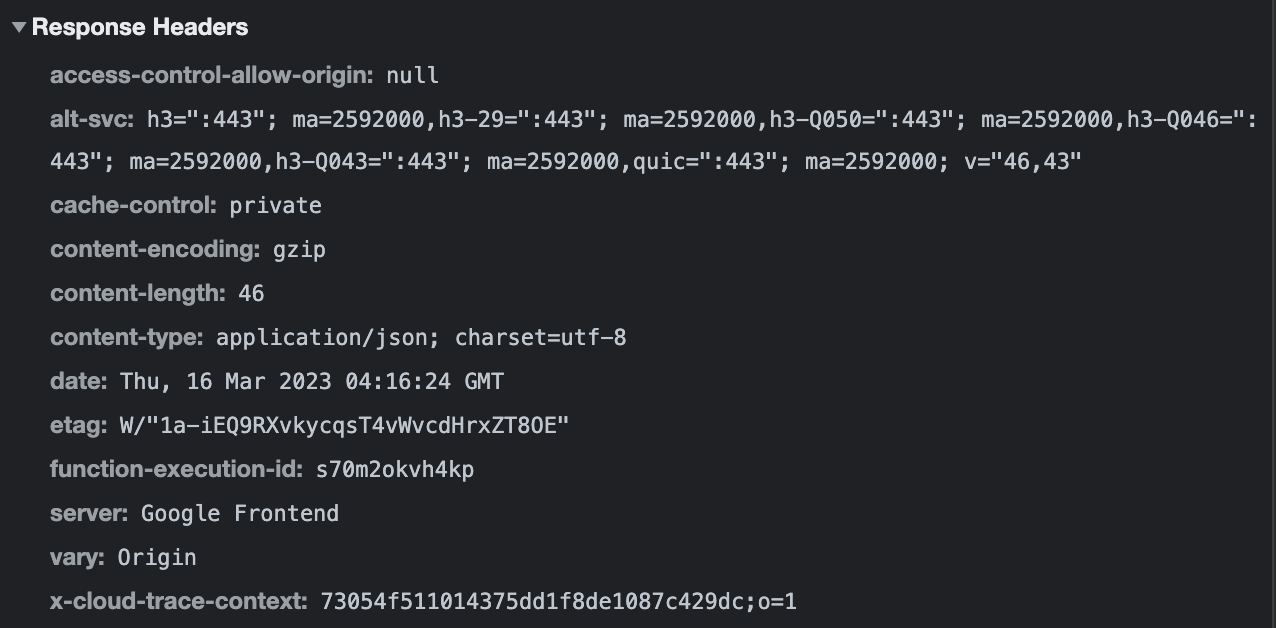
As you can see, there are many extra headers present in this call compared to the previous one. Some of the interesting headers we can notice
x-served-by: it mentions a cache (of course it is empty at this point)vary: This contains more header names as compared to the direct function callx-cache: With valueMISS, which is correct because there is nothing in the cache so it missed serving from the cachex-cache-hits: With value0. If it serves from the cache then this value would be a positive integercache-control: With a valueprivatefor both calls. This is the header we'll be modifying for enabling cache.privatemeans that the data is private and can only be stored in a private cache, say your browser.
Configuring cache-control header
Head over to the index.js file within the functions folder, and add the following line to the two functions just before the "res.send" line.
res.setHeader('cache-control', 'public, max-age=30, s-maxage=90');
Deploy your functions changes by executing "firebase deploy --only functions".
What we're doing here is:
- Setting the
cache-controlheader topublic. This allows the CDN to cache the data - Setting
max-ageto30. This means that the browser can store this response, and it will remain fresh and valid for 30 seconds from the time it was generated. - Setting
s-maxageto90. This directive is similar to the max-age directive but applies only to the shared caches (the CDNs and proxies in between the origin and the client). So we're storing the response for a longer duration at the CDN. This may or may not be the case always and it can be removed if not needed.
So essentially what we've done is allow caching at the client as well as the intermediate steps in the journey. And also configured the time for which we can go on without asking the origin for fresh data.
Below is what I see in the network tab of my browser's dev console after making some requests

As you can see, the first requests for both functions are taking their usual timings. But the second requests which were made after ~10 seconds take only 4ms. And we also see that it has been served from the disk cache. That means the responses were cached locally and no new network request was made.
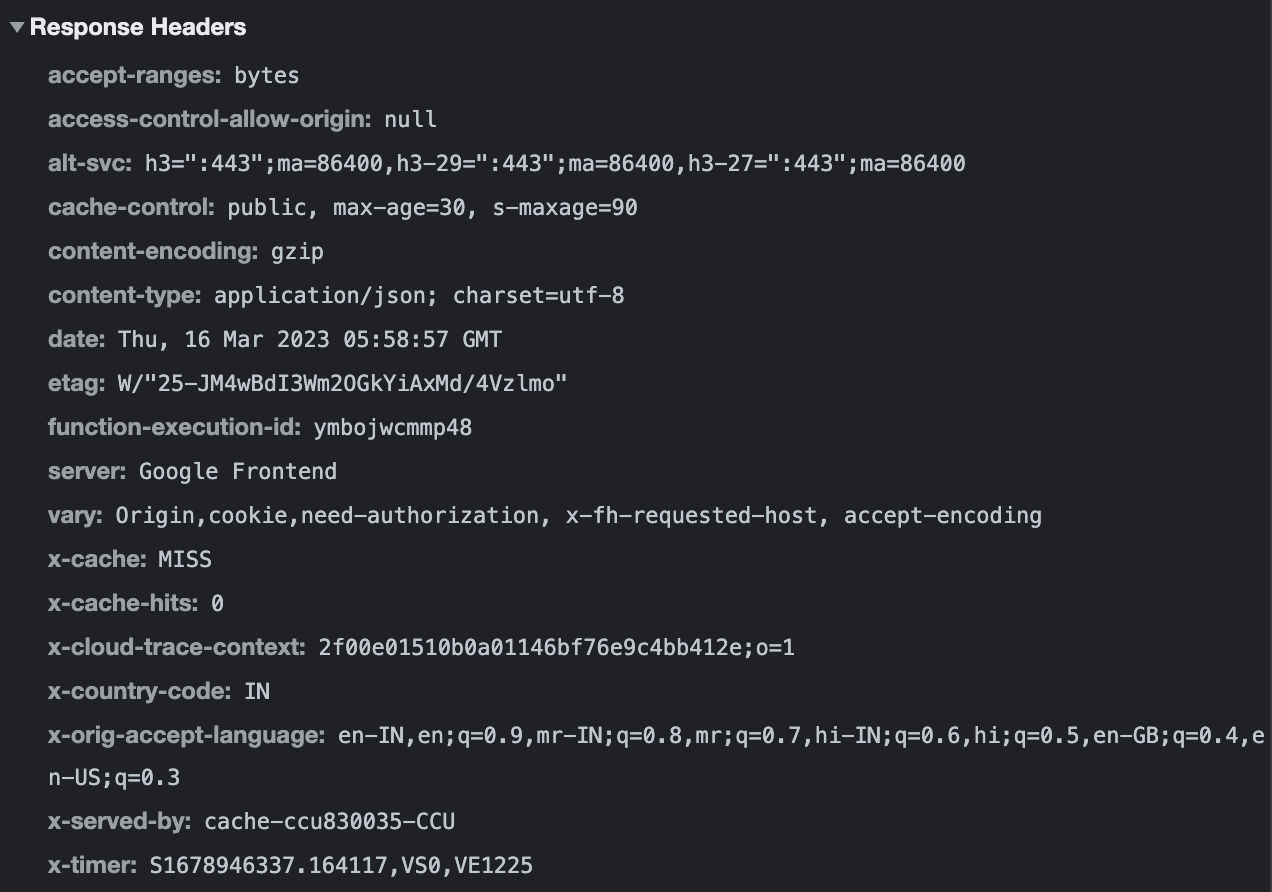
Below are the response headers for the first two wonderful calls. Notice the x-cache header with a value of MISS. If you check your dev console, you'll also see that for the second call, no request headers are present. This is because no network request was made for it.
What is interesting is the third batch of requests. The helloWorld function call takes its usual ~400-500ms range (because a fresh request was made to the firebase function) but the wonderful call takes only 69ms. Further clicking on the wonderful request gives me the below details
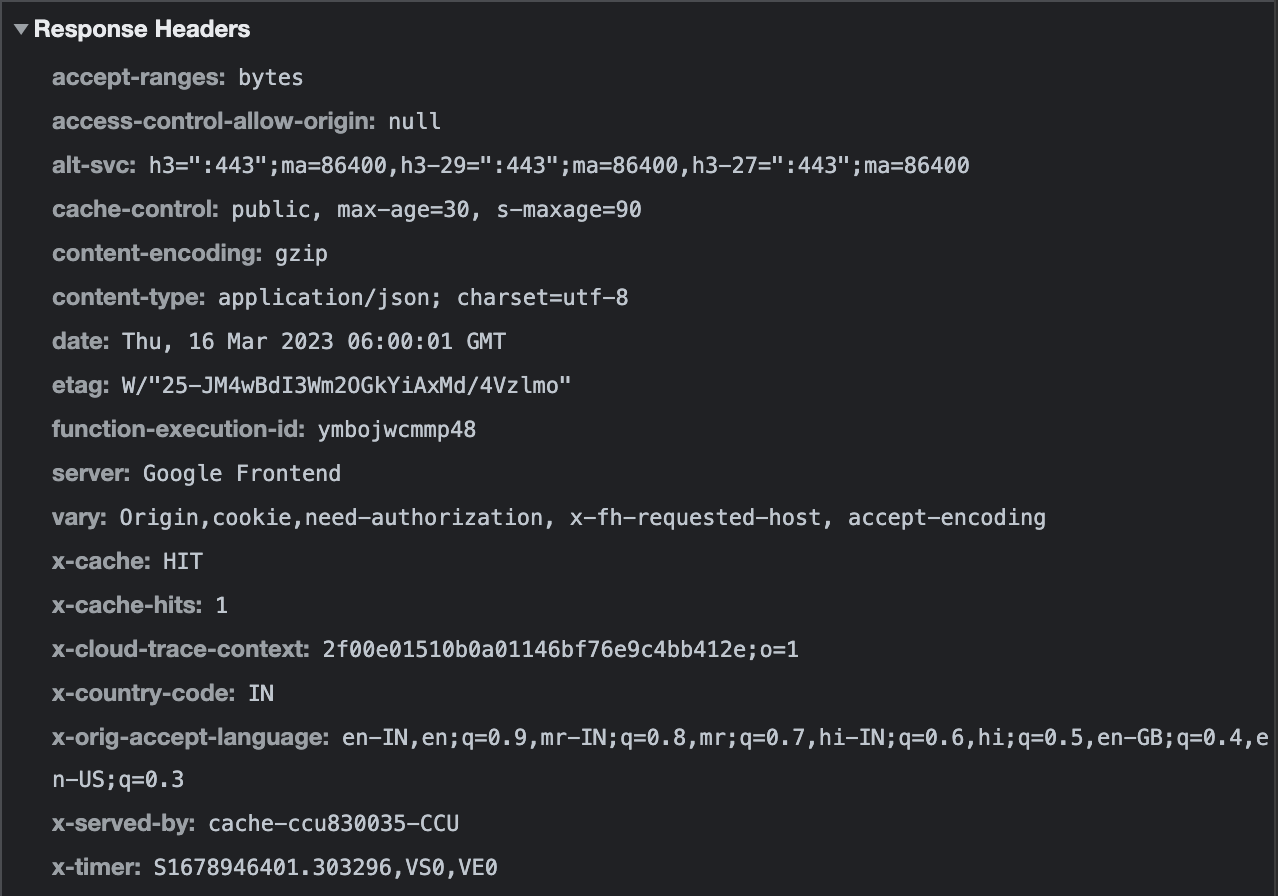
We see that the x-cache has a value of HIT now and x-cache-hits is 1. This request was served from the cache, and our firebase function was not called. We can also verify this by checking the function logs in the Google Cloud Console.
What we've achieved here is:
- significantly lesser response time
- a lesser number of firebase functions invocations
- potentially lesser number of database calls (generally you would get the data from a database and not just return a static value which we're doing currently)
When and where to cache
When deciding to use a cache, the first question you should ask yourself is, "When and where (locally, CDN etc.) to do it"? There is no silver bullet here, and every case needs to be analyzed based on its pros and cons. A wrong decision may return stale and irrelevant data to your users.
In general, if the same data is needed for a lot of users then it is a good candidate to be cached at the CDN. For example, weather data, some meta information, a blog post etc. The time for which to store the data depends on the case at hand.
User profile data doesn't change that frequently, but it is useful for only one person so it can be stored locally (using private for cache-control) for a short duration. And so on.
Things to Keep in Mind with Firebase CDN
If you're convinced about using a cache for your API, below are some things that you should keep in mind
- In general, a firebase function can be configured for up to 9 minutes of request timeout. But when you connect your functions to firebase hosting, the request timeout value for these functions gets capped at 60 seconds.
- Only GET & HEAD requests can be cached at the CDN
- For Firebase the Cache keys' generation depends on the following factors. If any of these factors are different a different key gets generated and hence cache hit or miss happens accordingly
- The hostname (
<project_id>.web.appin the example project of this article) - The path (
/api/wonderful) - The query string (we didn't use any query string)
- The content of the request headers specified in the
Varyheader (by default Firebase CDN uses Origin, cookie, need-authorization, x-fh-requested-host and accept-encoding as can be seen from the screenshots above). Only the __session cookie (if present) is made part of the cache key.
- The hostname (
- Sometimes you need to remove the API data cached at the CDN. This can be done by redeploying to firebase hosting (using
firebase deploy --only hosting) - Instead of setting the
cache-controlheader individually within each function, we can add it tofirebase.jsonitself. Though for more control over individual requests caching, adding the header within the function is better.
Limitations
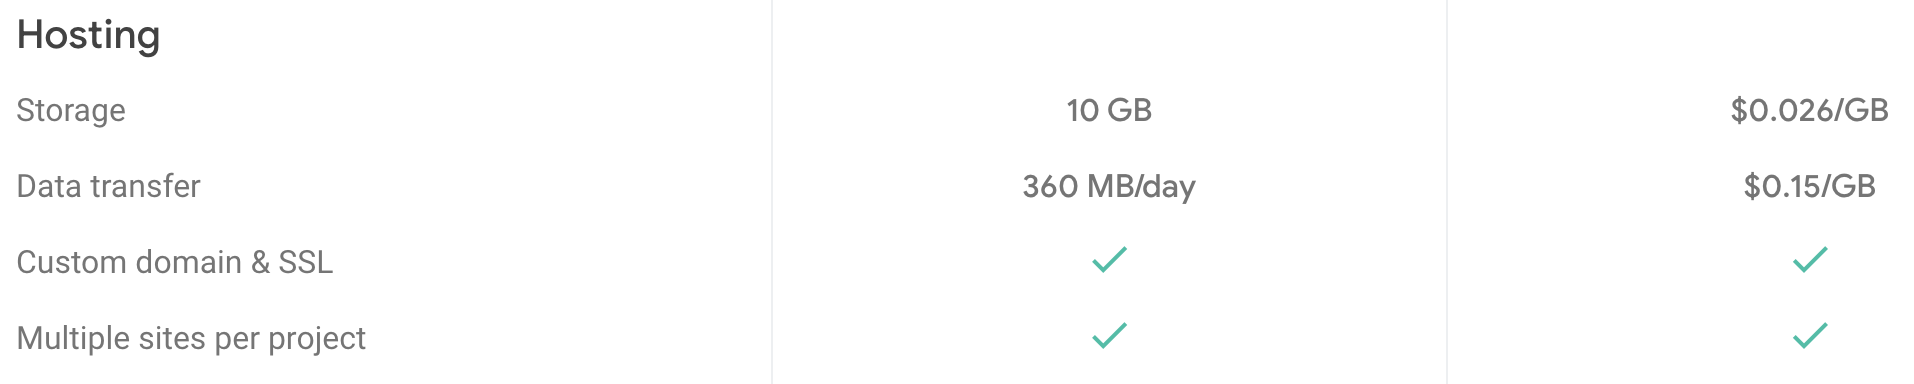
While Firebase CDN is good for general use cases, if you want more from your CDN then you should look for a proper CDN service like Cloudflare, Google and so on. Firebase CDN doesn't provide DDoS protection, Rate Limiting etc out of the box. Also, data transfer out of hosting is free till 360MB/day, beyond that you get charged $0.15/GB.
Real Live Caching Example
For one of my recent projects, I applied the Firebase CDN cache for one of the endpoints. The project is a daily puzzle game based on React SPA, called GoldRoad where every player gets the same puzzle which gets refreshed at midnight GMT.
This is how I've configured the cache. The request gets stored at the CDN for the maximum time possible (including a buffer of 5 mins).
let cacheTime = 300; // 5 mins local cache time
let serverCacheTime;

// 1. game is the current puzzle object
// 2. nextGameAt is the dateTime when the new puzzle will be available
const nextGameAtInMs = new Date(game.nextGameAt).getTime();

// Server Cache time, minus the local cache time (some buffer)
serverCacheTime = parseInt((nextGameAtInMs - Date.now()) / 1000) - cacheTime;
if (serverCacheTime < 0) {
  serverCacheTime = 0;
}

if (serverCacheTime < cacheTime) {
  cacheTime = serverCacheTime;
}

response.set('Cache-Control', `public, max-age=${cacheTime}, s-maxage=${serverCacheTime}`
);
Many other directives can be used in the cache-control header. You should read more about these directives for advanced use cases.
Conclusion
In conclusion, using the firebase CDN can greatly enhance your API performance by caching frequently accessed data closer to the end user, thus reducing latency and improving response times. It also reduces firebase functions invocations, as well as database calls, thus reducing cost.
But before embarking on this journey, do analyze the pros and cons of adding a cache for your use case.
Hope you enjoyed reading the article. If you found any mistake in the article please let me know in the comments.
Cheers :-)
Further reading
We've only looked at a couple of directives for the cache-control header, for a complete overview please visit the MDN site
For understanding caching in detail you can visit the following links