
How to create a simple context menu action on Macbooks

Introduction
The backstory for this rabbit hole is not that deep. When you start your writing journey soon you get to know about some sort of text length restrictions. Sometimes it is for SEO because you want more eyeballs on your articles, organically. Or, maybe you're writing your Ads or Website copy. Or you're just the sort of person who needs to know the exact characters count at all times.
Whatever the case may be, this restriction mindset soon becomes a habit. You start selecting random texts and try to find out their length. Or, maybe not! This is just me, being my weird self.
Until now I used to copy-paste the text into my VS Code, which is always open by the way, and find out its length by selecting it. But I was looking for a better & omnipresent solution (at least on my laptop). And that is how I learnt about the Automator App. You must believe me when I say this, before yesterday I hadn't heard of Automator App, even though I've had a MacBook for quite some time.
The Automator App
As the name implies, it allows you to create automated workflows and actions etc for your MacBook. When you launch it, using either the Spotlight Search or from Launchpad -> Other -> Automator, you'll see something like the below (please note that my laptop is on macOS Monterey v12.6.2)
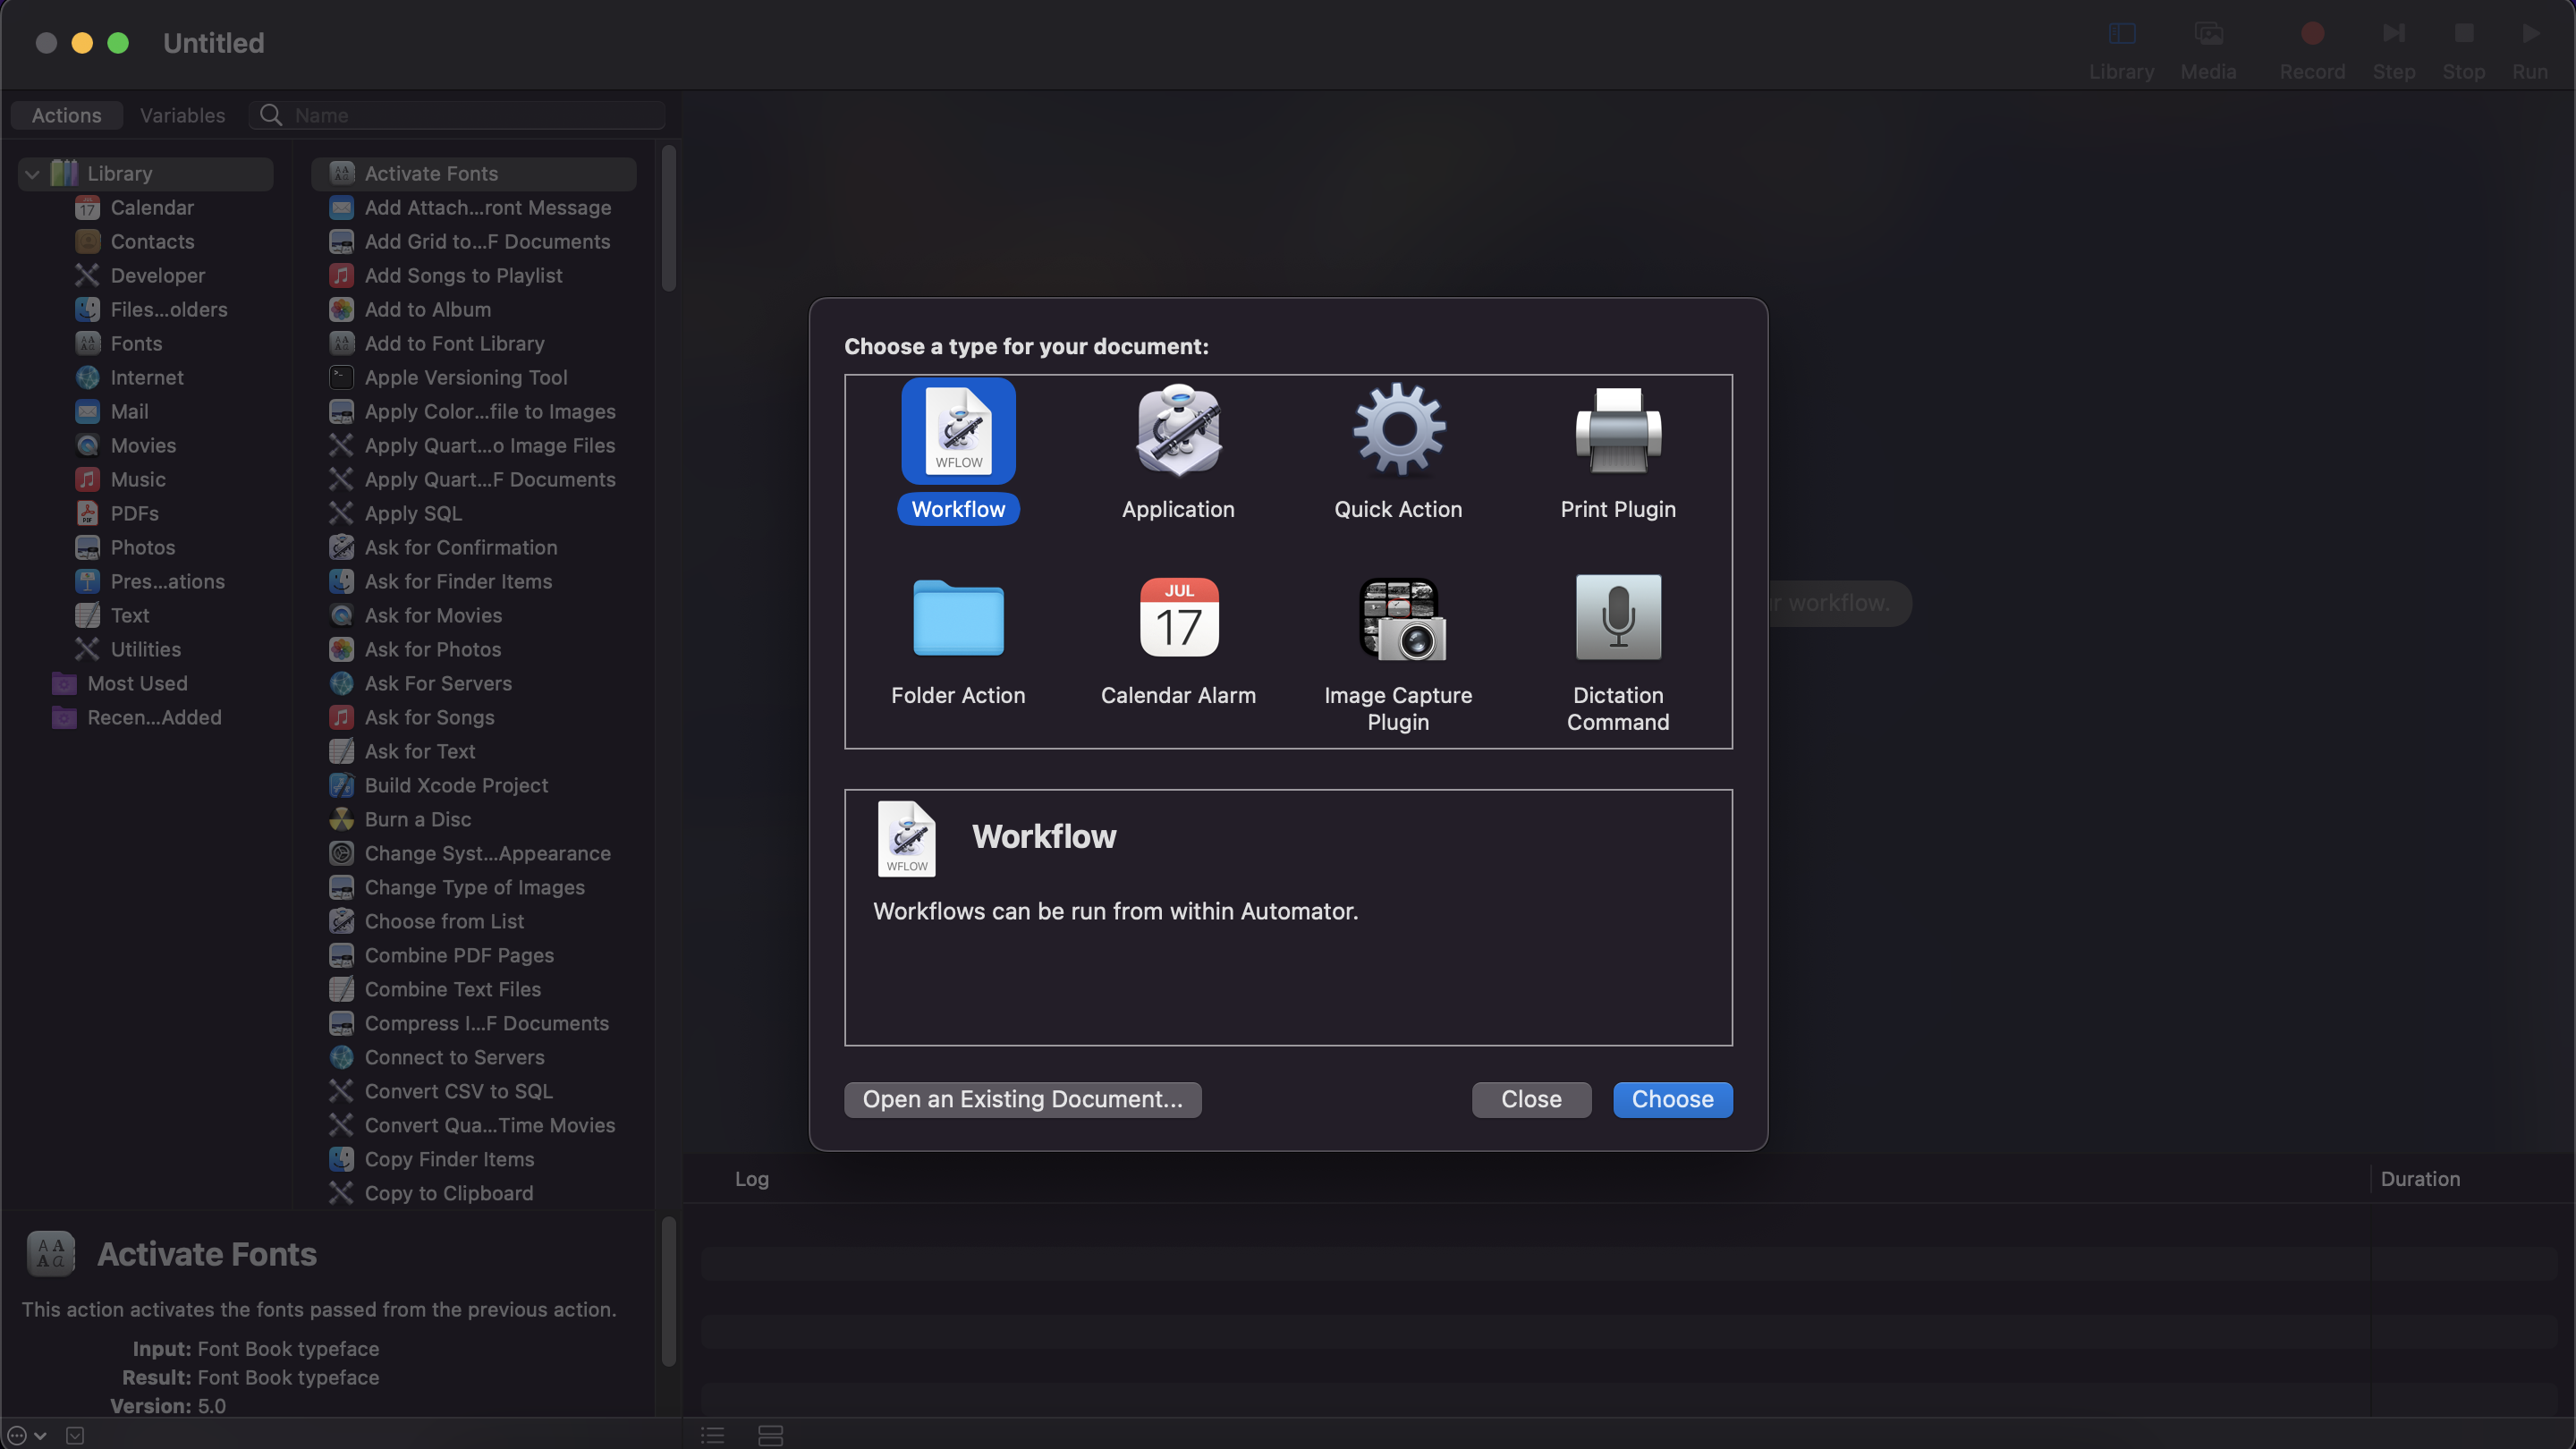
We can create a whole lot of things from here. For now, I've only explored the Quick Action type as that is sufficient for creating a context menu action.
Creating the Text Length Action
After selecting the Quick Action option you should get the below screen.
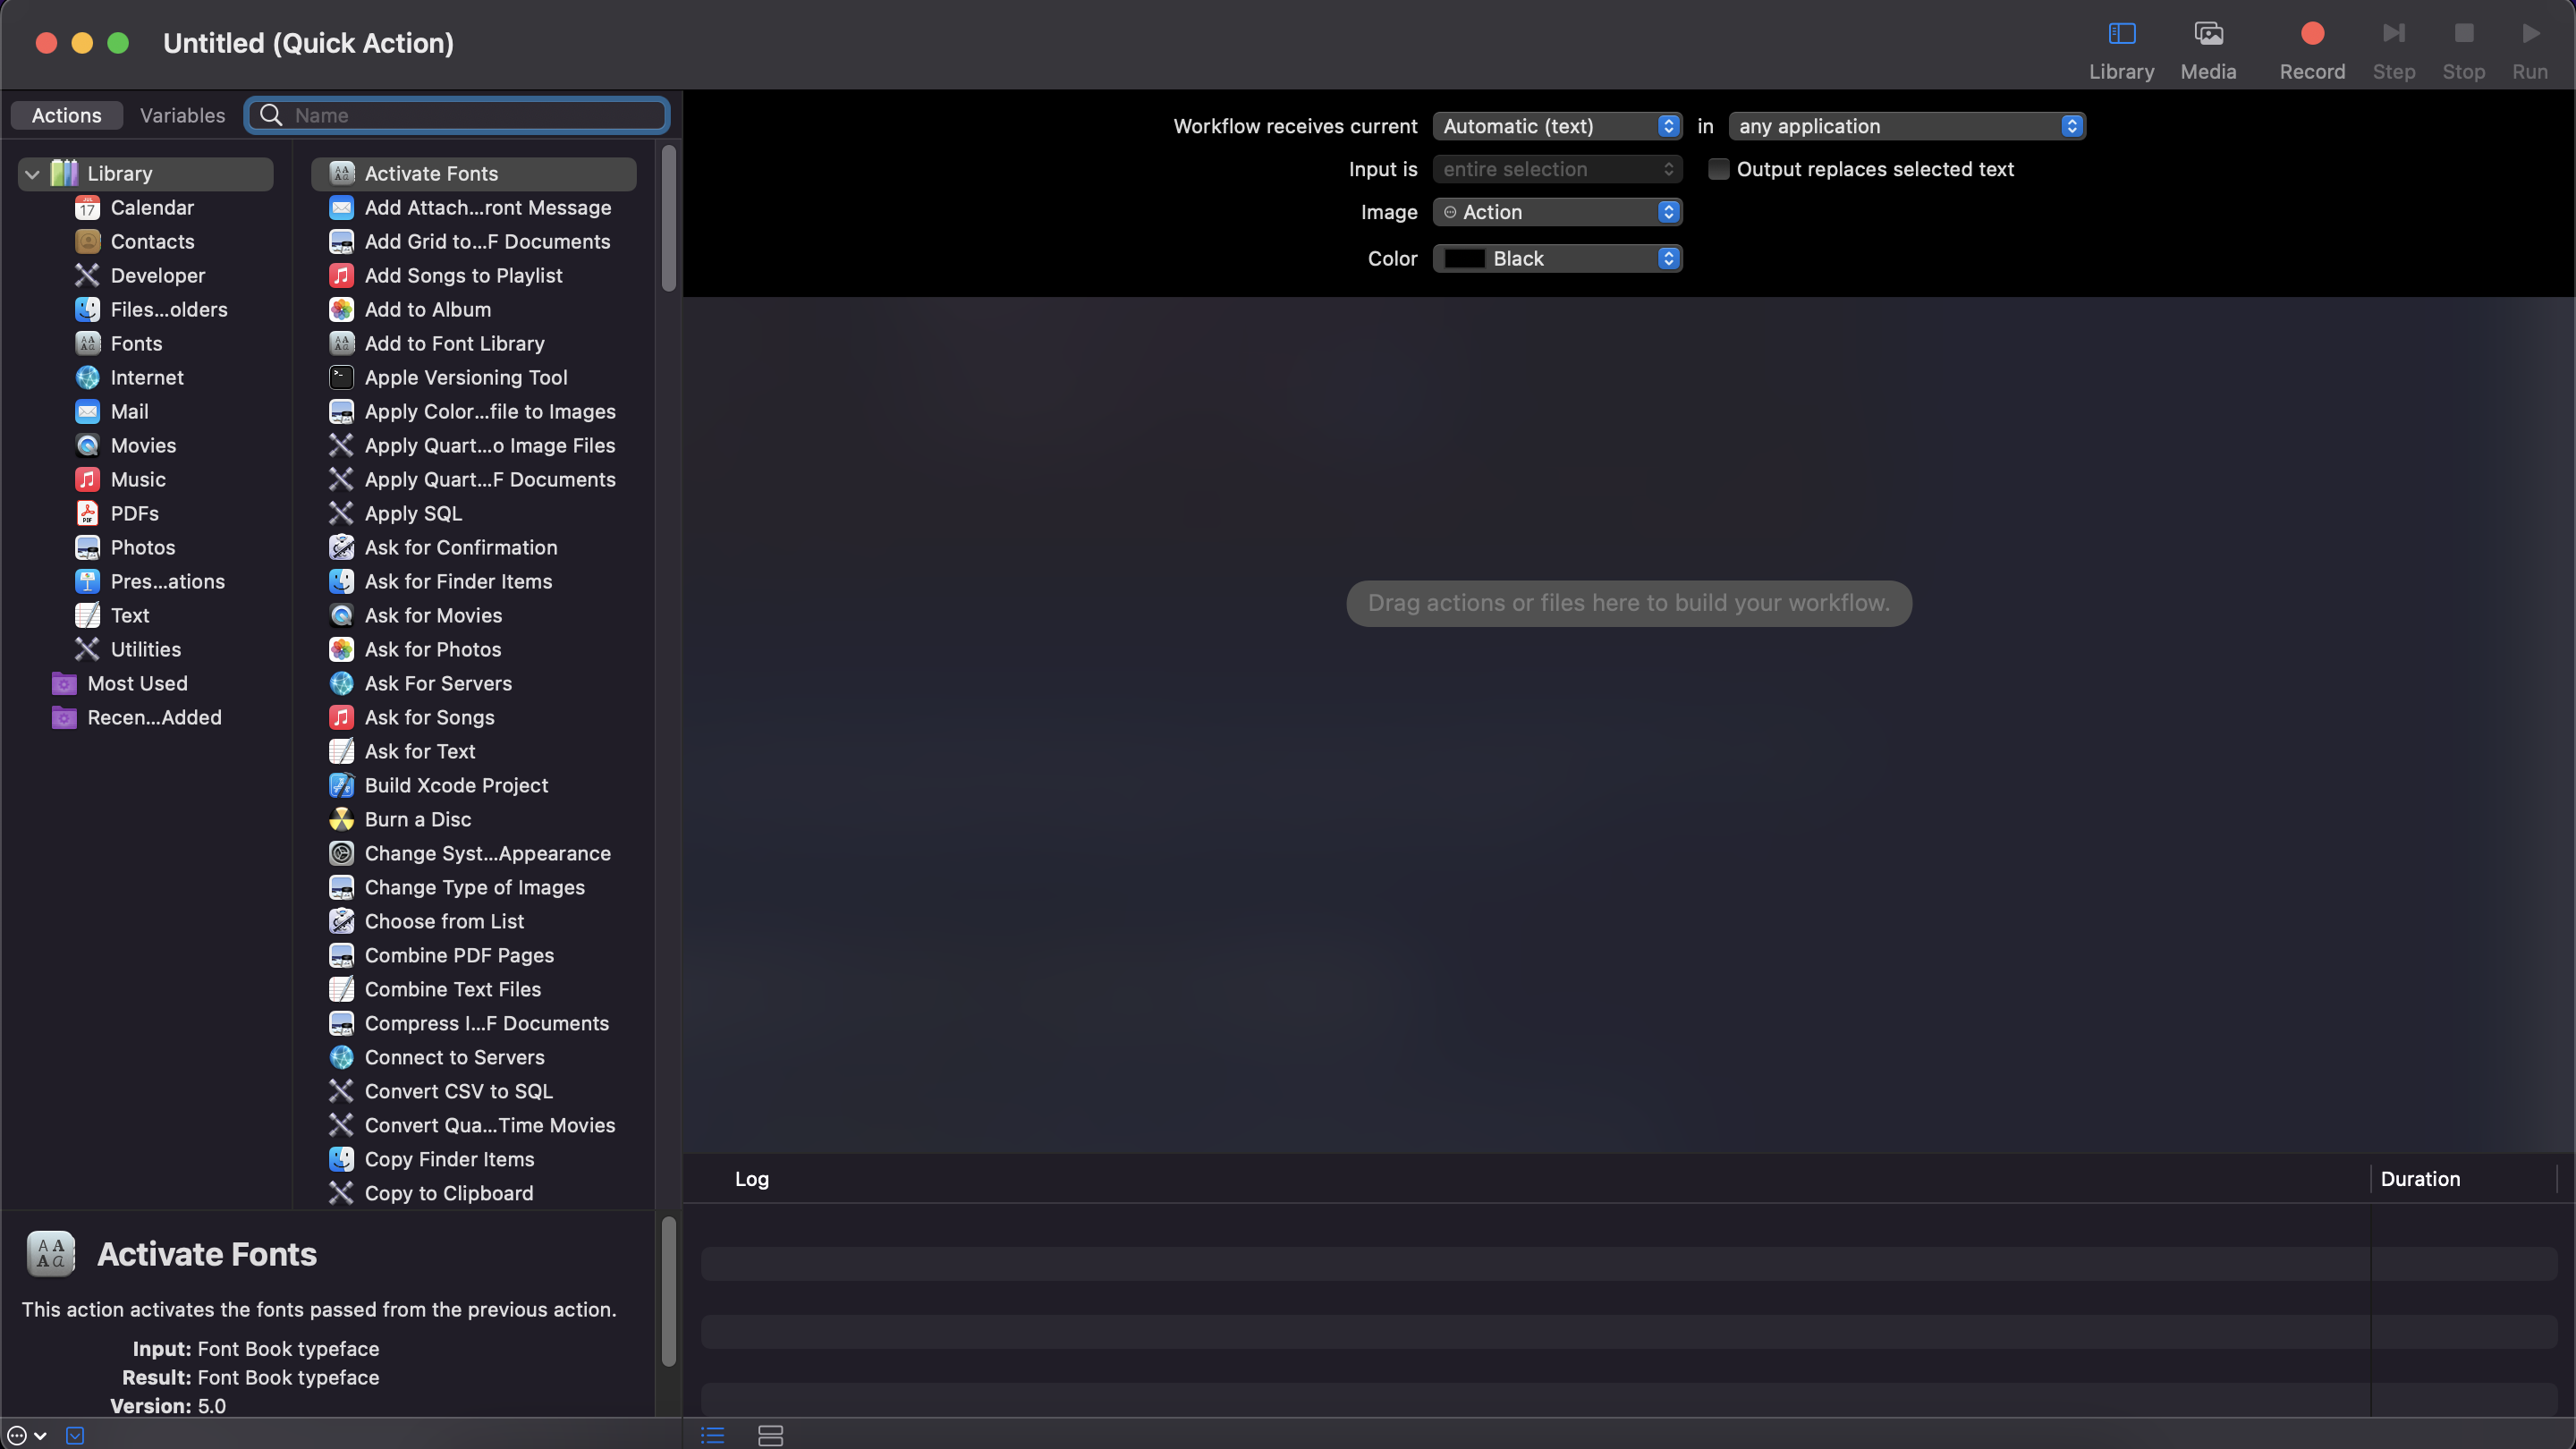
The leftmost panel is the list of categories for which actions are available. The second panel lists the available actions, and the rightmost panel is where you create the action workflow.
If you look at the top of the rightmost panel, it says "Workflow receives current" and "Automatic (Text)" is already selected from the dropdown. This is exactly what we need to create our current action. If you want to create a different action then you can look at other available choices.
Run Shell Script action
As our workflow is already receiving the text selection, now we somehow need to calculate its length. If you go through the available actions, you'll some familiar names like Run JavaScript & Run Shell Script (forgive me for not mentioning Run AppleScript as I didn't have the desire to explore AppleScript). You can also type in the search box above the second panel (the middle panel)
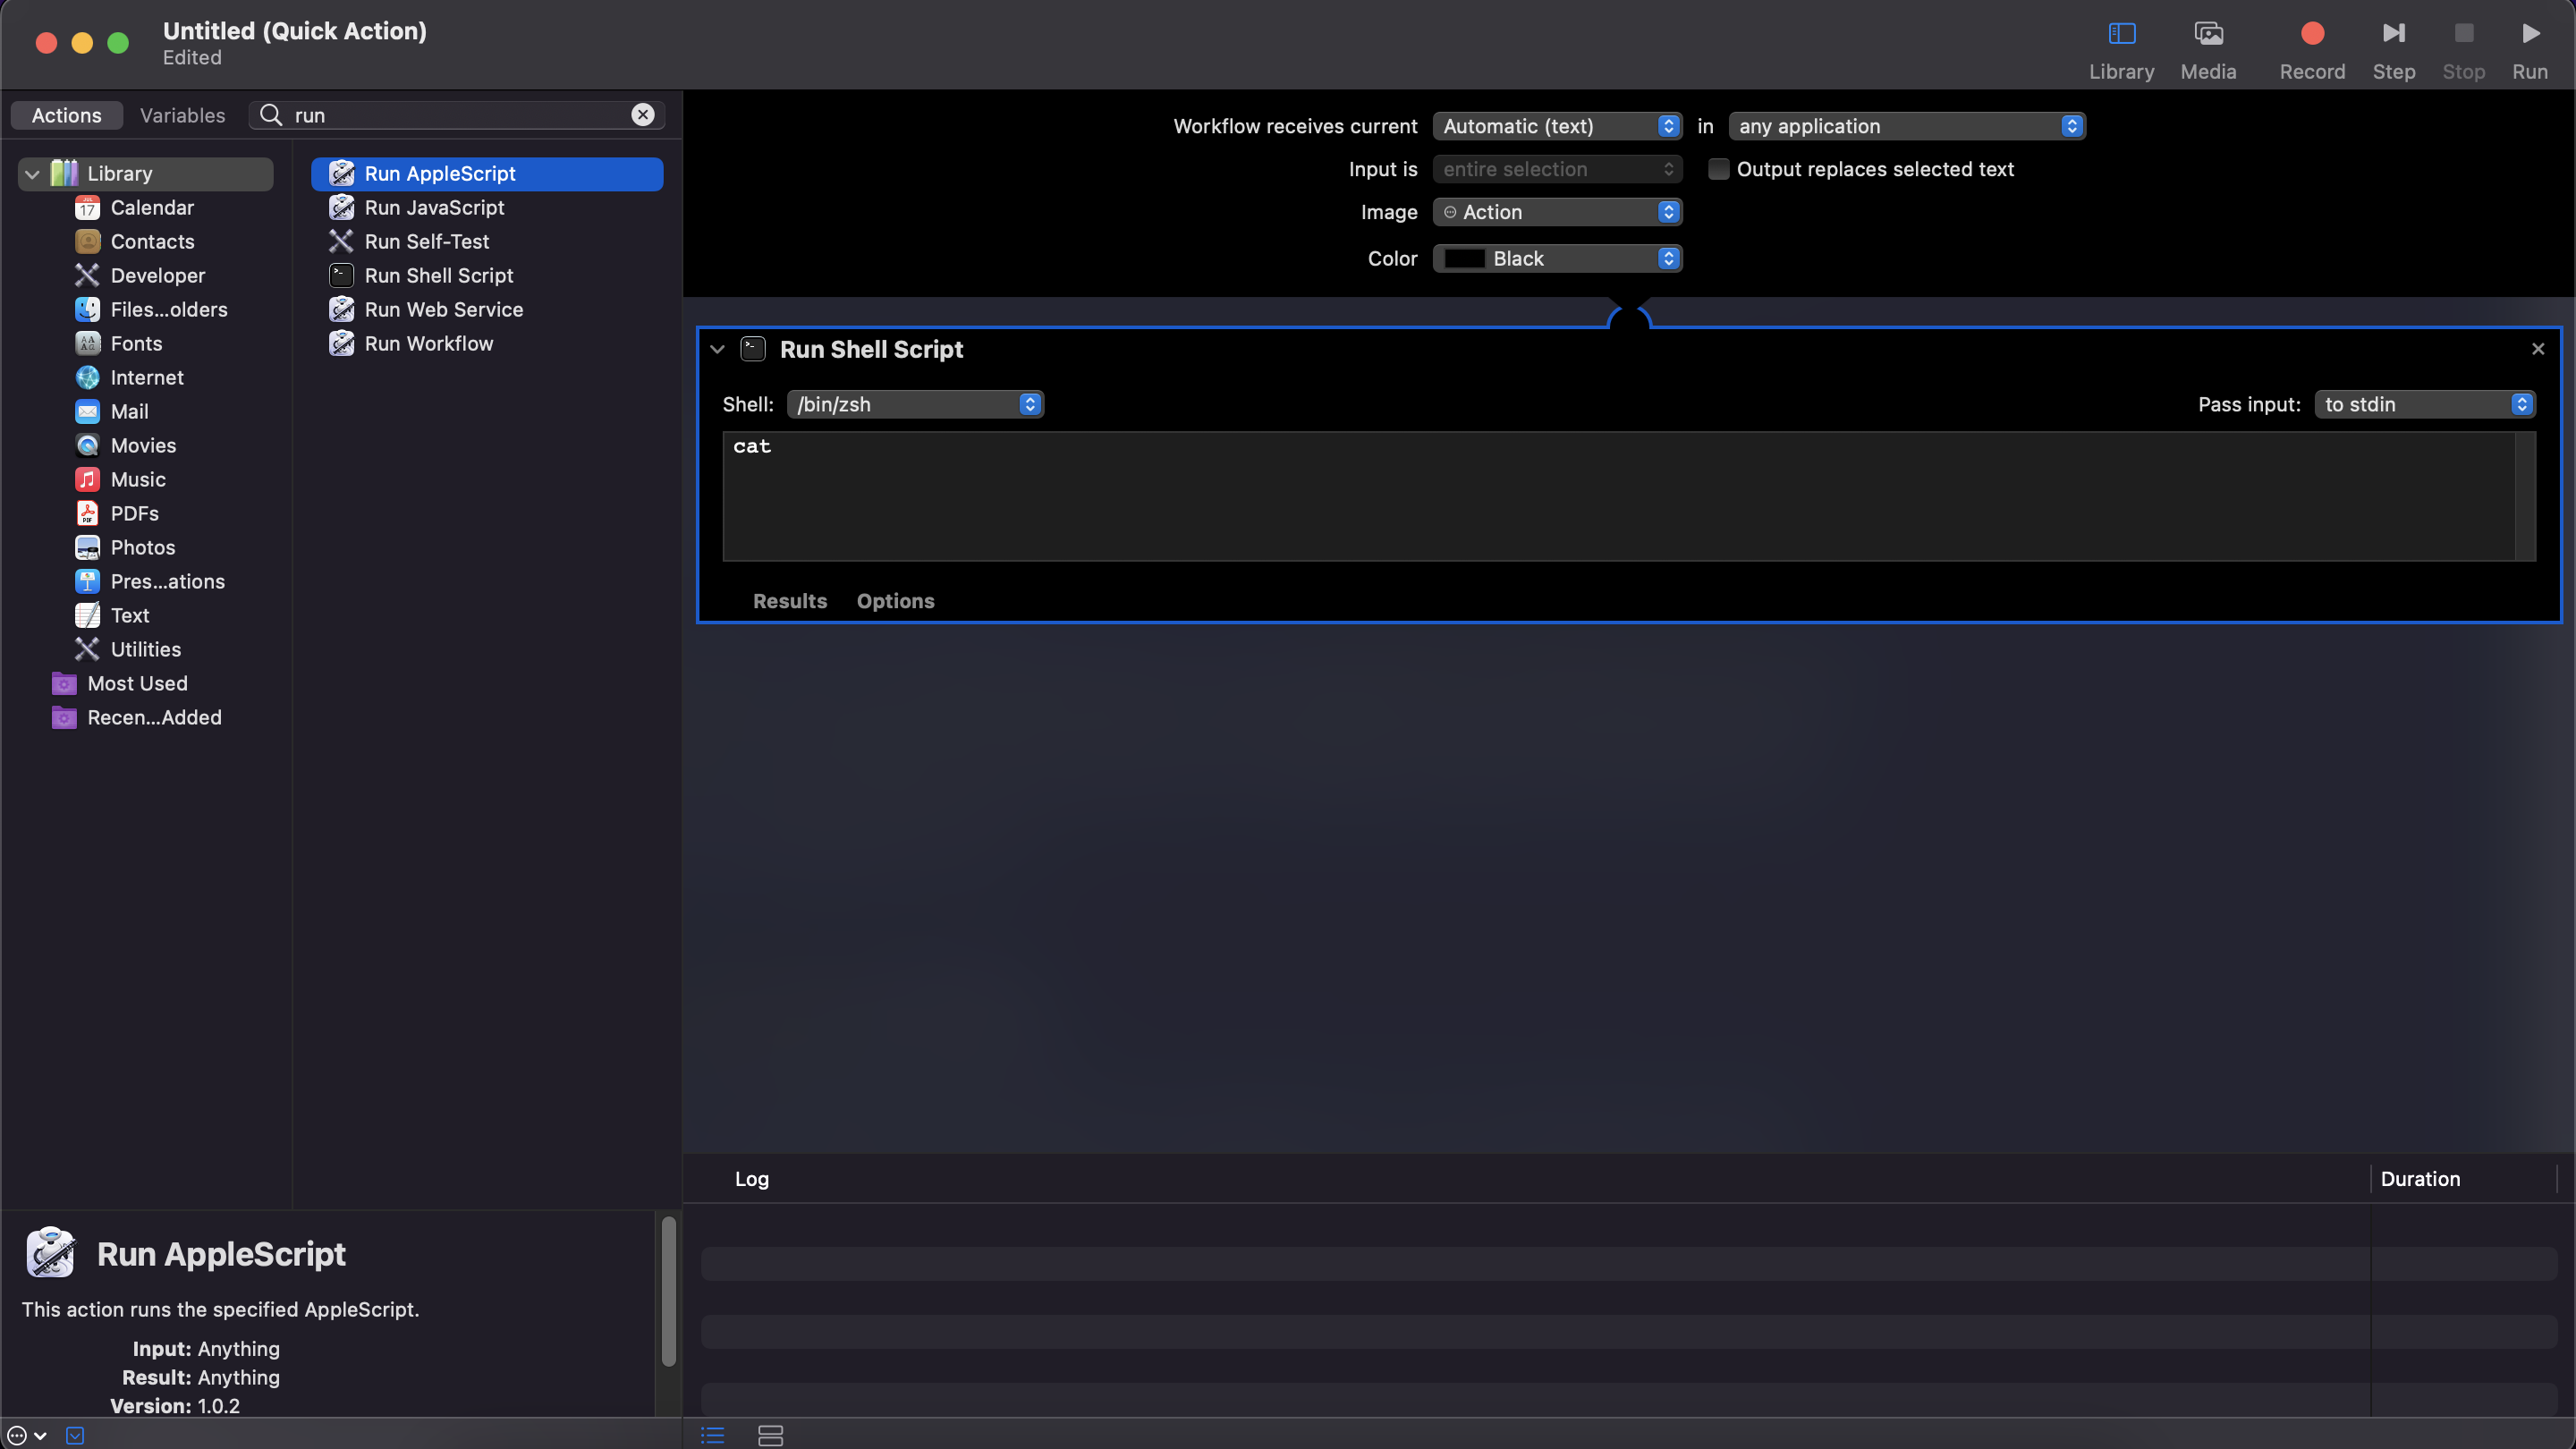
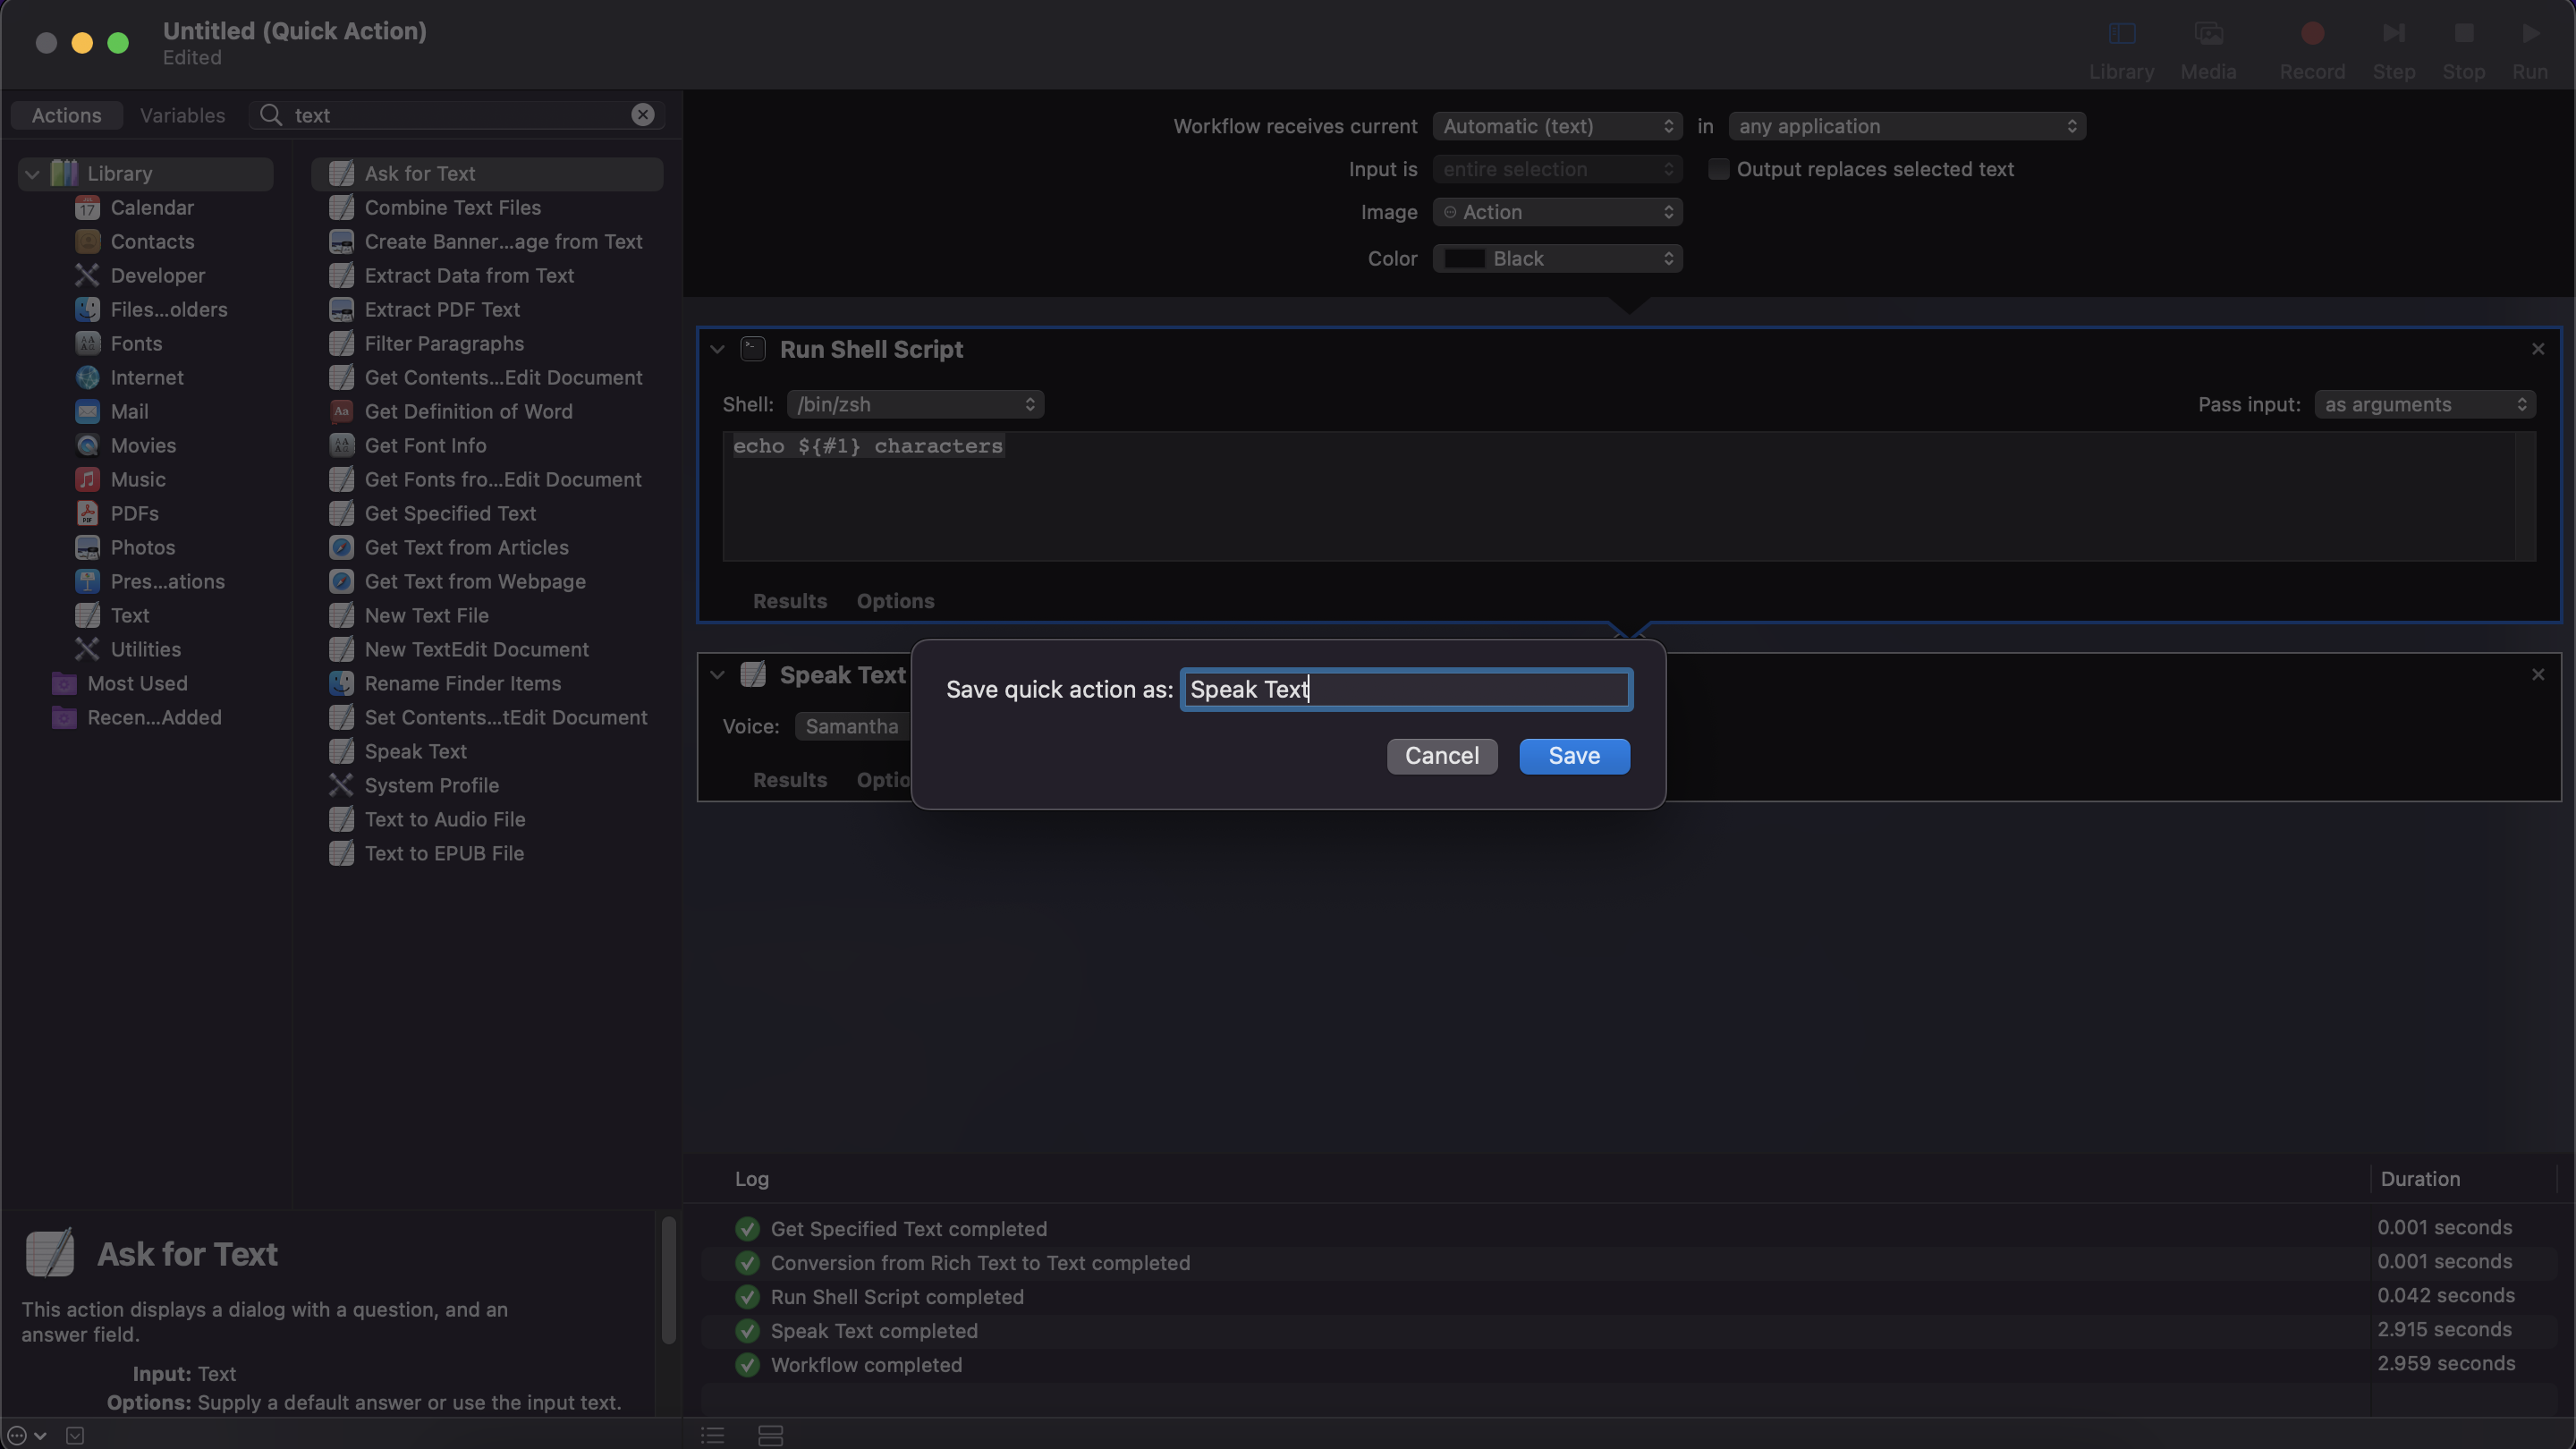
Drag and drop the Run Shell Script action to the right side panel. So this script is the second step of our workflow, the first being the automatic text selection input (notice the connection shown between these steps).
Now change the Pass Input option on the top right of the shell script to "as arguments" instead of the current "to stdin"

Now we're ready to work on the incoming arguments (provided by the previous step). Note that you can change the type of shell from the left top Shell option (mine is showing /bin/zsh). Our script can receive multiple input arguments in some other workflows, and that's why you see the for loop which comes up automatically. For text inputs, we will receive only one input argument. So we can change the script to echo ${#1} characters. Essentially we're taking the first argument and finding out its length using the # operator, and then adding the "characters" suffix.

And that is it. Our action needs only this much scripting.
Testing the action
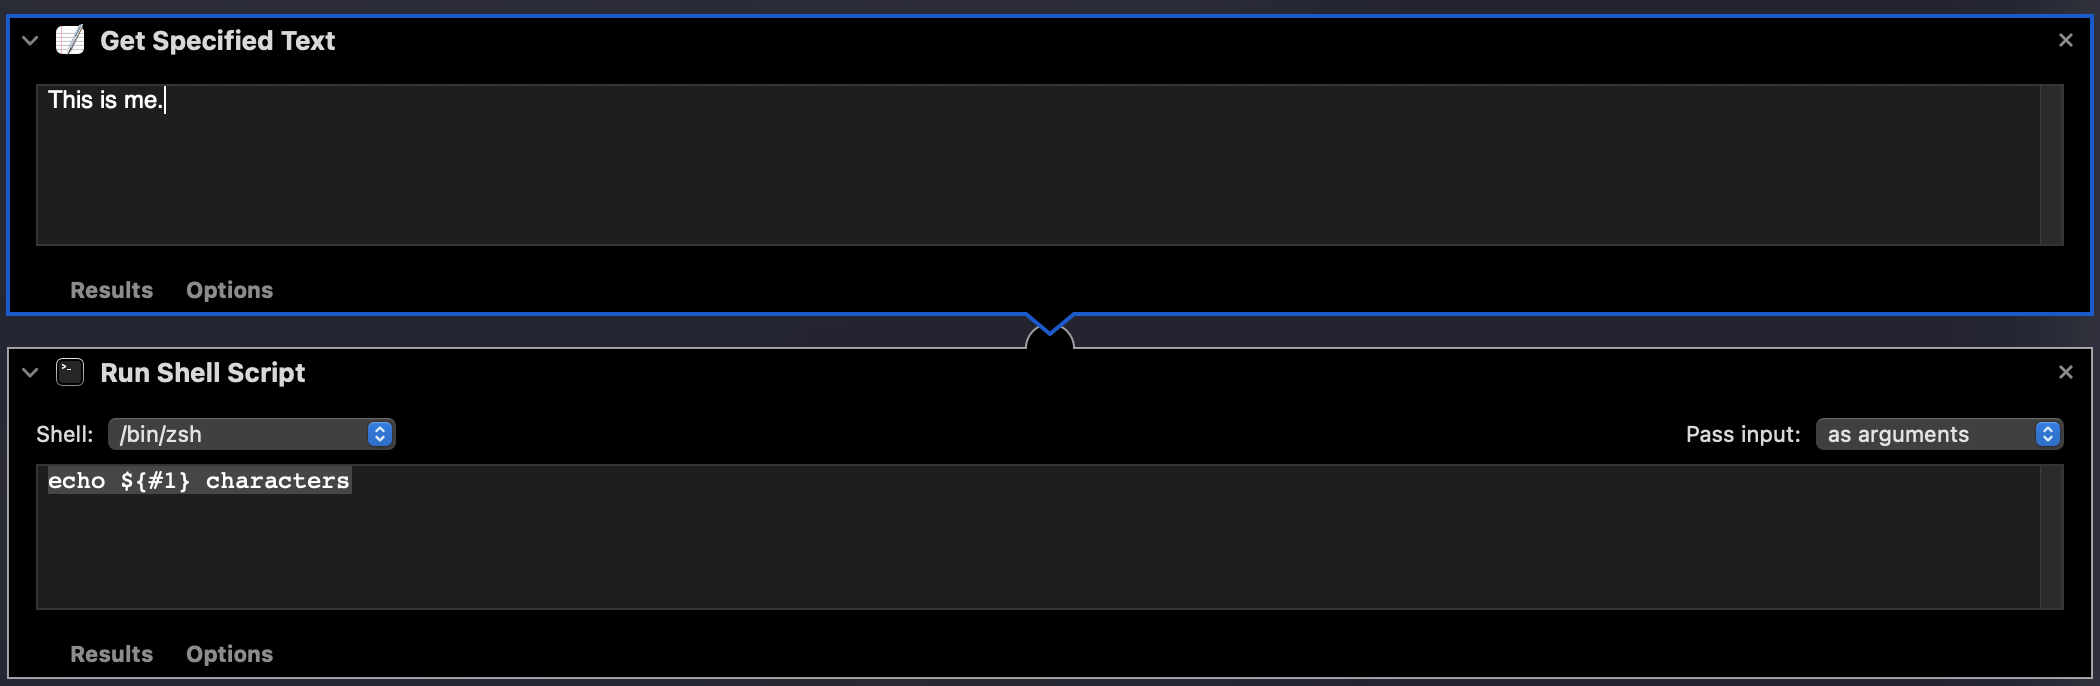
Before finalizing and saving our newly created action we need to test it first. To test it while we're still in the Automator we can make use of Get Specified Text action. Search for "text" in the search box, and drag the Get Specified Text action just above our shell script. Write something in the textarea (I've written "This is me.", how original).
We're ready to test our script now. Click on the run option from the top right part of the Automator, it shows that everything is a success in the logs at the bottom of the screen.
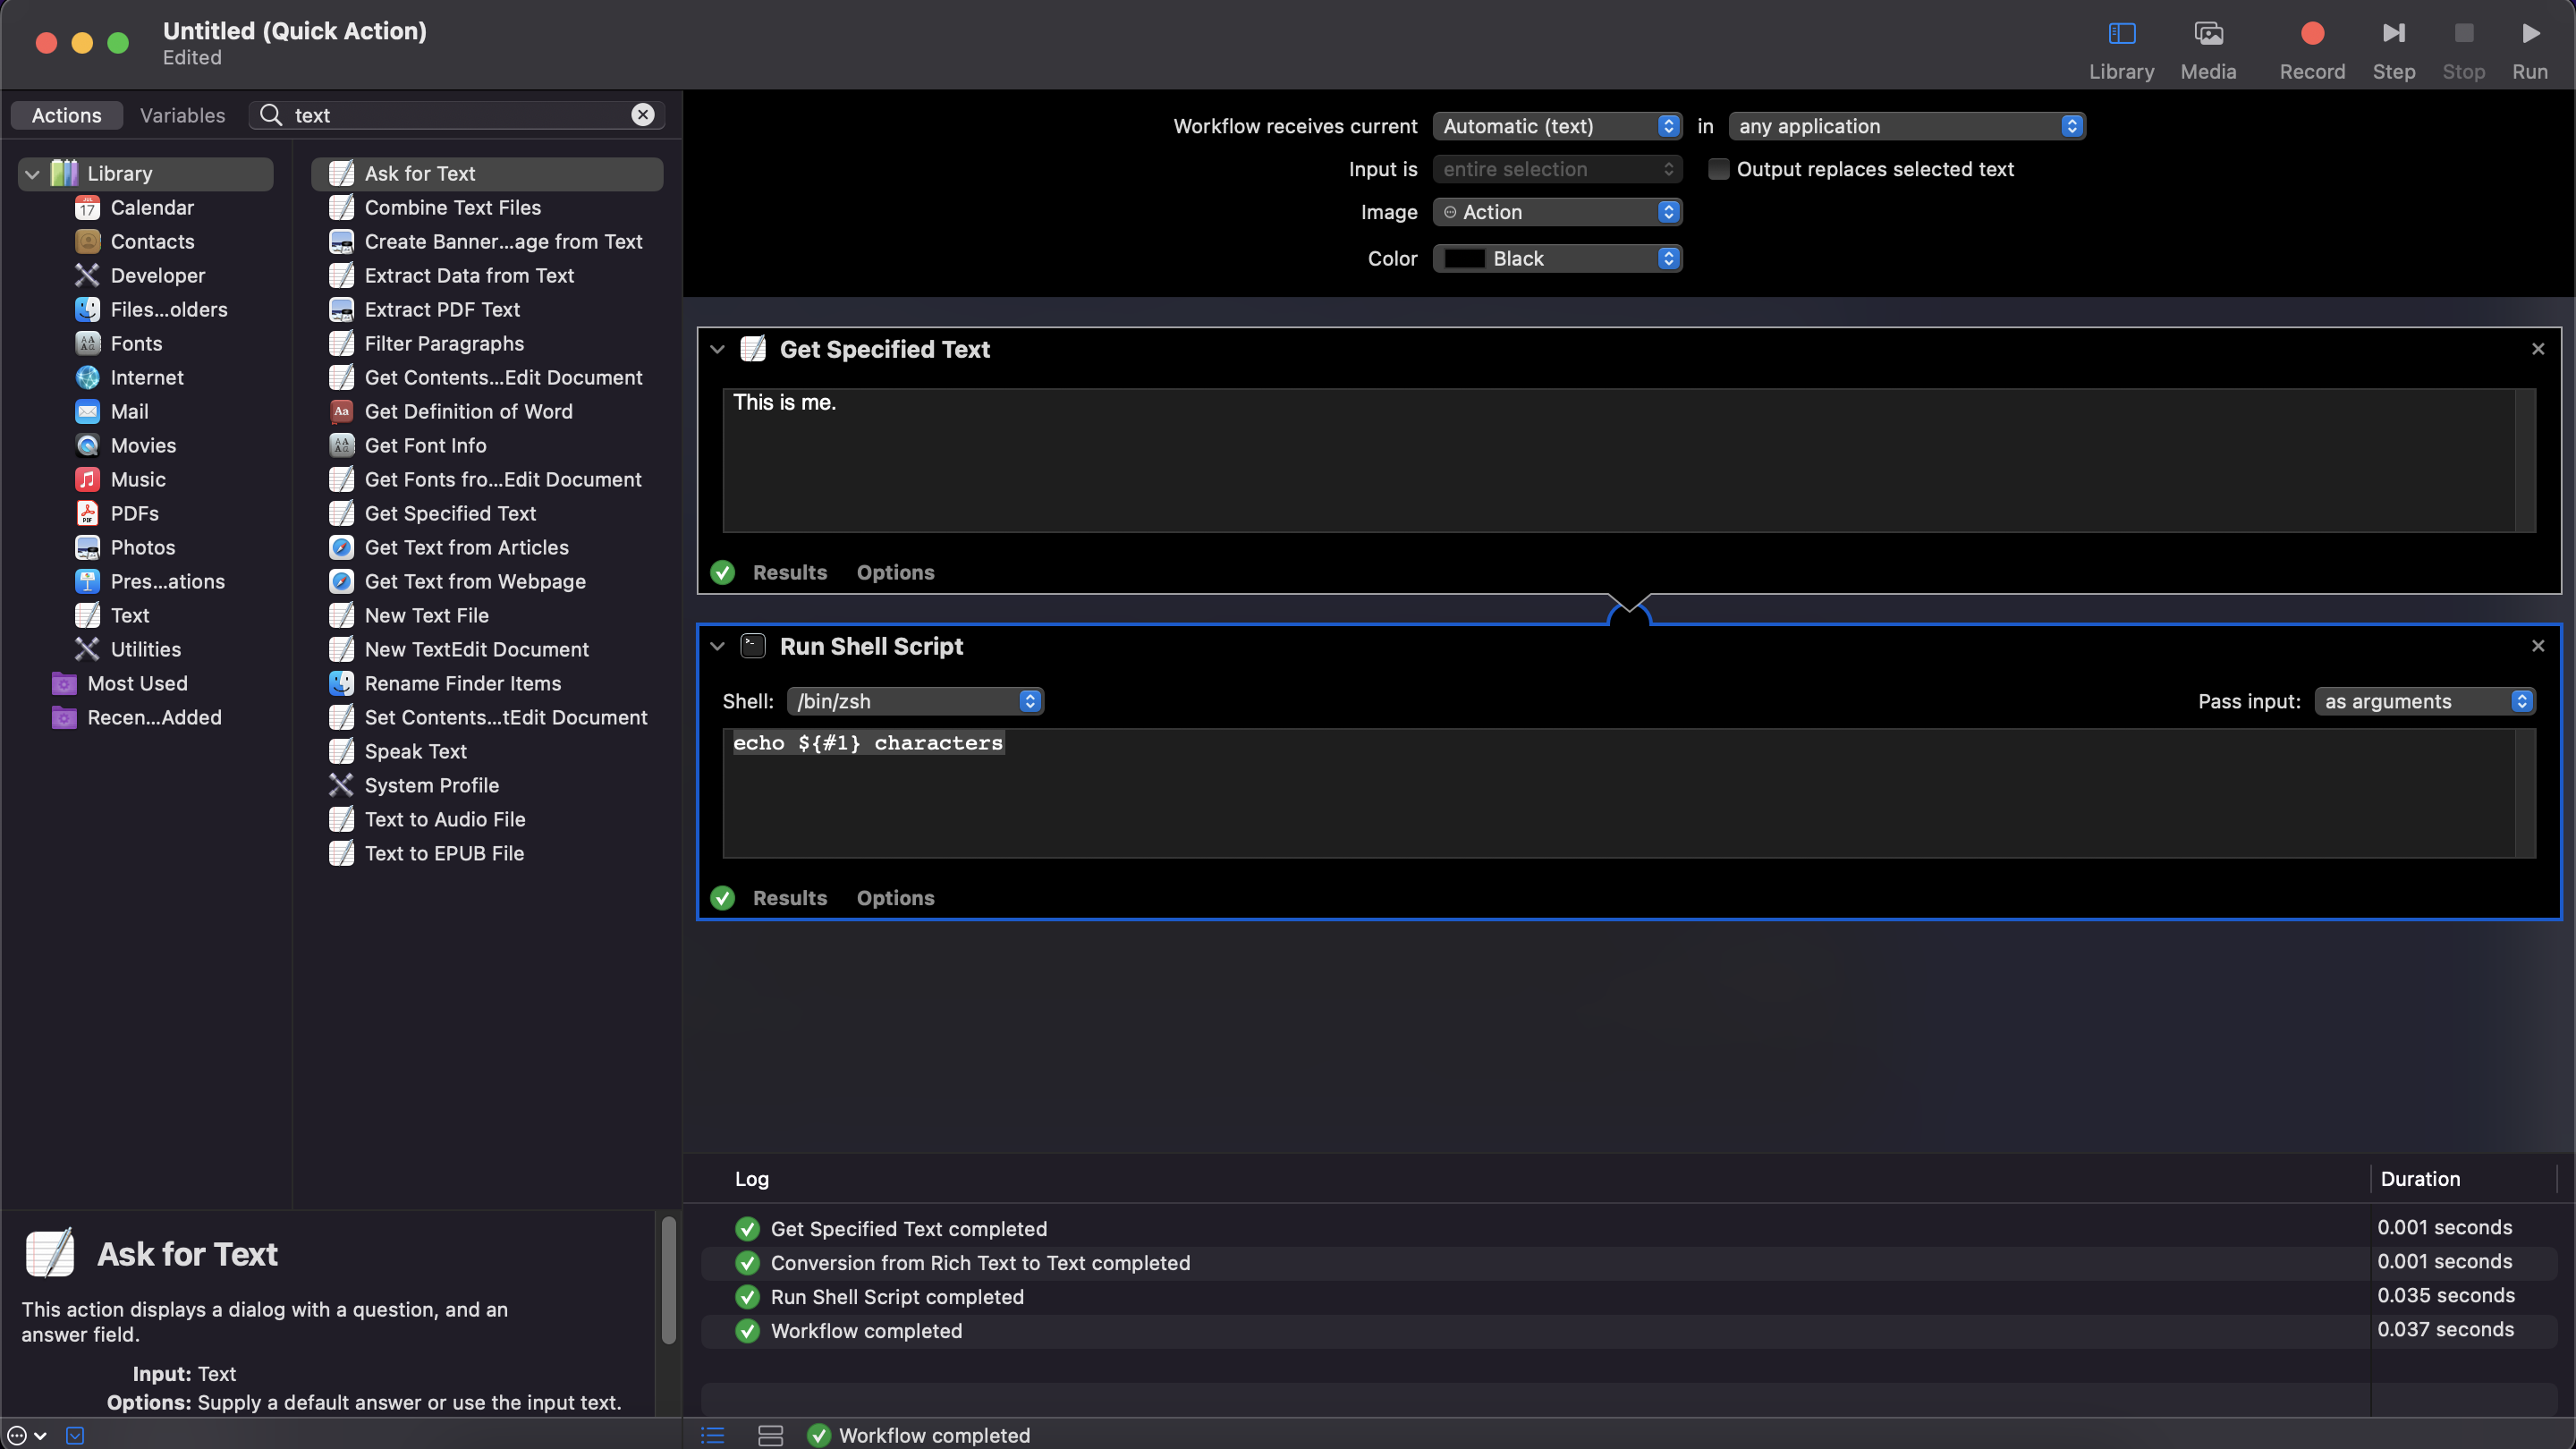
It's great that everything is green, but what was the length of "This is me."? Well, we can see the output of our shell script by clicking on the results at the bottom of the script.
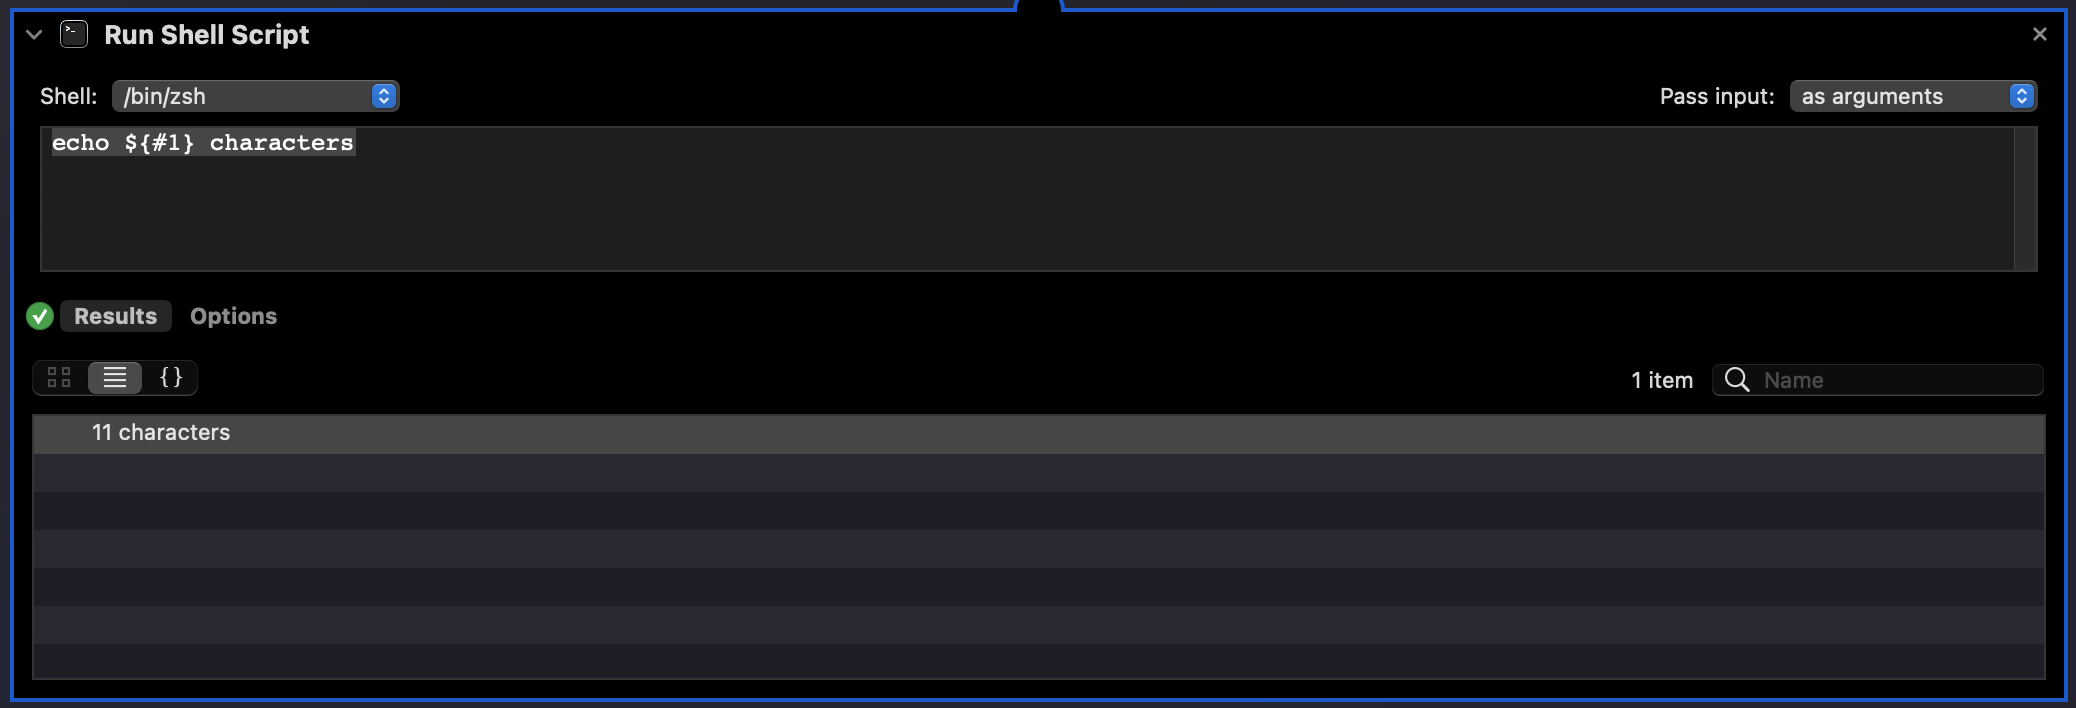
It seems to be giving the correct results. You can test it again by changing the input text to something else. For newlines, it adds one to the count for every newline character.
The Speak Text action
But where will we see the output in real situations? We need one more action to get the output of the shell script delivered to us. There are a couple of ways to do this, one being a dialogbox giving us the output, but the one I liked and used is the "Speak Text".
When you searched for "text" in the search box, then you may have seen "Speak Text" also as one of the filtered results. Drag it to just below the Shell Script. So the output of the shell script will be the input to the Speak Text action.
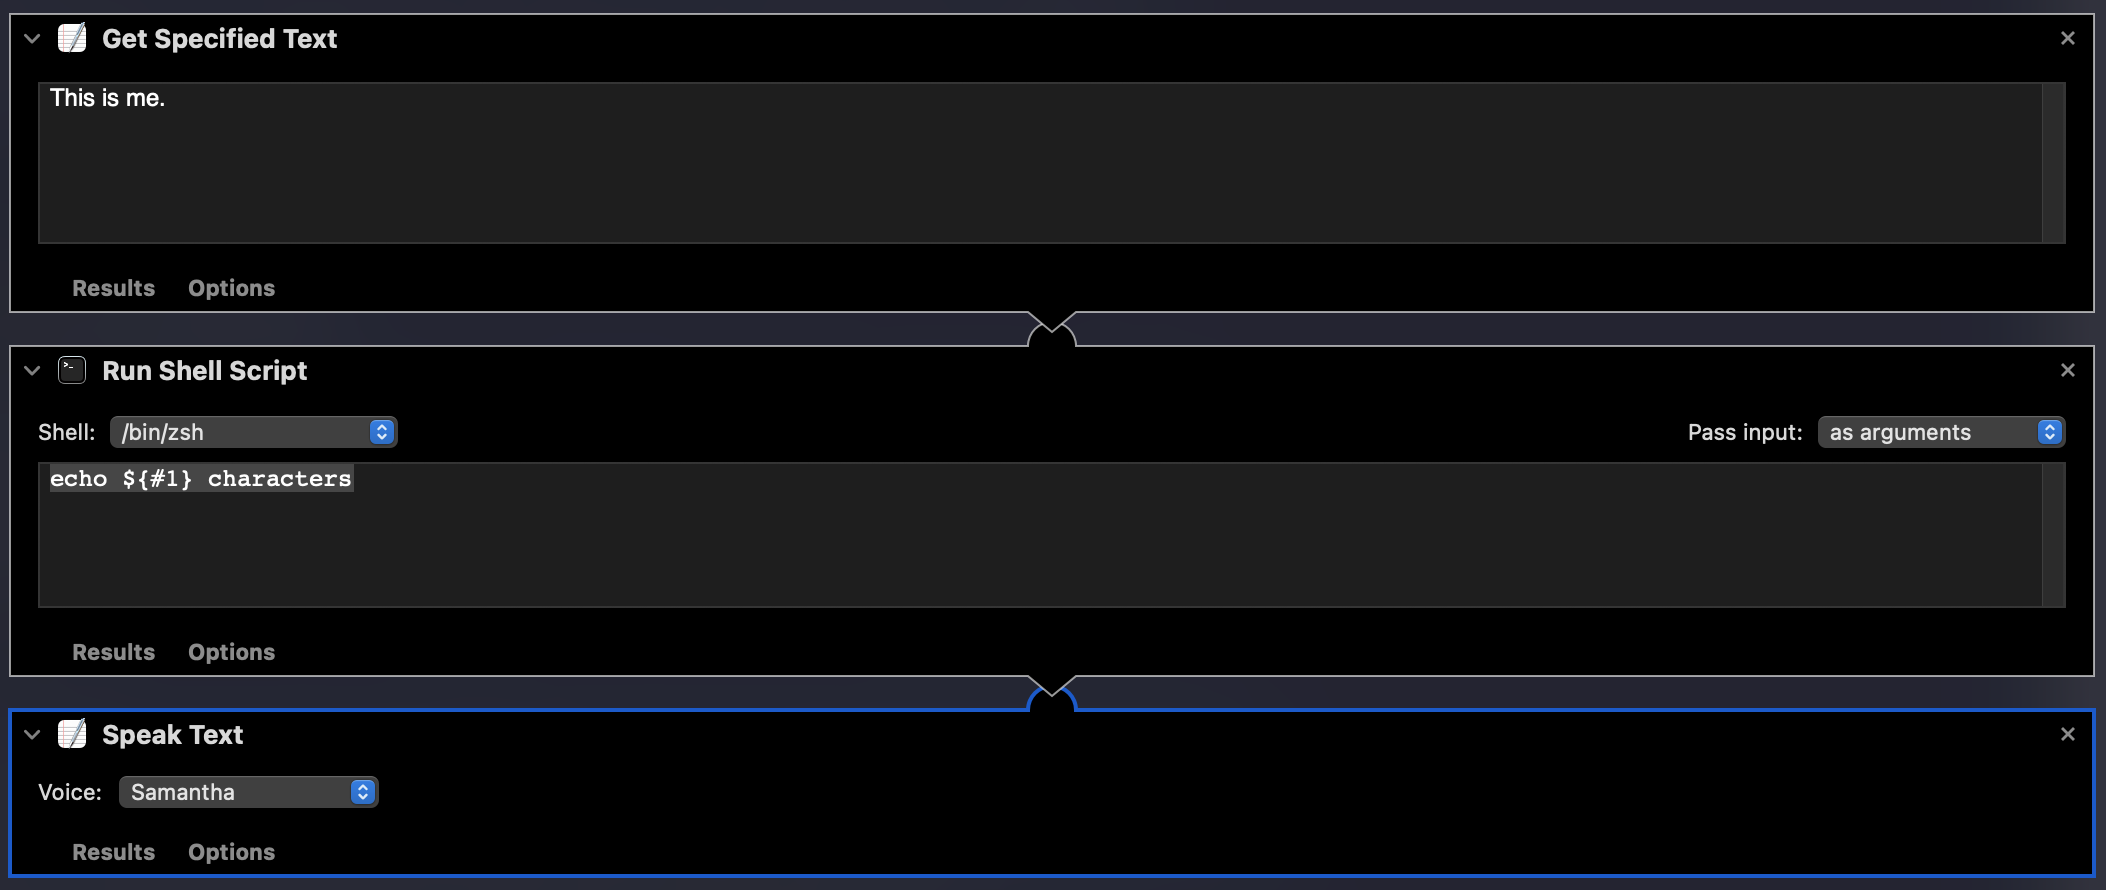
Run the same test one more time, and this time you should hear "11 characters" (remember my dialogue is still "This is me.", maybe it is time to change my script writer) from the speaker of your MacBook, or your headphones if they are connected to it.
Saving the custom action
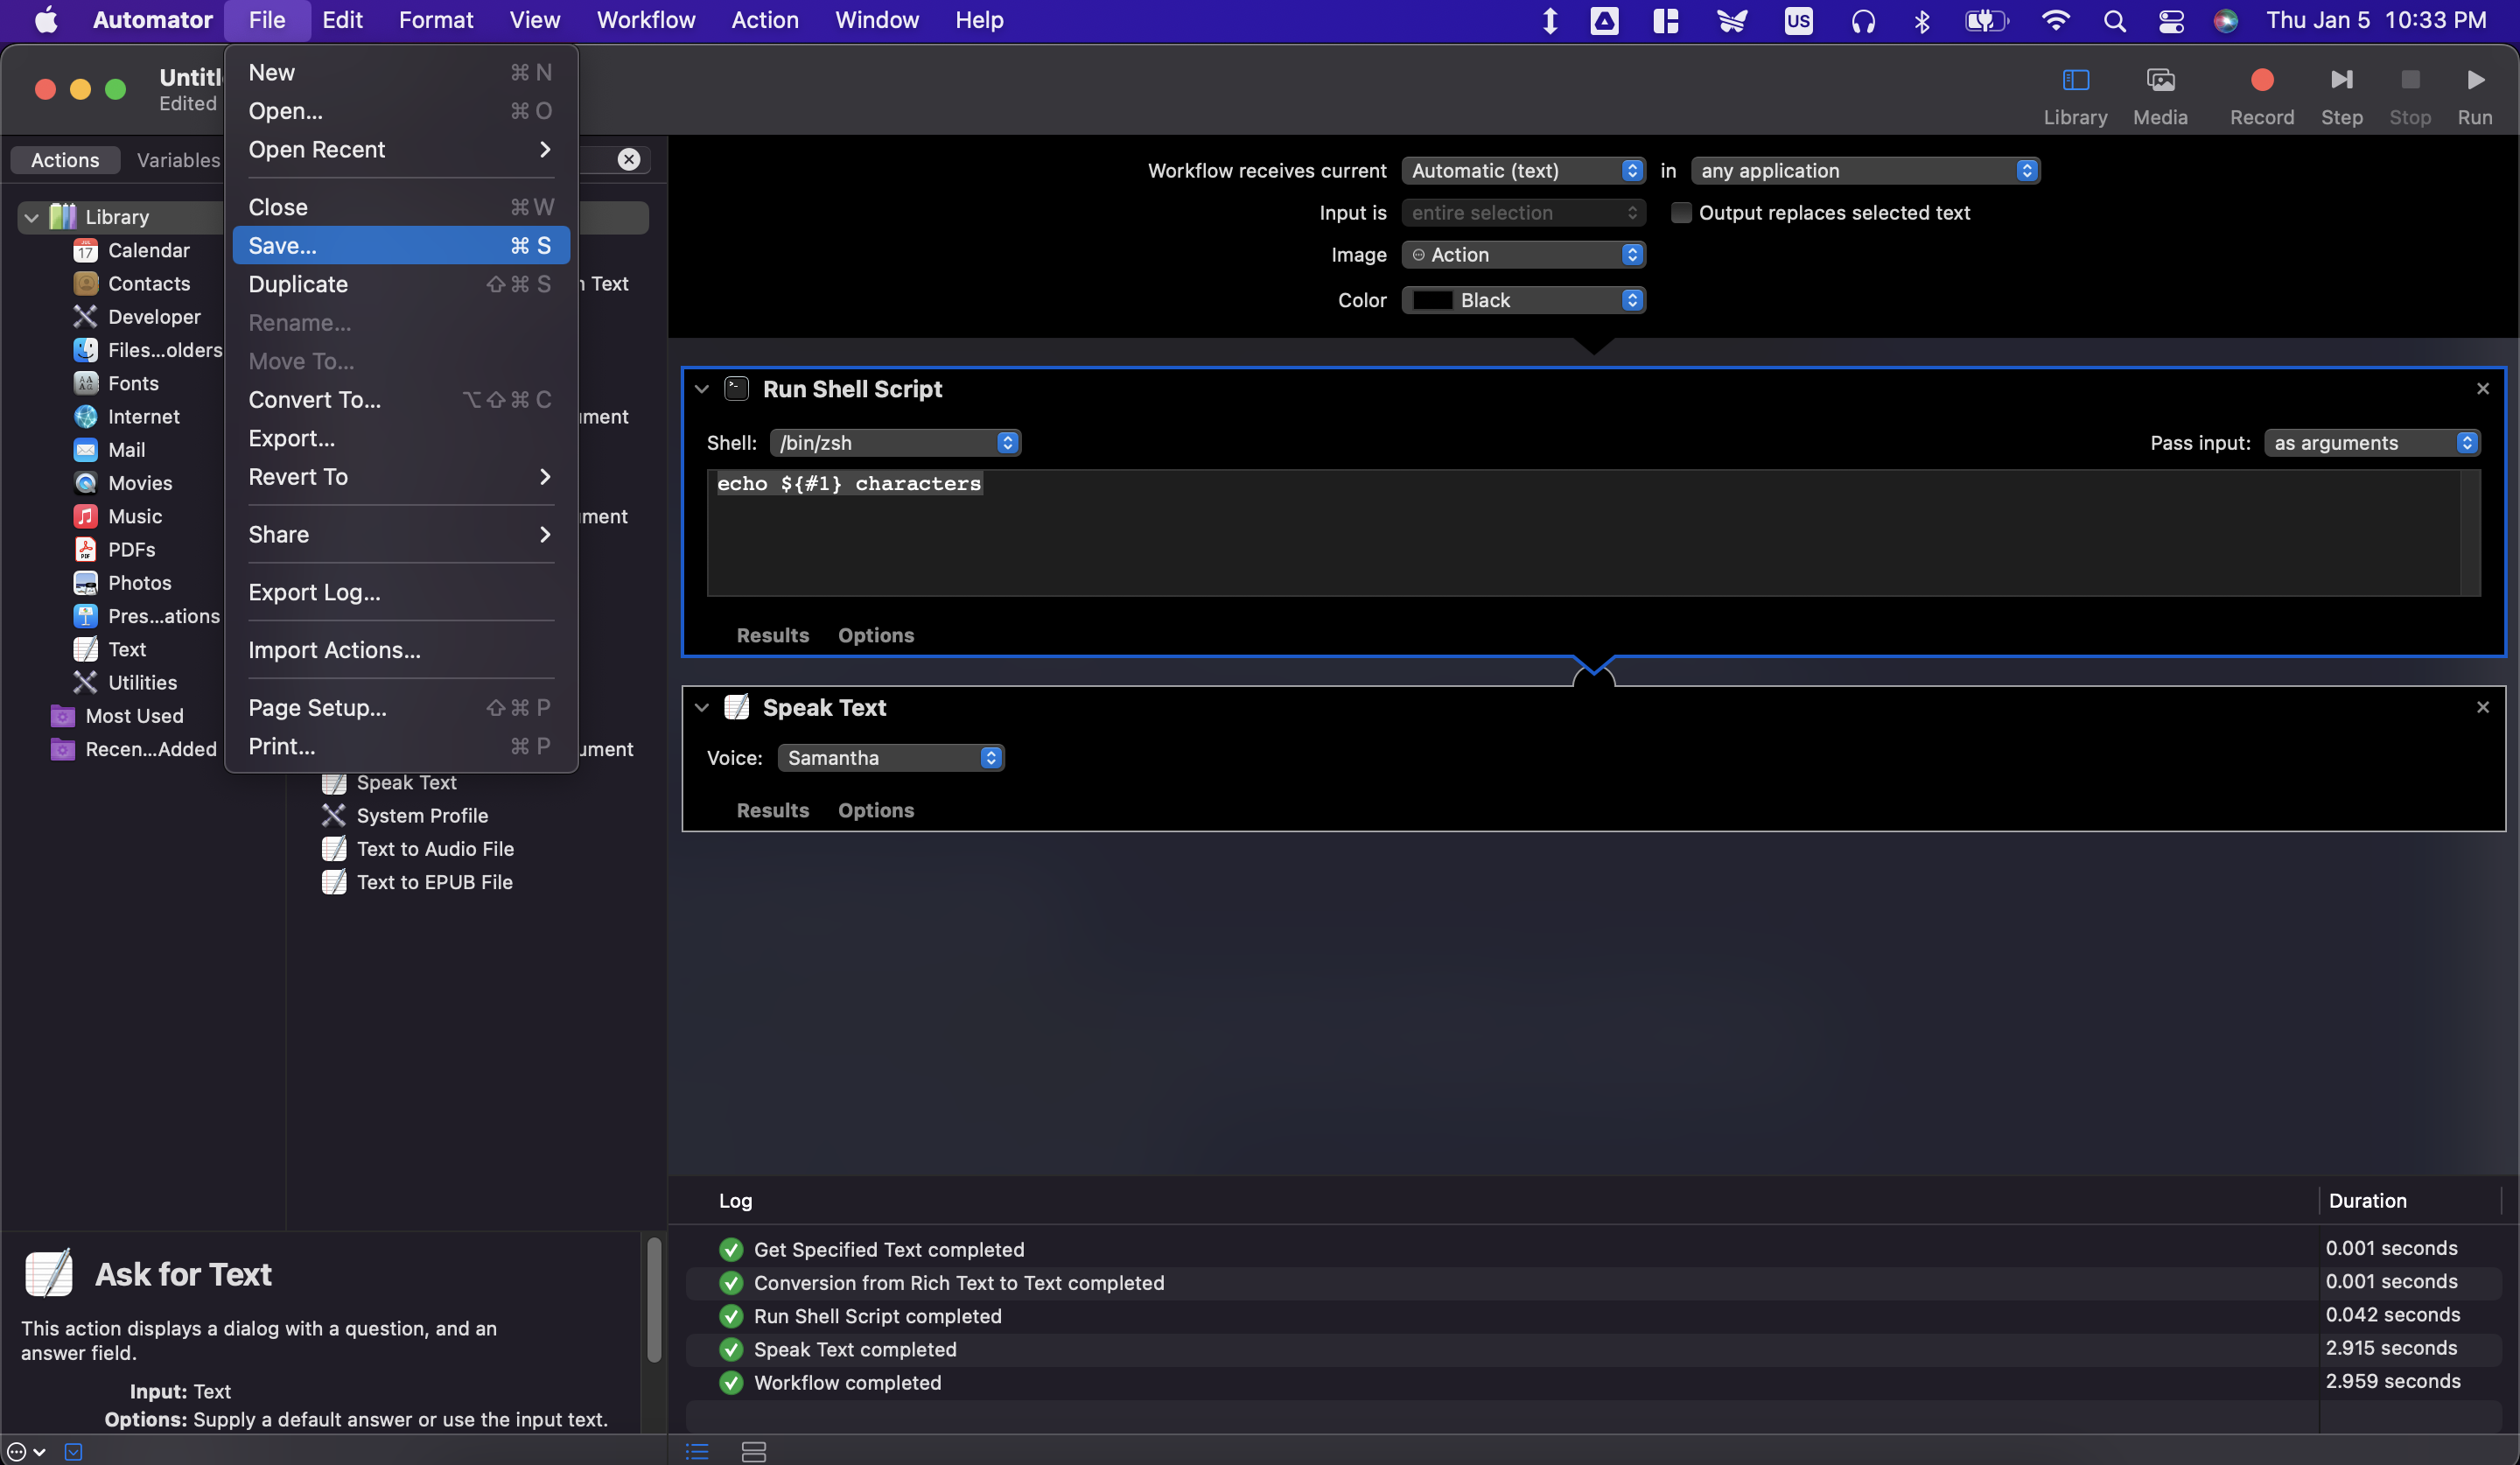
We don't need the "Get Specified Text" action anymore, delete it by clicking the "x" button on its top right. Click on File -> Save from the top menu bar, give your action a name (I am using "Text Length") and save it.
Text Length in action
After saving the action it will be available from the mouse right-click -> Services -> Text Length. In some applications where the right-click context menu is already customized by the application, say VS Code, you can get it from the mac menu bar -> <Application_Name> -> Services -> Text Length. My created actions were saved in ~/Library/Services, if you ever want to edit or delete them.
Below are some screen recordings of our custom action, in action. No prizes for figuring out the test subject of the first video :-).
Using Run JavaScript action in place of Shell Script
Tried to use Javascript instead of the shell script. Came to know that there are certain extra benefits provided to JavaScript (as well as AppleScript) actions. We don't need to use the Speak Text action if we use these actions.
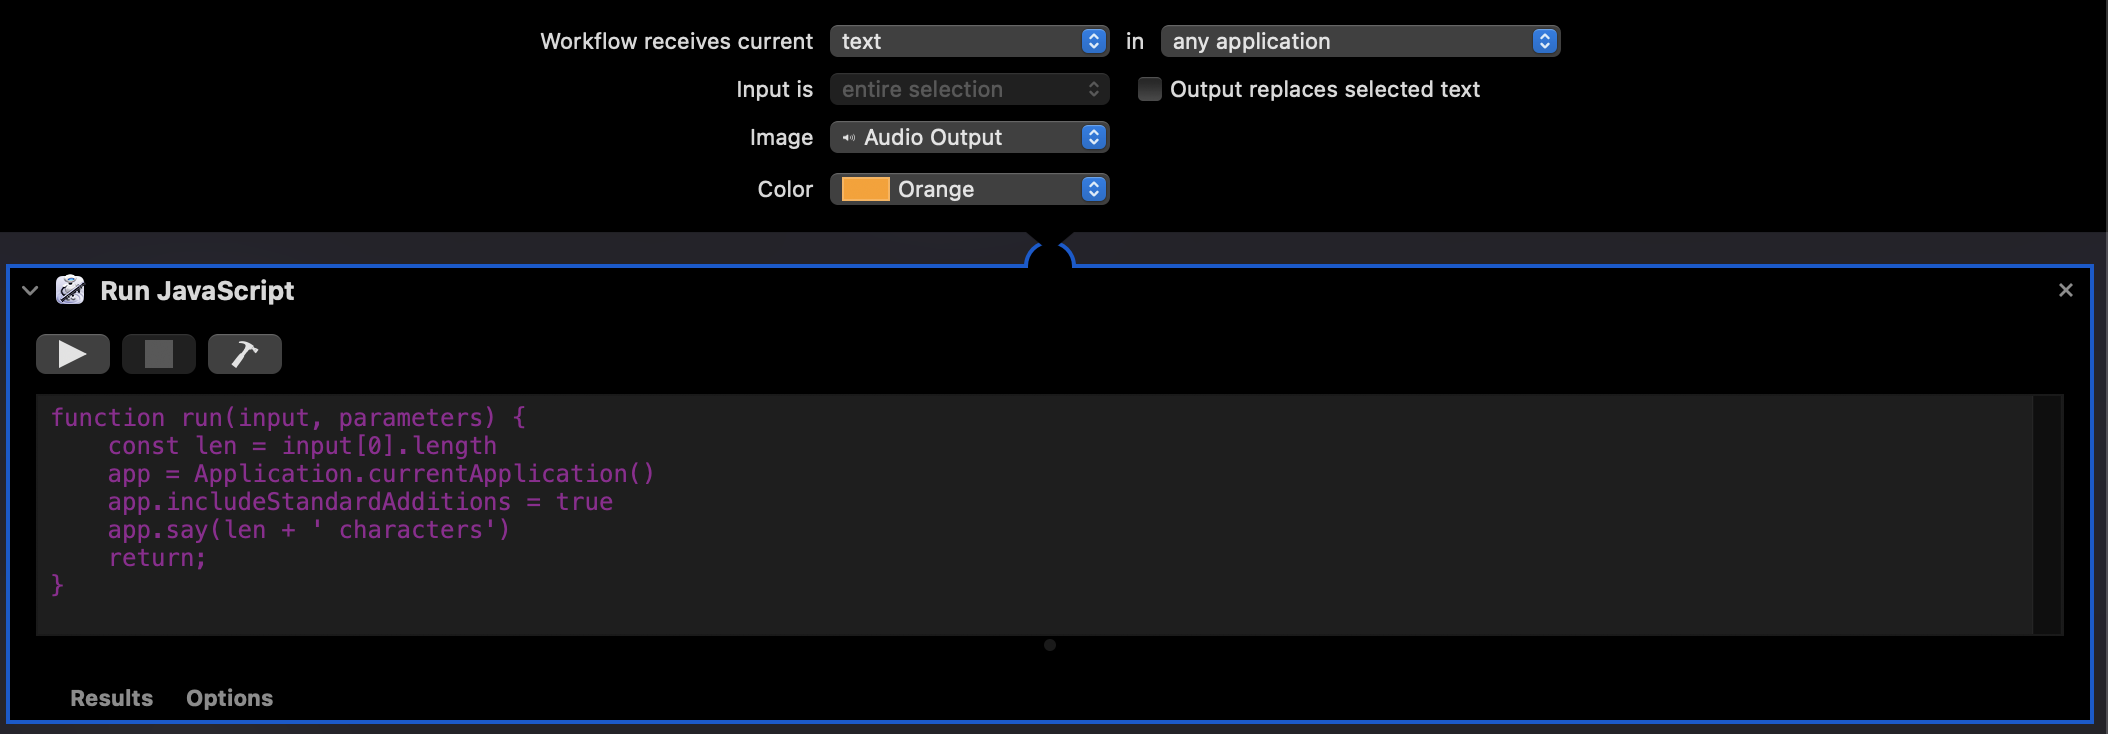
As you can see, I've removed both, the Run Shell Script & Speak Text actions, and have instead added the Run JavaScript action. Do remember to select text from the dropdown menu for Workflow receives current setting at the top.
This is the code inside the code block
function run(input, parameters) {
    const len = input[0].length
    app = Application.currentApplication()
    app.includeStandardAdditions = true
    app.say(len + ' characters')
    return;
}
input is the input arguments (which is a list, as there can be multiple arguments). So we are grabbing the first item from the list and getting its length. Then we use those extra bells and whistles to speak the text in the next 3 lines. Actual speaking is done by app.say(len + ' characters'), the first 2 lines are just enabling that.
Also, the parameters above is not your typical function parameters, it is some sort of meta-information of the function. When I tried printing it, got the following result (with some different function code which is visible below)
{|temporary items path|:"/var/folders/js/7l1q79ds78d8rc3sjs53_xp80000gn/T/6764B971-C5BA-484C-BCBA-1F88B3715B83/1/com.apple.Automator.RunJavaScript", source:"function run(input, parameters) {

    // Your script goes here
    console.log('input is:', input);
    console.log(parameters);

    return parameters;
}", ignoresInput:false}
Summary
There are so many things around you waiting to be explored by you. You just need the drive, or the itch to go look for it. The above article is the perfect example of scratching your itch. Now that we've got the basic introduction to Automation on a MacBook, I'm sure we can create some good, time-saving workflows for ourselves.
Hope you enjoyed reading the article. Thanks for reading till the end. Do share your comments in the comment section.
Until next time. :-)