


Working on my new year's promise to my son
A react app made with AWS Amplify backend to manage my son's piggy bank & pocket money, and to help him get started with his financial education.


The back story
There is always one, isn't it? Let's start from the beginning. We're in the dying days of December 2021. My son will be turning 8 in a couple of months. In his mind 8 is some sort of milestone, and he wants to get started with his pocket money. So we do a discussion on what he understands about money, and how he can make more if he saves. He is excited, and wants me to make an app for him to handle all this. And that is where the new year promise cum resolution kicks in.
Fast forward to March / April 2022
The birthday has come and gone. Not even a single line of code has been written for the app. That's how new year resolutions are supposed to be, right? He reminds me one of these days, so to make good on my promise, I take a Nuxt template, create a couple of cards and then...crickets!! :-)
September 2022
I see this tweet from AWS Amplify of a hackathon, snd that is why I'm writing this post. This hackathon marks a lot of firsts for me: first tech blog post (though I do have some blogging experience but that is another lifetime, and non tech), first time working with react, first time working with Amplify Studio, first encounter with AppSync / Graphql, and so on...
The what
A basic app where you can create piggy bank accounts for your kids. Allows you to add / deduct money on ad-hoc basis. You can also configure their pocket money amount, and schedule, for auto credit to their account. A simple dashboard showing the status of different accounts and transactions, as well as basic settings page.
The journey
Initial thought was to have more bells and whistles in the app but that is not how products are built. You keep cutting down the scope of work until you arrive at an MVP or MUP (minimum usable product, remember my customer is my son ;-)), and this project is no exception to the rule. For me, creating an account with some initial balance, add/remove ad-hoc money and auto handling of pocket money credit per the defined schedule is a good place to start.
Deciding the stack
As the backend is already decided per the hackathon rules, the decision was for the frontend. I am comfortable with Vue/Nuxt ecosystem but have been wanting to start React. This project seemed an ideal candidate for this exploration, more so with the promise of ui-react components library from the Amplify team. Wanted to try out Amplify's Figma integration also, but finally decided against it as my intention was to be with React + Amplify ui-react components more.
The initial steps
- Went through the react docs, tried out their intro to react tutorial (along with the improvements suggested at the end).
- Had a go at Amplify Studio docs. Setup a local project following the instructions.
- Created a new AWS account to skip the sandbox experience. Went to Amplify, created a new backend project and launched Amplify Studio from there.
- Create basic data models and pulled the whole thing to my local machine using
amplify pull. It asks for your AWS credentials and after logging in, you can select the project which you created in step 3 (or you can directly pull by mentioning your appId using--appidoption).
The data models
The user model: The first model to be decided was the account owner's (the parent). After a little bit of tinkering around, settled with the following model
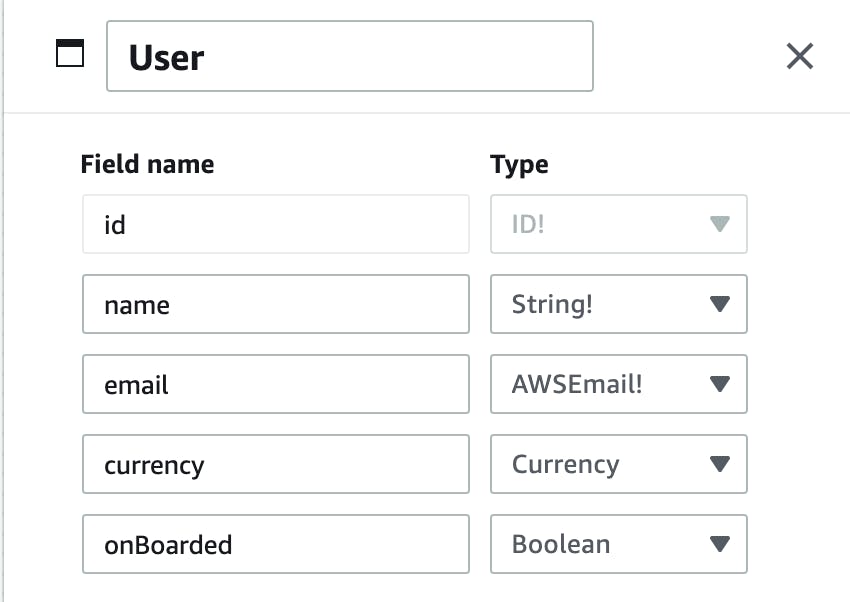
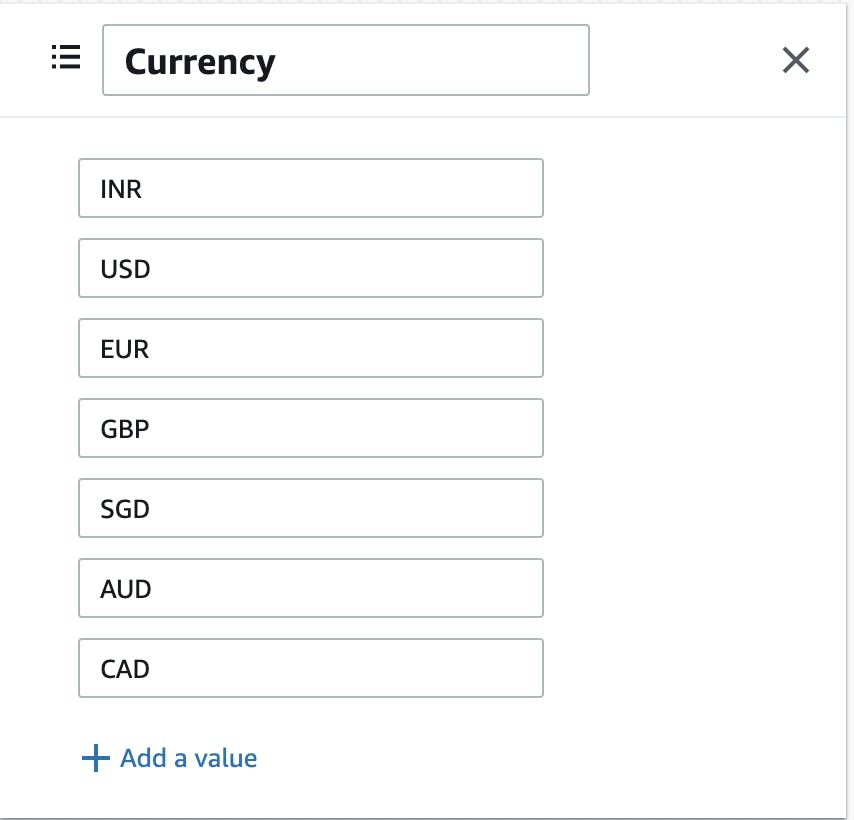
where Currency is an enum supporting some major currencies. This was needed for showing the account balances and transactions with the corresponding currency symbol. The enum values are important (ISO 4217 currency codes) as we'll be using Intl.NumberFormat to get the correct symbols and formatting.
The child model: Child model had some more fields as it needed to have a balance (remember we're creating a bank account?). Then it needed a pocket money amount and a schedule for the same (instead of enforcing my schedule, we're giving the parent a choice to select their own). This needs to be in the child model as pocket money and schedule may differ based on kids' ages
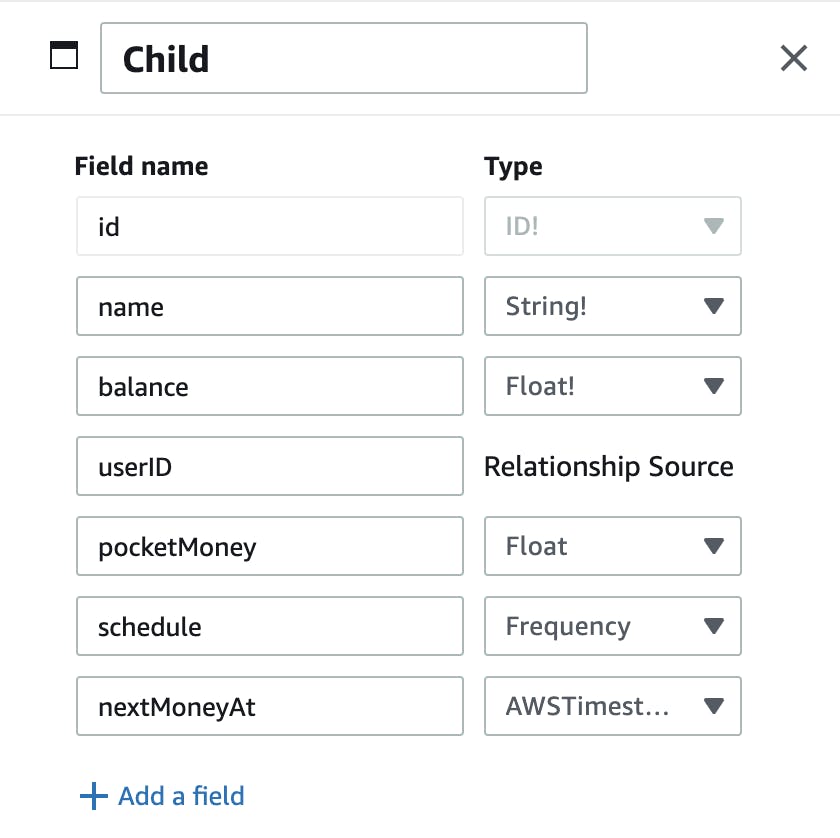
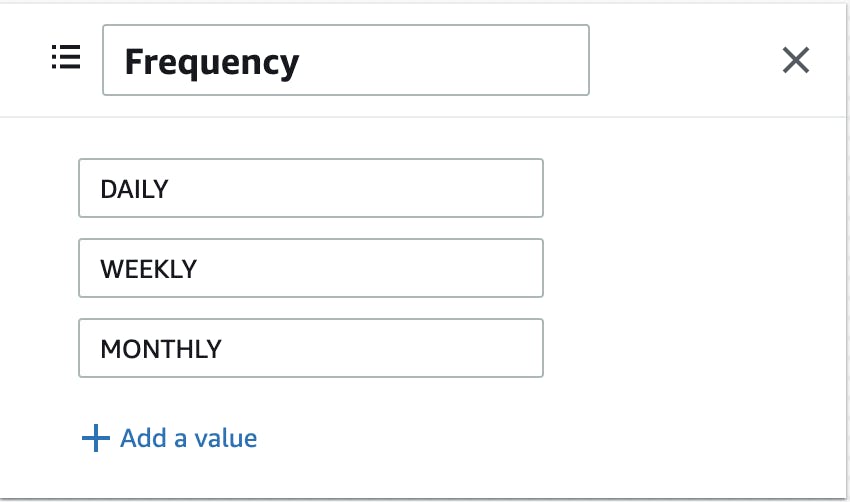
where Frequency is again an enum with the following values
There are some extra fields present in the model and we'll come to those in a bit.
The transaction model: This is quite simple. The transaction amount and a comment for the transaction.

This model also has 2 extra fields called userID & childID. The thing is: when someone is making a transaction, that transaction belongs to him so we need a reference to the user who made this transaction. Also, we'll be making the transaction for a particular child so we need a reference to the child as well.
Similarly, a child needs to have a reference to their parent, that is why we had a userID field in the child model.
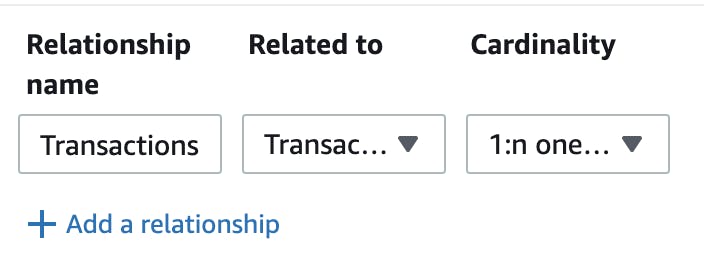
These relationships are achieved through relationships in Amplify Studio. You just tell the data modeling, what kind of relationship you want and it will do the heavy lifting on our behalf. It is quite a breeze to design models and create relationships with Amplify Studio.
In our case, a parent can have multiple children, as well as have multiple transactions, so we did the following
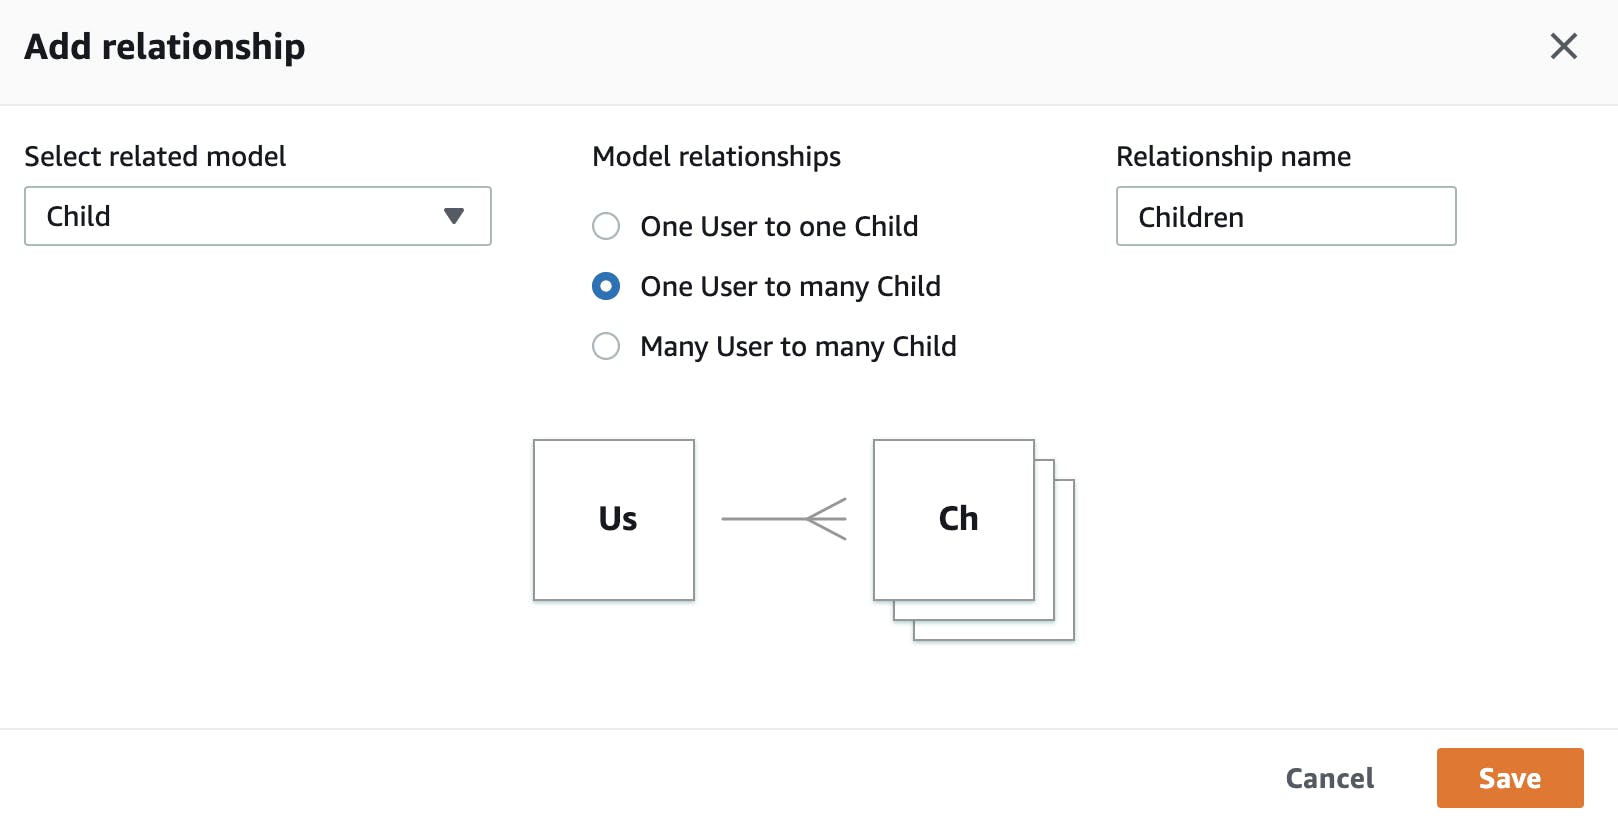
We created similar relationships for user -> transactions, as well as child -> transactions also. After doing so we can see it in our models too

Enough with modeling. Time to save and deploy. It takes a bit to deploy, maybe take a break and get a cup of coffee? :-)
Once it is deployed you can pull these changes to your local machine using amplify pull.
Frontend awaits
Now that we've our datastore, we can create the UI and integrate both. This is where Amplify UI comes in. Follow the getting started guide and the code given alongside. It is enough to get you started quickly, the intricacies we can always dive into later on.
Saw the usage of useState there, so went on another tangent and read through the react docs on useState as well as useEffect. This is how I prefer to learn, you get the initial basic idea first, start building, then you hit a roadblock or see something interesting and you dive deeper.
I needed different routes for different screens. Saw the protected routes guide on Amplify UI, went on another tangent to learn little bit of react-router. All this while our project keeps on changing by trying out these different examples.
Authentication
This didn't require any UI as it comes prebuilt. But to use it we need to set it up first using Amplify Studio. I needed the user's name as part of sign up (see user data model), so I configured that in the sign up attributes section. After deploying and pulling the changes I could create an account and login.
Now I needed to copy the user details from Cognito to my datastore. Two choices here: do it form the frontend or the backend. For frontend we need to find a proper hook to latch on to for doing this. Authenticator provides some such hooks which are suitable for the purpose.
I picked handleSignUp for my purpose and created user in datastore. All fine and good. But then I had another concern, till now I hadn't given authorization and thought. My children and transactions are my own, other users should not be able to read / change these.
So again I went to data setup page in Amplify Studio. This time I saw things which I had missed in my initial visits. When you click on a particular field in nay model, you can mark it as required / optional. Also when you click on any model name, you can decide who is authorized to read /change it.
Since we'd configured Cognito, we had the option to restrict down the access to only the owner (which is what I wanted). Made some changes (ownerField) in the graphql schema (found at amplify -> backend -> api -> -> schema.graphql) to reflect this reality (These changes are not necessarily needed)
type User @model @auth(rules: [{allow: owner, ownerField: "id"}]) {
  id: ID!
  name: String!
  email: AWSEmail!
  currency: Currency
  Transactions: [Child] @hasMany(indexName: "byUser", fields: ["id"])
  Children: [Child] @hasMany(indexName: "byUser", fields: ["id"])
  onBoarded: Boolean
}

type Transaction @model @auth(rules: [{allow: owner, ownerField: "userID"}]) {
  id: ID!
  amount: Float!
  comment: String!
  userID: ID! @index(name: "byUser")
  childID: ID! @index(name: "byChild")
} // and same for child model as well
Anyhow, now that we've restricted access I found another issue. You can't set an **Id** for a user through datastore. So now I've one user id from cognito and another from datastore. I wanted both to have the same id, so here come the hallowed lambda functions. After a bit of searching, found lambda triggers. Post Confirmation hook suited my needs.
So, I removed the handleSignUp code from earlier and created the Post Confirmation trigger using amplify add function command. It has one prebuilt template of adding user to a group (which you should select. If you select custom then it leaves you out hanging to dry with no hand holding. I had to redo the steps 2-3 times to realize this, better to have some starting files as compared to you yourself figuring out where to add the files).
Then updated the function and added correct permissions. We want to write to datastore, which, in a loose sense, is a layer on top of DynamoDB (so we need to give DynamoDB write permission to our lambda function). Here is the code for creating a user:
const aws = require('aws-sdk');
const docClient = new aws.DynamoDB.DocumentClient();
const tableName = process.env.API_<APP_NAME>_USERTABLE_NAME;

exports.handler = async (event, context) => {
  const date = new Date()

  const params = {
    TableName: tableName,
    Item: {
      __typename: 'User',
      id: event.request.userAttributes.sub,
      name: event.request.userAttributes.name,
      email: event.request.userAttributes.email,
      createdAt: date.toISOString(),
      updatedAt: date.toISOString(),
      _version: 1,
      _lastChangedAt: date.getTime()
    },
  };

  try {
    const result = await docClient.put(params).promise();
    console.log(
      `Saved user data in DB`, JSON.stringify(result, null, 2)
    );
  } catch (err) {
    console.error(
      `Unable to save user data for ${event.request.userAttributes.sub}. Error JSON: `,
      JSON.stringify(err, null, 2)
    );
  }

  return event;
};
__typename, _version, _lastChangedAt, createdAt, updatedAt fields are automatically created in the backend when you try to create a user through datastore, so we need to maintain the same structure. The above code was taken from Ali Spittel's github repo
Other screens
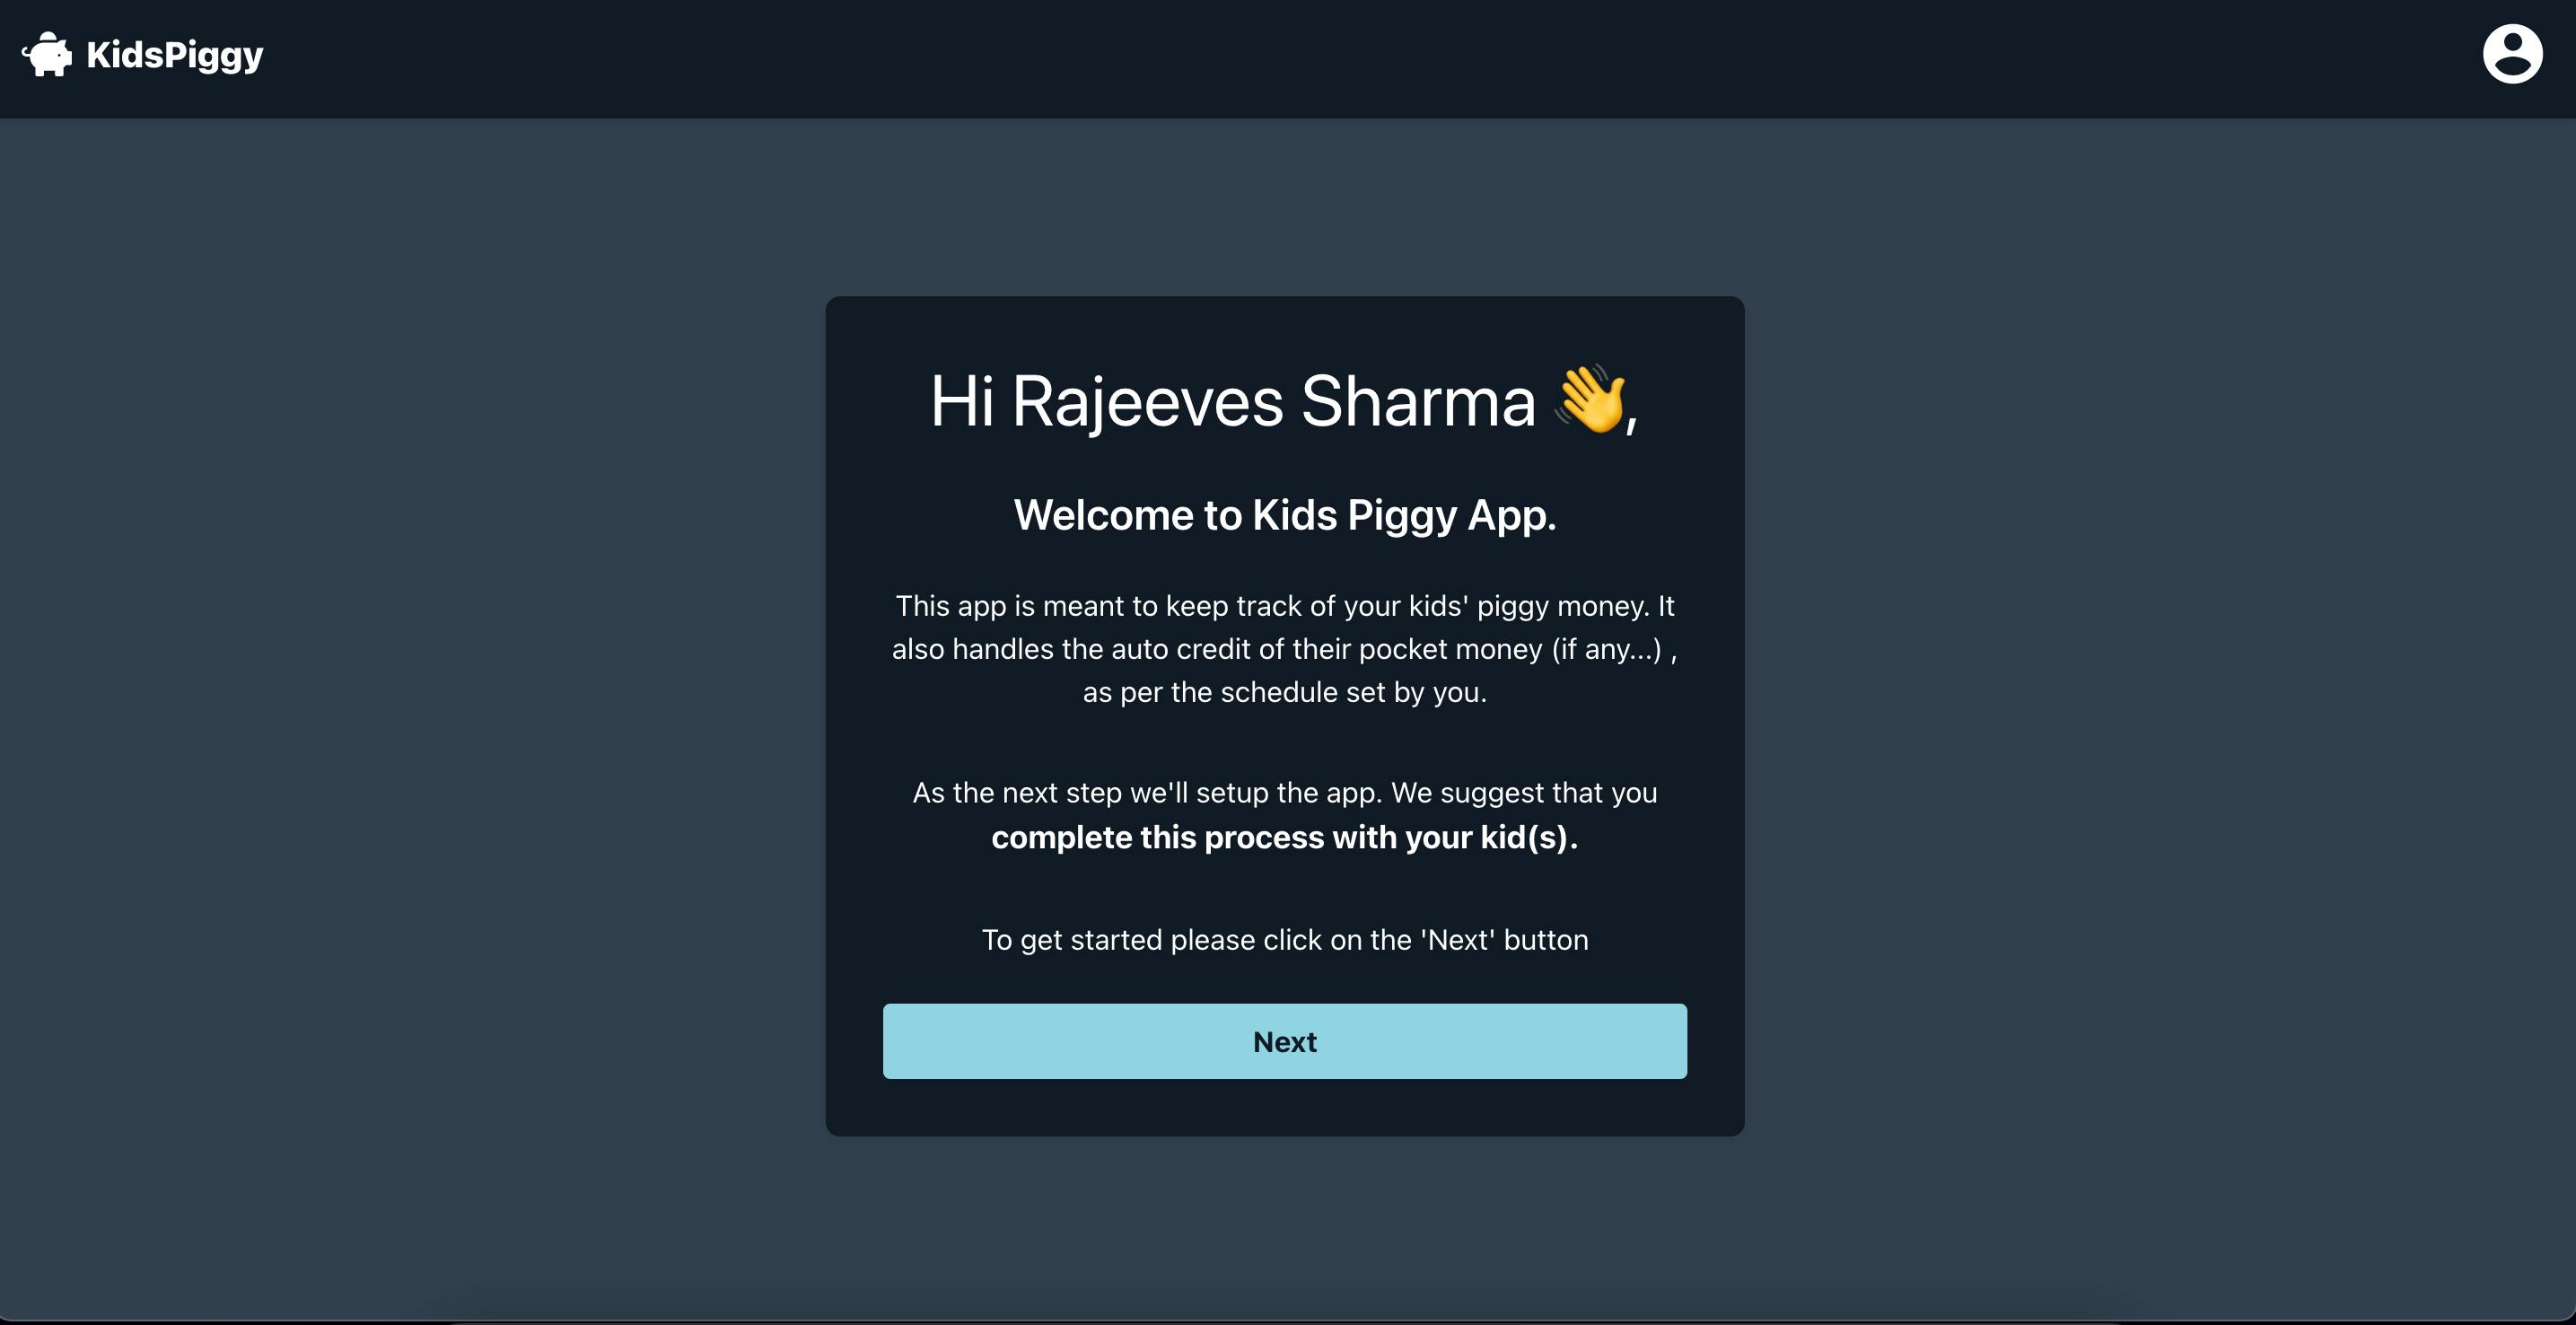
Once the auth piece was sorted out, quickly created the onboarding screens (which they see when they create an account), the dashboard, transaction form and the settings screens.
Auto credit of pocket money
One major event remaining was the auto credit of pocket money to a child's account. Created another lambda function which runs on a schedule (amplify add function gives you such a choice). This function runs everyday at 12:00 AM GMT/UTC, fetches all the eligible children (this is where the last data field nextMoneyAt comes into play) whose pocket monies needs to be credited, and then creates transactions for all of them on their behalf. It also updates their balances at the same time, so for every eligible child two graphql queries are executed.
Code to fetch eligible children (timestamp is 12:00 AM GMT in seconds for that day, taking this directly from the lambda event itself. Giving the filter a range of 4 minutes which is not needed, but still...). Creating this lambda taught me everything I know about graphql / appsync (which is of course not much :-))
const getEligibleChildren = async (timestamp) => {
  const variables = {
    filter: {
      nextMoneyAt: { ge: timestamp - 120, le: timestamp + 120 },
    },
  };

  const body = JSON.stringify({
    query: `
      query List_Children(
          $filter: ModelChildFilterInput
          $limit: Int
          $nextToken: String
        ) {
          listChildren(filter: $filter, limit: $limit, nextToken: $nextToken) {
            items {
              id
              name
              balance
              nextMoneyAt
              pocketMoney
              schedule
              userID
              _version
            }
            nextToken
          }
        }
        `,
    operationName: 'List_Children',
    variables,
  });

  const req = getSignedRequest(body);
  const res = await executeReq(req);

  console.log('eligible children for payout: %j', res);
  return res.data.listChildren.items;
};
Where getSignedRequest and executeReq functions are as shown
const https = require('https');
const AWS = require('aws-sdk');
const { randomUUID } = require('crypto');
const urlParse = require('url').URL;

const GRAPHQL_ENDPOINT = process.env.API_<APP_NAME>_GRAPHQLAPIENDPOINTOUTPUT;

const REGION = process.env.REGION;
const endpoint = new urlParse(GRAPHQL_ENDPOINT).hostname.toString();

const getSignedRequest = (body) => {
  const req = new AWS.HttpRequest(GRAPHQL_ENDPOINT, REGION);
  req.method = 'POST';
  req.path = '/graphql';
  req.headers.host = endpoint;
  req.headers['Content-Type'] = 'application/json';
  req.body = body;

  console.log('request body is: ', body);

  const signer = new AWS.Signers.V4(req, 'appsync', true);
  signer.addAuthorization(AWS.config.credentials, AWS.util.date.getDate());

  return req;
};

const executeReq = (req) => {
  return new Promise((resolve, reject) => {
    const httpRequest = https.request({ ...req, host: endpoint }, (result) => {
      let data = '';

      result.on('data', (chunk) => {
        data += chunk;
      });

      result.on('end', () => {
        resolve(JSON.parse(data.toString()));
      });
    });

    httpRequest.write(req.body);
    httpRequest.end();
  });
};
Code for creating a transaction and updating the balance for a child. Need to pass the existing _version of child model for updating it, else it will be rejected
const depositPocketMoney = (child, timestamp, eventDate) => {
  const transactionVariables = {
    input: {
      id: randomUUID(),
      amount: child.pocketMoney,
      comment: '👏 Pocket money added',
      childID: child.id,
      userID: child.userID,
    },
  };

  const transactionBody = JSON.stringify({
    query: `
      mutation Create_Transaction($input: CreateTransactionInput!) {
          createTransaction(input: $input) {
            id
            amount
            comment
            userID
            childID
            createdAt
            updatedAt
            _version
            _lastChangedAt
            _deleted
          }
        }
    `,
    operationName: 'Create_Transaction',
    variables: transactionVariables,
  });

  const createTransactionReq = getSignedRequest(transactionBody);
  const childVariables = {
    input: {
      id: child.id,
      balance: child.balance + child.pocketMoney,
      _version: child._version,
    },
  };

  if (child.schedule === 'DAILY') {
    childVariables.input.nextMoneyAt = timestamp + 86400;
  } else if (child.schedule === 'WEEKLY') {
    childVariables.input.nextMoneyAt = timestamp + 7 * 86400;
  } else if (child.schedule === 'MONTHLY') {
    const nextMoneyDate = new Date();
    nextMoneyDate.setUTCHours(0, 0, 0);
    nextMoneyDate.setUTCMonth(eventDate.getMonth() + 1, 1);
    childVariables.input.nextMoneyAt = parseInt(nextMoneyDate.getTime() / 1000);
  } else {
    console.error(`Unsupported child payout schedule: ${child.schedule}`);
  }

  const childUpdateBody = JSON.stringify({
    query: `
      mutation Update_Child($input: UpdateChildInput!, $condition: ModelChildConditionInput) {
        updateChild(input: $input, condition: $condition) {
          id
          name
          balance
          userID
          pocketMoney
          schedule
          nextMoneyAt
          createdAt
          updatedAt
          _version
          _lastChangedAt
          _deleted
        }
      }
    `,
    operationName: 'Update_Child',
    variables: childVariables,
    condition: null,
  });
  const childUpdateReq = getSignedRequest(childUpdateBody);
  return [executeReq(createTransactionReq), executeReq(childUpdateReq)];
};
The important piece here is this (together with balance we need to update the nextMoneyAt field as well, so that the money can be credited in the next cycle)
  if (child.schedule === 'DAILY') {
    childVariables.input.nextMoneyAt = timestamp + 86400;
  } else if (child.schedule === 'WEEKLY') {
    childVariables.input.nextMoneyAt = timestamp + 7 * 86400;
  } else if (child.schedule === 'MONTHLY') {
    const nextMoneyDate = new Date();
    nextMoneyDate.setUTCHours(0, 0, 0);
    nextMoneyDate.setUTCMonth(eventDate.getMonth() + 1, 1);
    childVariables.input.nextMoneyAt = parseInt(nextMoneyDate.getTime() / 1000);
  } else {
    console.error(`Unsupported child payout schedule: ${child.schedule}`);
  }
Corresponding frontend code to calculated the first payout time (done at the time of onboarding, as well as if the frequency is changed for the child)
const calculateNextPayout = (schedule) => {
  if (schedule) {
    const date = new Date();
    const currDate = date.getDate();
    const currMonth = date.getMonth();

    const nextMoneyDate = new Date();
    nextMoneyDate.setUTCHours(0, 0, 0);

    if (schedule === Frequency.DAILY) {
      nextMoneyDate.setUTCDate(currDate + 1);
    } else if (schedule === Frequency.WEEKLY) {
      // +1 is for getting Monday, doesn't care if today is Sunday,
      // next payout will be after 8 days
      const nextMondayInDays = 7 - date.getDay() + 1;
      nextMoneyDate.setUTCDate(currDate + nextMondayInDays);
    } else if (schedule === Frequency.MONTHLY) {
      nextMoneyDate.setUTCMonth(currMonth + 1, 1);
    }

    return nextMoneyDate;
  }
One important thing with graphql mutations from lambda functions is: you need to select the required fields (including _version, _lastChangedAt, _deleted etc) while making the api call, else your datastore in the frontend won't be getting the updates immediately. I spent a lot of time in figuring this out (even though it is written in plain English here).
Hosting
Now it is time to make the app live. Simply run amplify add hosting from the command line, and it will prompt you with different hosting options. I went with "hosting with amplify console", configured the github repo for continuous deployment, and done...! The console automatically recognizes that the project is using reactJs, suggests the correct build settings, and finally builds and deploys the app for you. It takes a while to do all this, but saves you a lot of pain later on :-).
Improvements
- Right now many things are happening from frontend. Like when you create a transaction, child's balance is also updated from there. Ideally it should happen from backend
- The pocket money credit happens on a single schedule for all children, pretty soon it will start failing as users grow and lambda starts hitting its limits. Will need to split out the functionality. Also right now not taking care of pagination while querying for eligible children, need to add that.
- Pocket money credit is happening only at 12:00 AM GMT. Ideally it should be according to the user's local time.
- At present it is not possible to create or delete an account from the settings page. The functionality needs to be added.
- Dashboard should show a limited number of transactions, with an option to show more
Screenshots
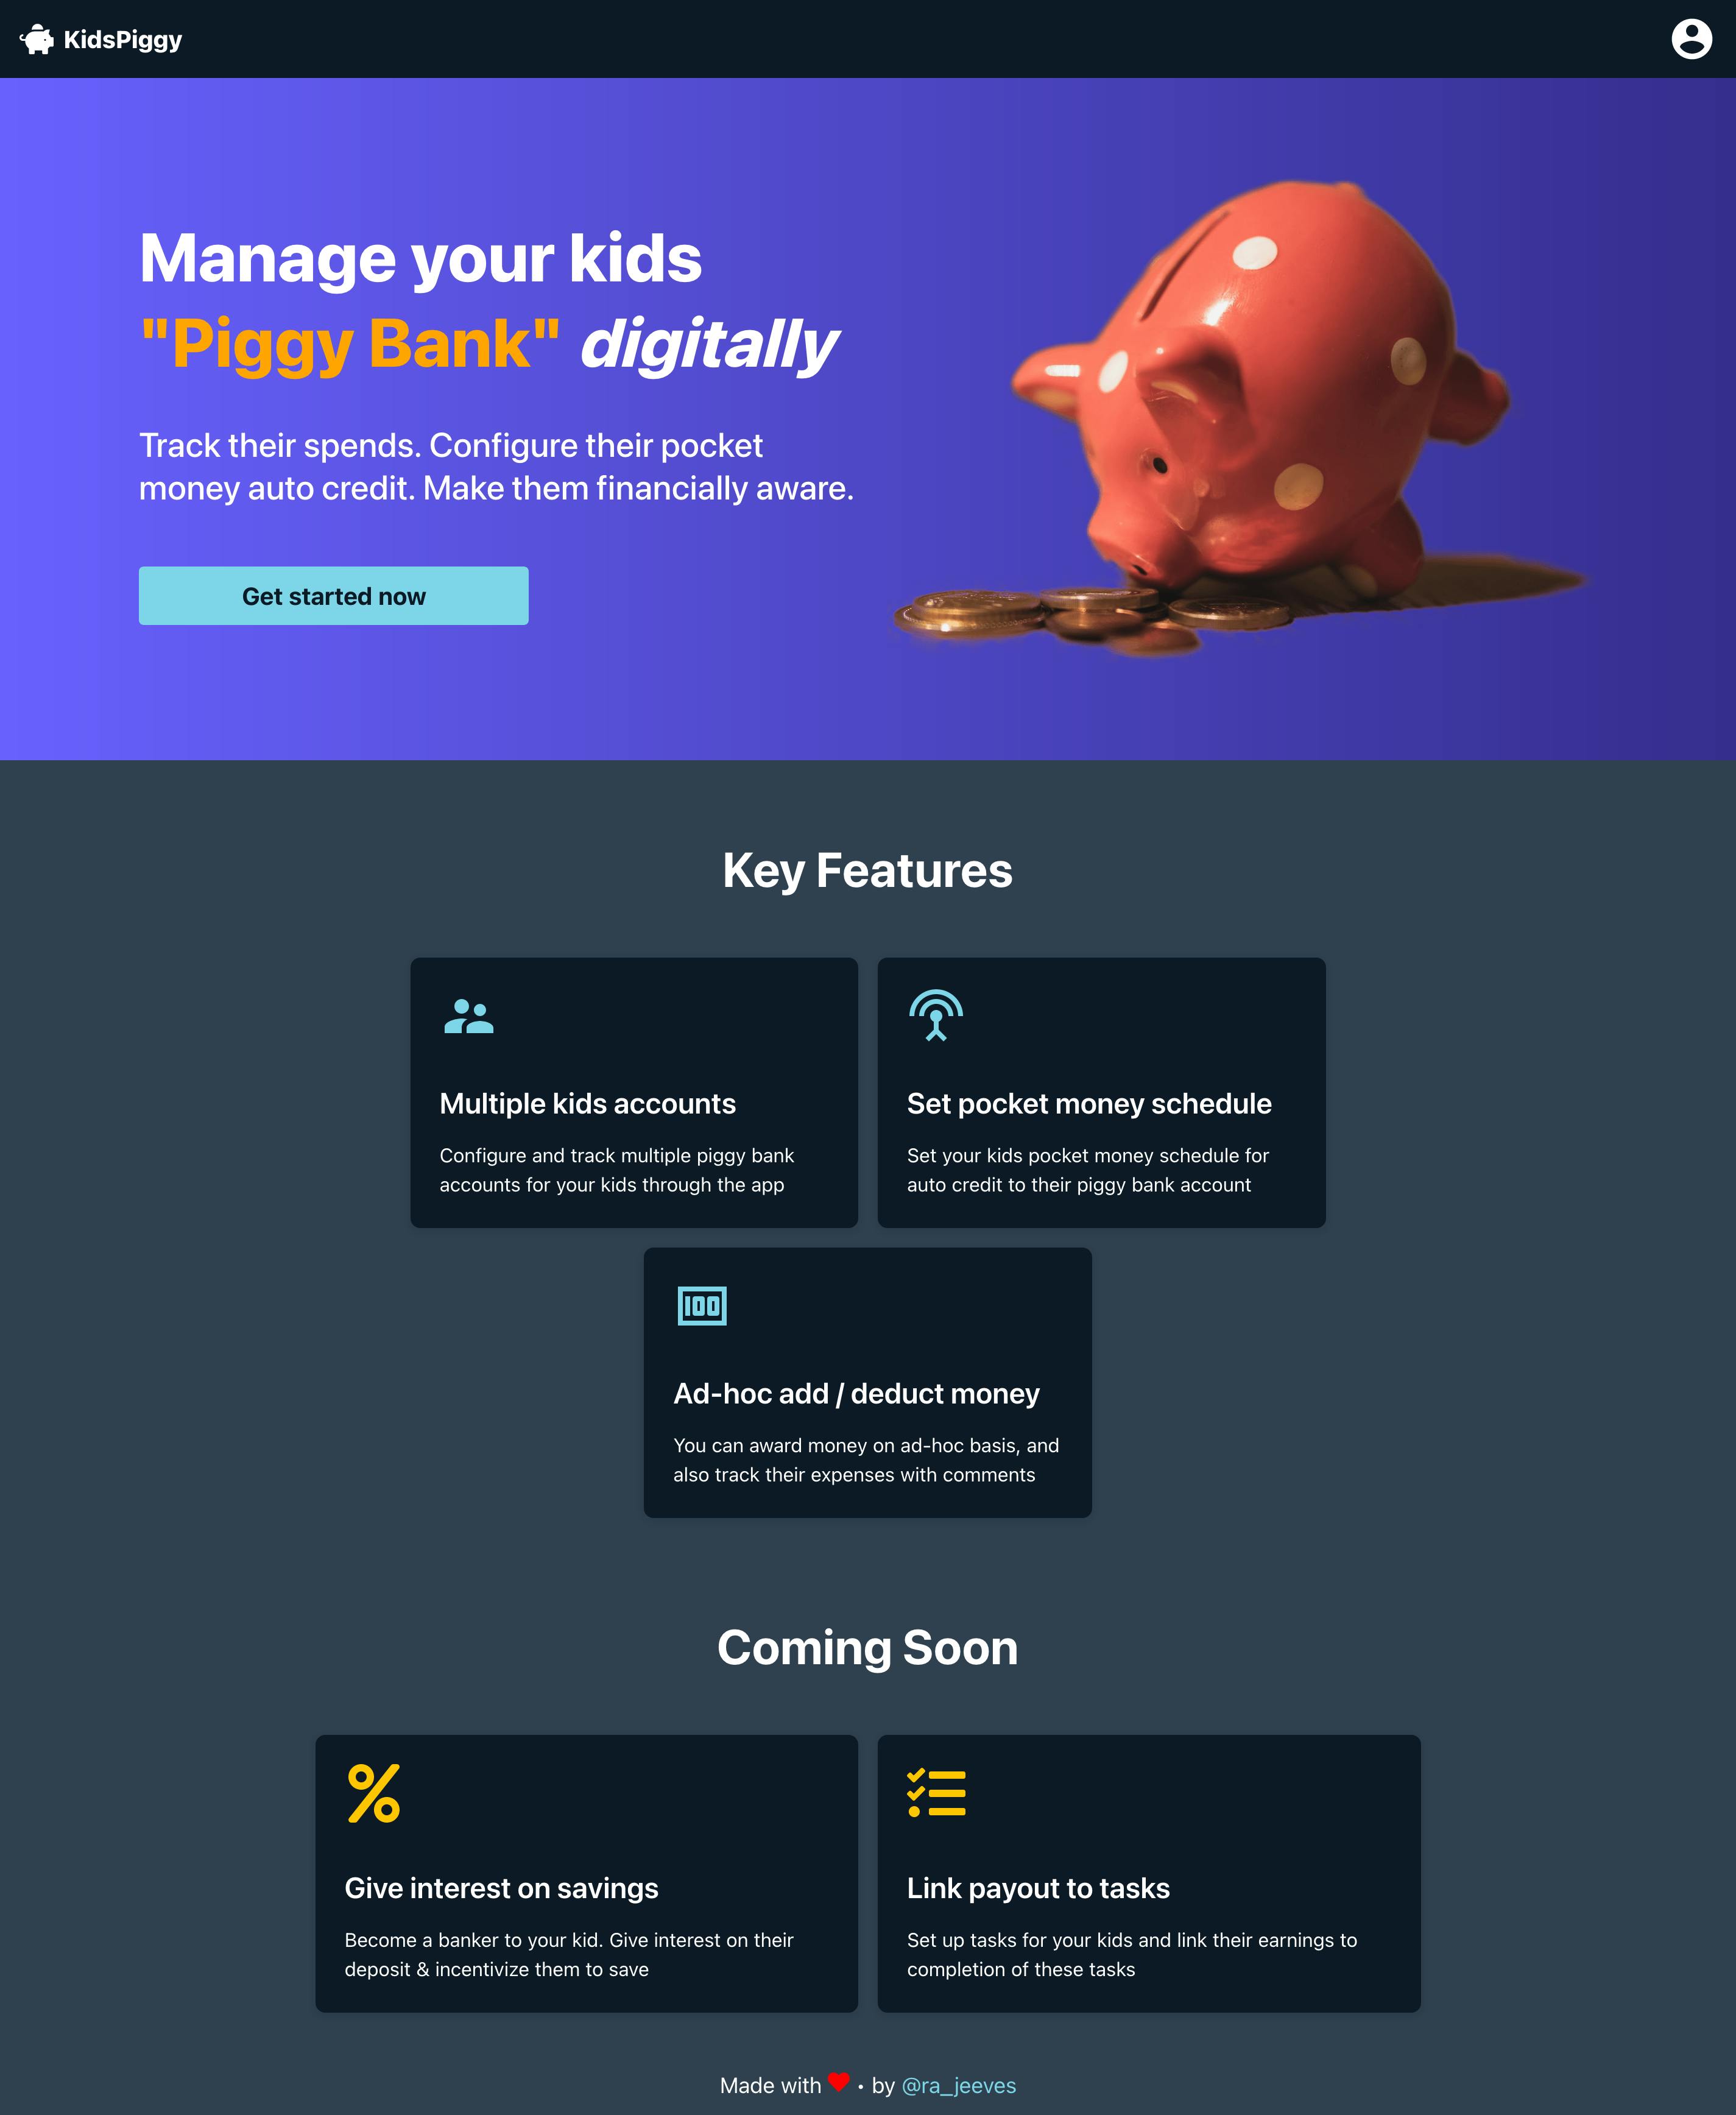
Homepage
Onboarding
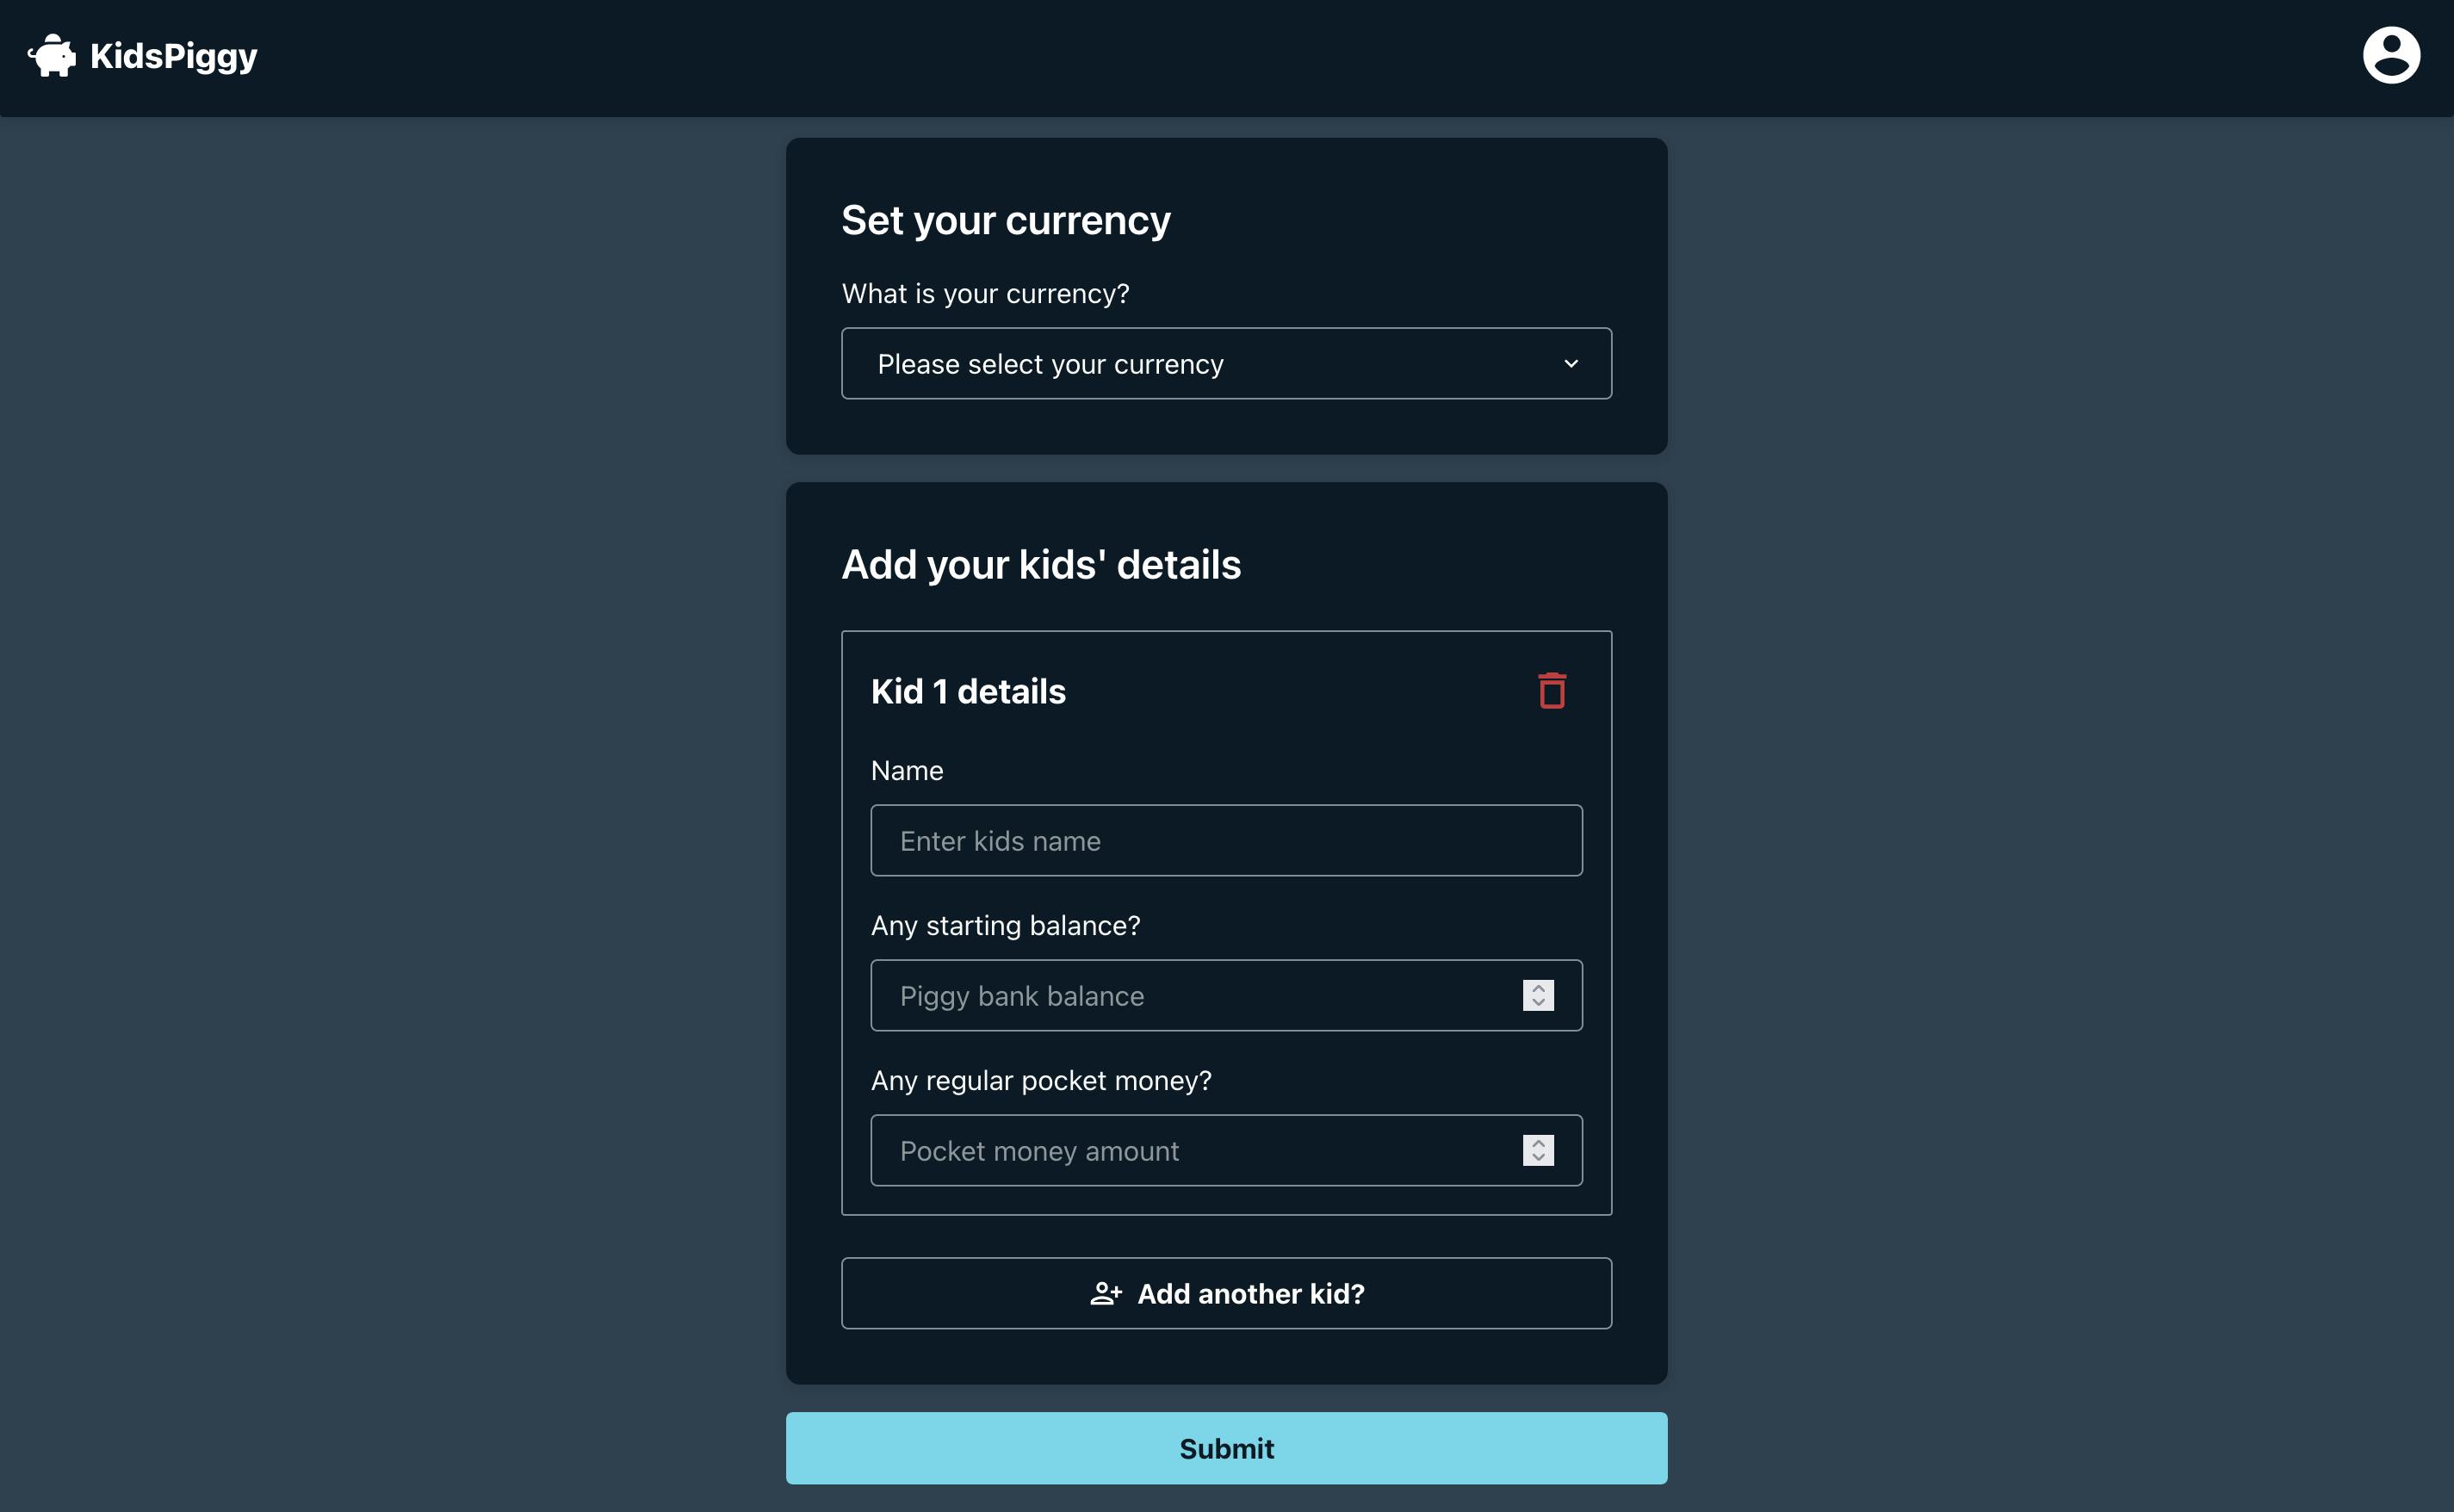
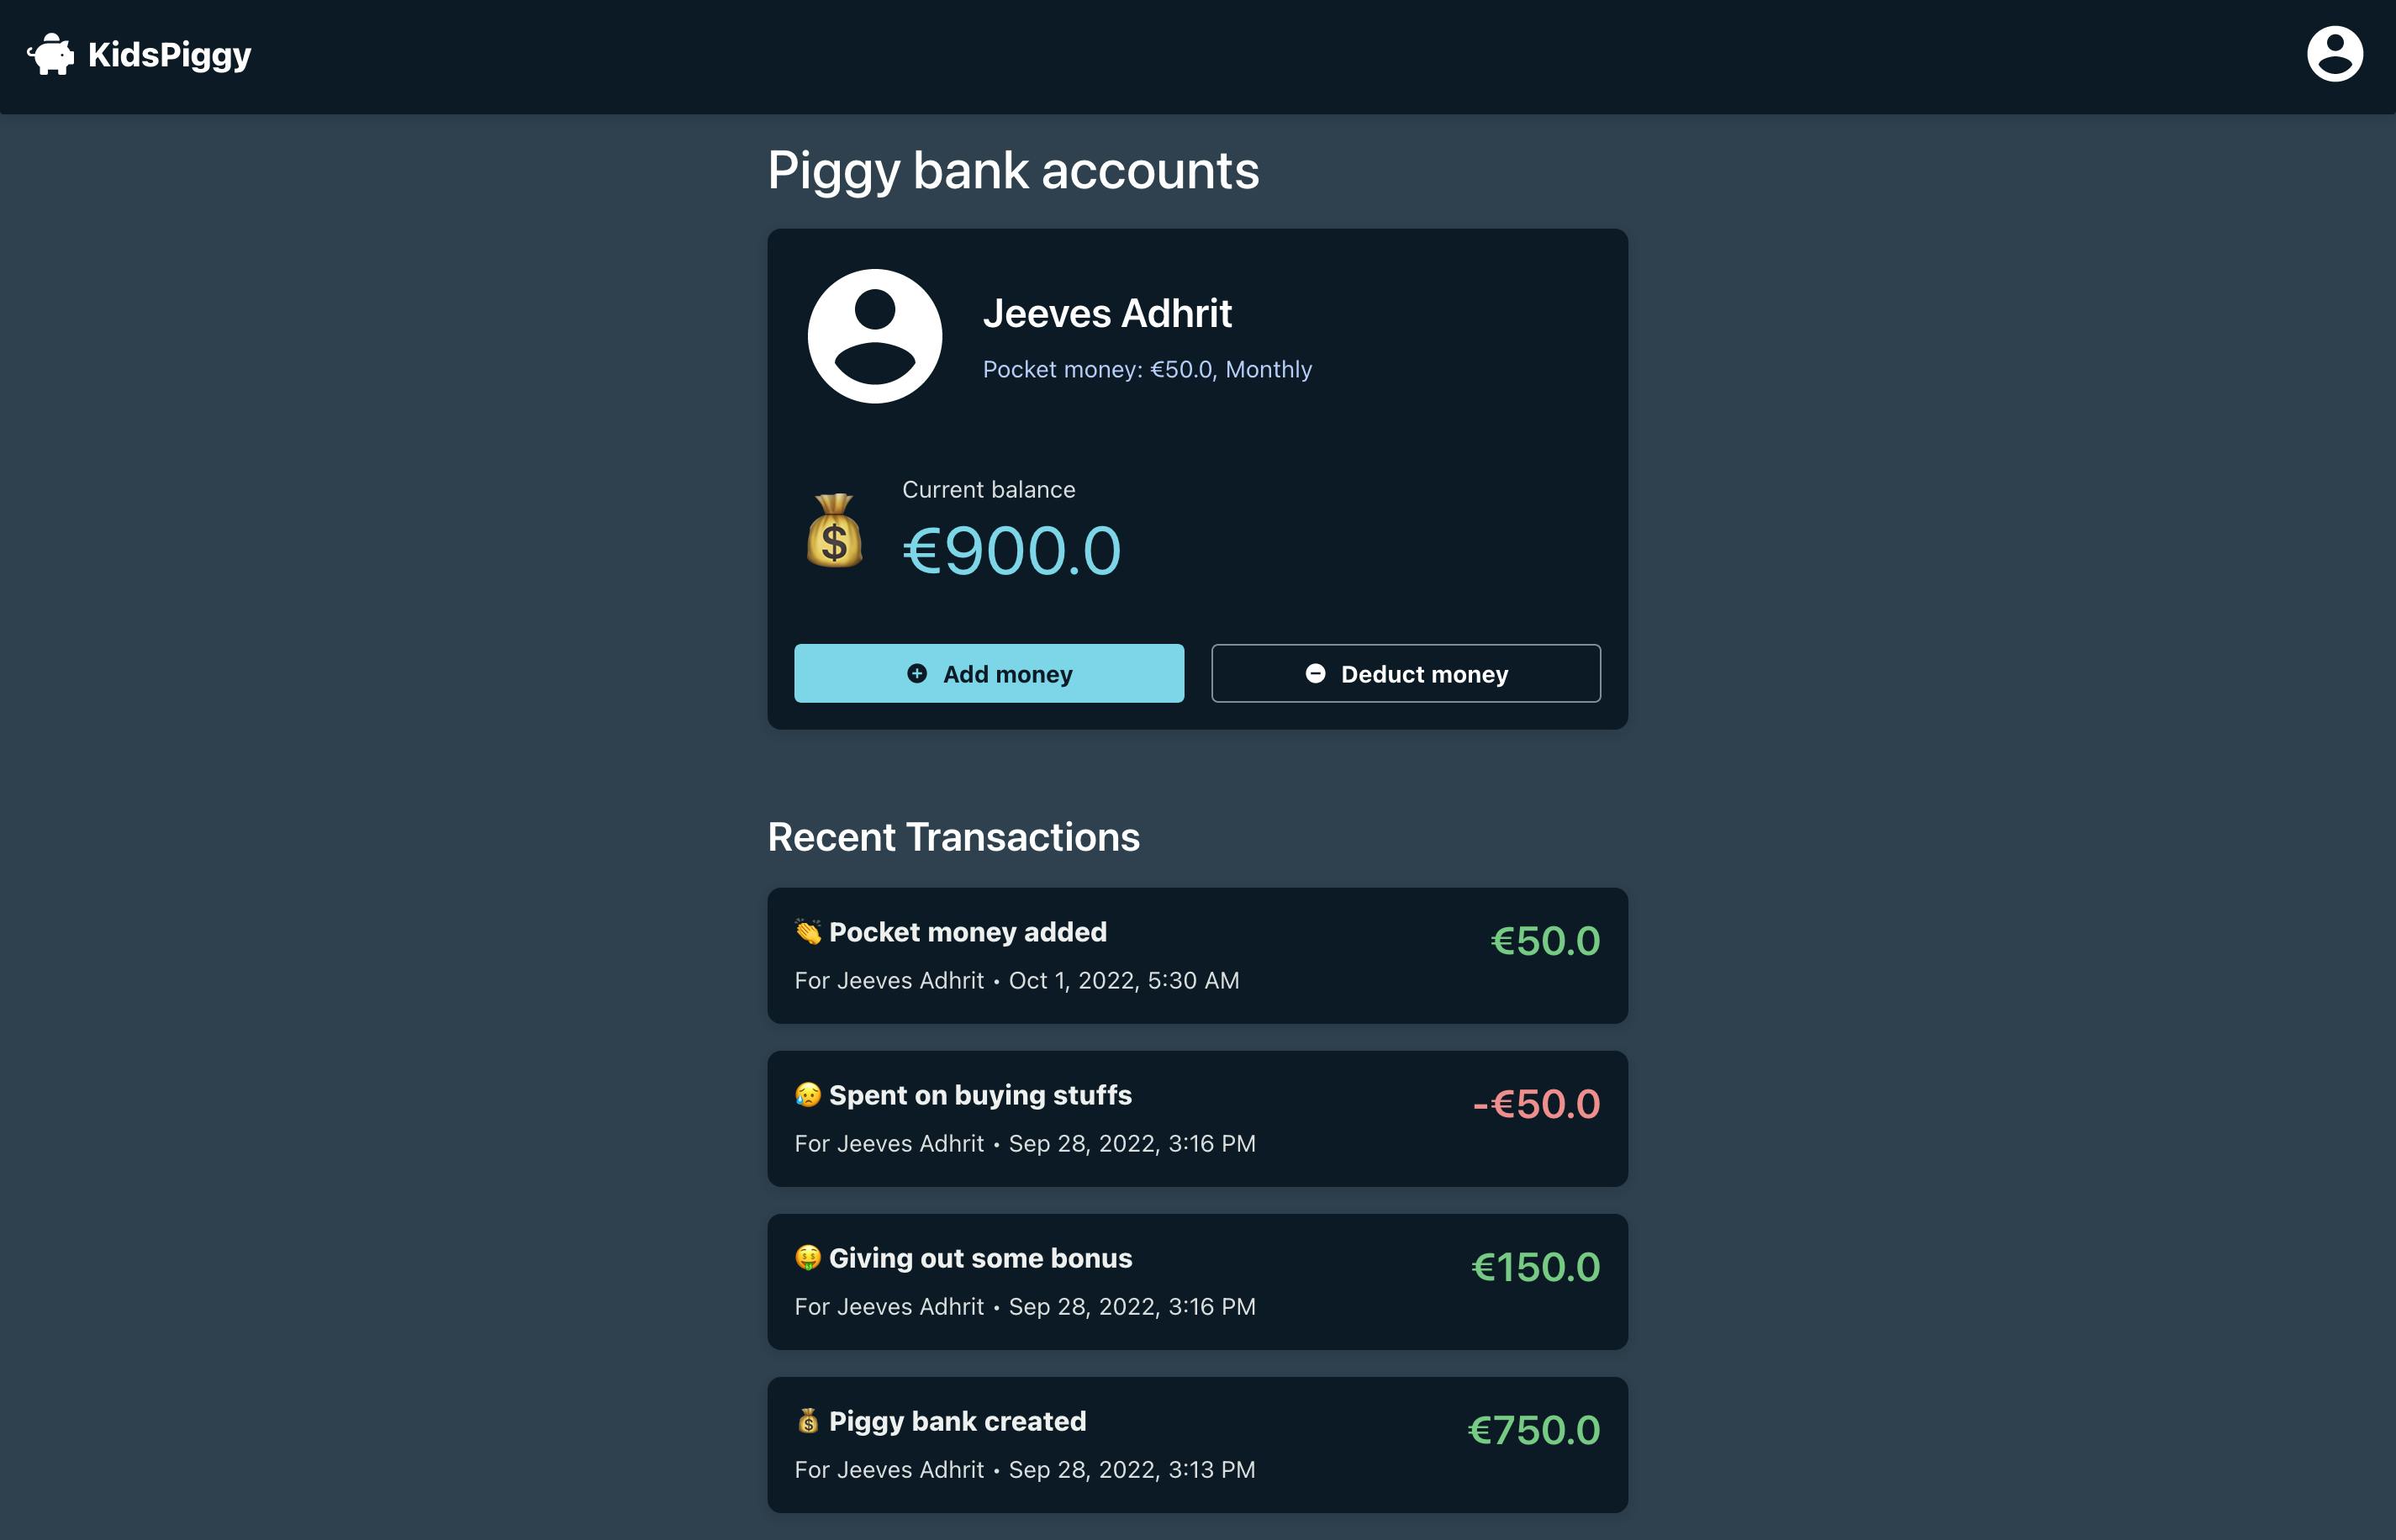
Dashboard
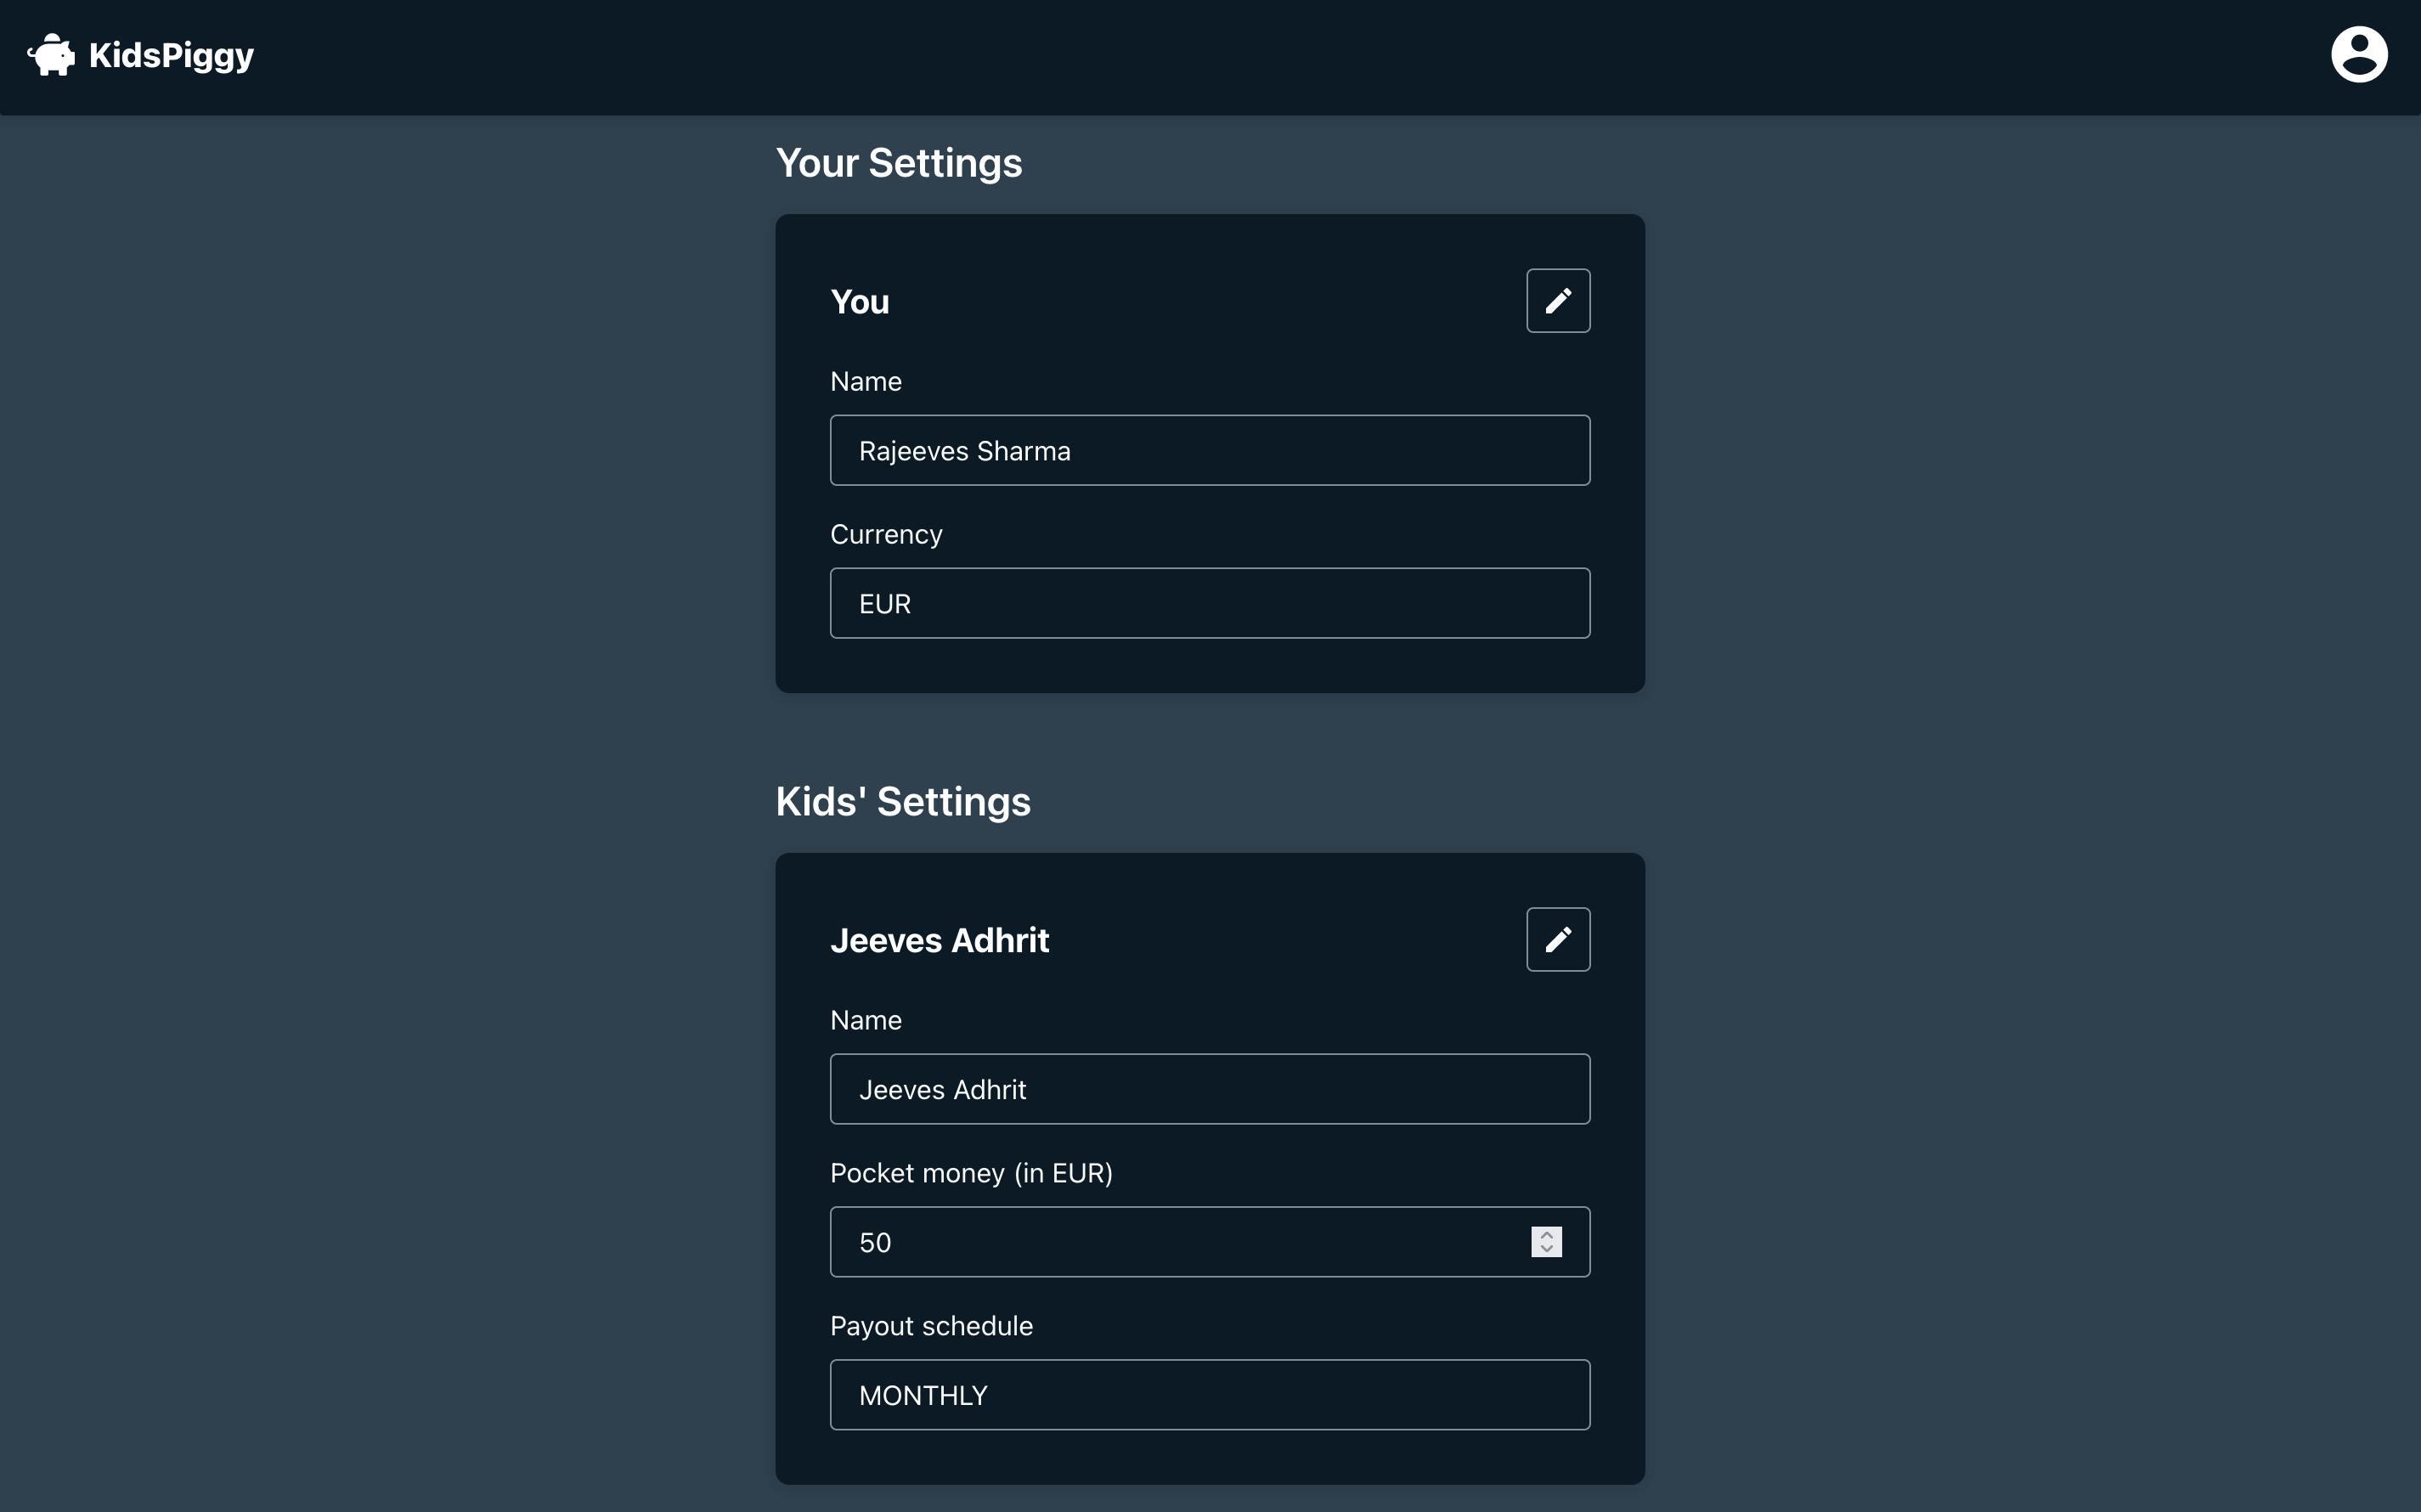
Settings
Conclusion
I thoroughly enjoyed creating this app with Amplify Studio. Learnt many new things. And finally there is at least one new year resolution which I have achieved :-)
Links:
Repo link: Github Live preview: MyPiggyJar.com